


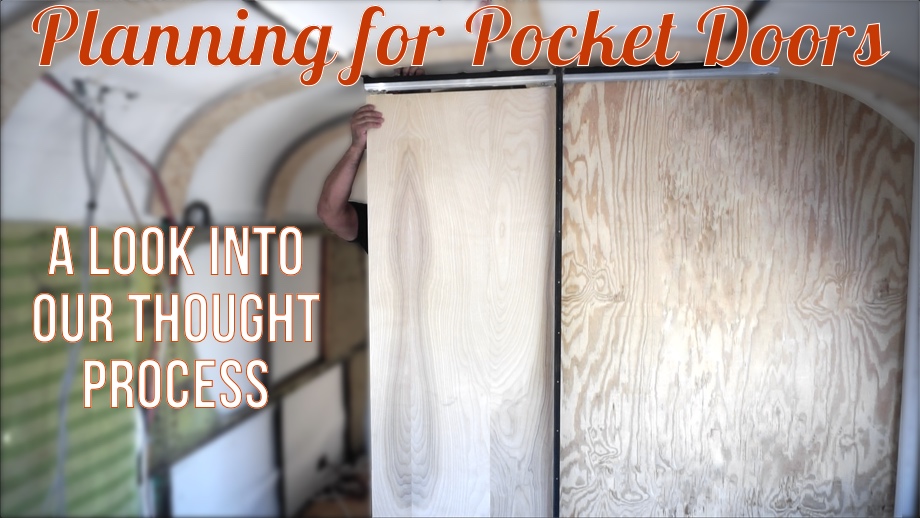
Although the demo process of the previous conversion was long, arduous, and mostly gross, the fact that we bought a bus that was already converted did give us one big advantage. We were able to really get a feel for what would work and what wouldn’t work for our family. One of the features that we really didn’t like was the tiny, walled-off bathroom with a door. It was almost suffocating being in there and there was no way more than one person could possibly be in there at the same time (with a family of six, that will be a necessity). We quickly decided that we would have a more open walk-through bathroom with a pocket door on either side.
Pocket doors will provide a couple of additional benefits besides simply privacy. First, most of the time during the day, the doors will be open. If we had traditional doors, they would take up some of the width of the already fairly narrow walkway while open. Second, the pocket area behind the door will also conceal some important but ugly things. The front pocket is hiding the vent pipe that comes from our waste tank up and out the roof. The rear pocket will hide our shower plumbing (we will create a removable piece of the wall in the kids’ room to allow us access to the plumbing in the future).
It seems as though a feature like doors should come toward the end of the interior build, but with the pocket doors, we had to address those first. That is one of the hardest parts of building this bus for us - figuring out the order in which to work on different projects. We always have to be thinking of the build as a whole otherwise we would end up getting ourselves in trouble. We would love to jump right in and work on the kids' bedroom in the back. However, their beds are going to be mounted to two interior walls. One of those walls is also the side of our closet. The door jambs or strike plates (or whatever that thing is called) that the pocket doors will line up with when closed will be attached to the closet sidewalls. That means that the closet walls have to perfectly line up with the profile of the pocket doors. All of that meant that we had to build the two pocket doors first.
While we had previously built the support for the pocket door track, the time had come to actually design the doors themselves. The fun part of these doors is that they are some of the only large spaces we have to incorporate any kind of design. We are absolutely not designers of any kind. We just know what we like when we see it. When it comes to the design of the bus, we knew that we wanted to keep it fairly simple visually - nothing too bright or with a lot of patterns. We were hoping to simply add some texture and depth.
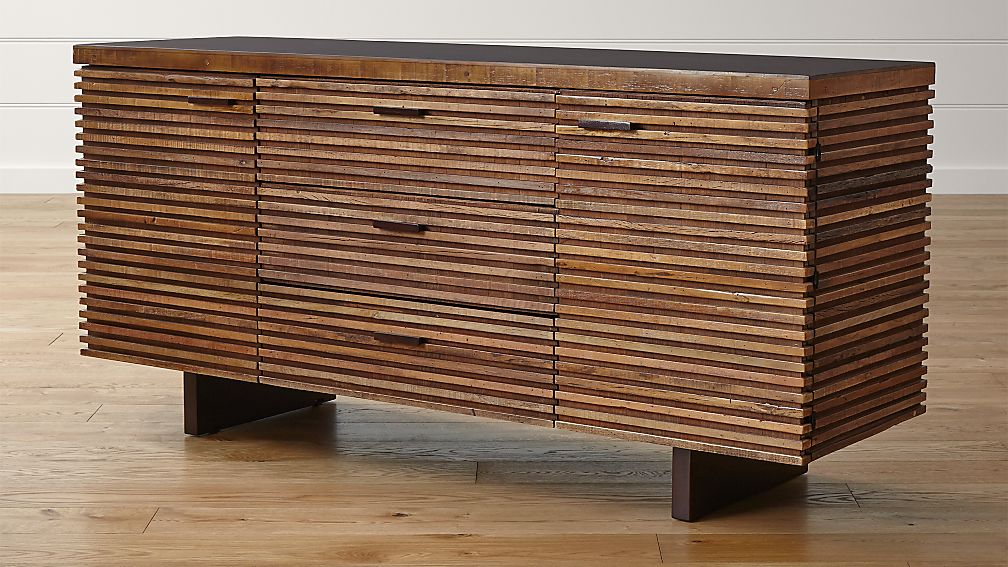
One day, I came across a picture of a console table that had a mid-century modern feel with narrow, horizontal slats. Juan and I both really loved the look and thought we could take that idea and use it as an inspiration for some elements in the bus. It wasn’t too busy or bright. It felt warm, had just the right amount of texture, and also seemed appropriate for our 1964 bus. You will probably see those horizontal slats come up elsewhere in the bus. For this project, however, we are turning those slats vertical.
We decided to use a vertical slatted design on the fronts of both of the pocket doors. The backs of each door will be something a little different which we will share next week when we actually proceed to build the doors.
Once we had a basic idea for a design, we first had to take the measurements. We had to figure out the width of the doorway and add a few inches to stay in the pocket. We also had to be sure that measurement worked with our hardware. We are using Johnson pocket door sliding hardware that will both soft-open and soft-close. The soft-open/soft-close requires special carriers that need the door to be a certain width. Thankfully, ours was perfect for the minimum size allowable with those carriers - 24”. Next, we had to figure out the height of the door, accounting for flooring, a small gap above the floor, and how the carriers attach to the top of the door. With all of those measurements, we were ready to build.
Just kidding! With our “slatted” design plan, there were still many decisions to make. How wide are the slats going to be? How far apart are we going to space the slats? Should we use the regular smooth side of the wood or should we do something even more modern and have the ply side of the plywood slats showing? Once we decide that, we can build. Just kidding! Now we have to decide how we are going to stain the wood. Which color stain? How many coats? Or maybe no stain?
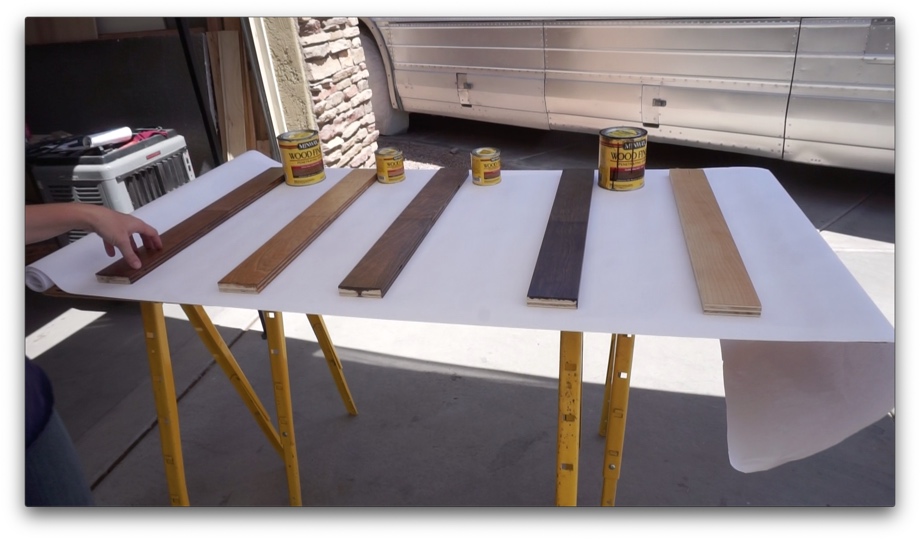
We needed to see for ourselves what the options would really look like. So, we went about testing some of the different design options with some scrap plywood. We cut several slats and combined them and spaced them and laid them out in different configurations. We also tested four different stains with both one and two coats and took those options into all different lighting.
Once we could see everything in front of us, not simply imagined in our heads, we finally made a clear design plan. Then, we could build. Yes! Then, we built. That’s what is coming next. Actually building something in the bus! Finally!
Thanks for taking a little journey inside our heads today. It gets messy in there sometimes and we just have to weed through it all to make things clear. Then it’s all super easy after that. Ha! Just kidding (nothing is ever easy in bus building).
See you next time!
Watch the video:
Click here If you cannot see the video.


0 Comments
Comments powered by Disqus