


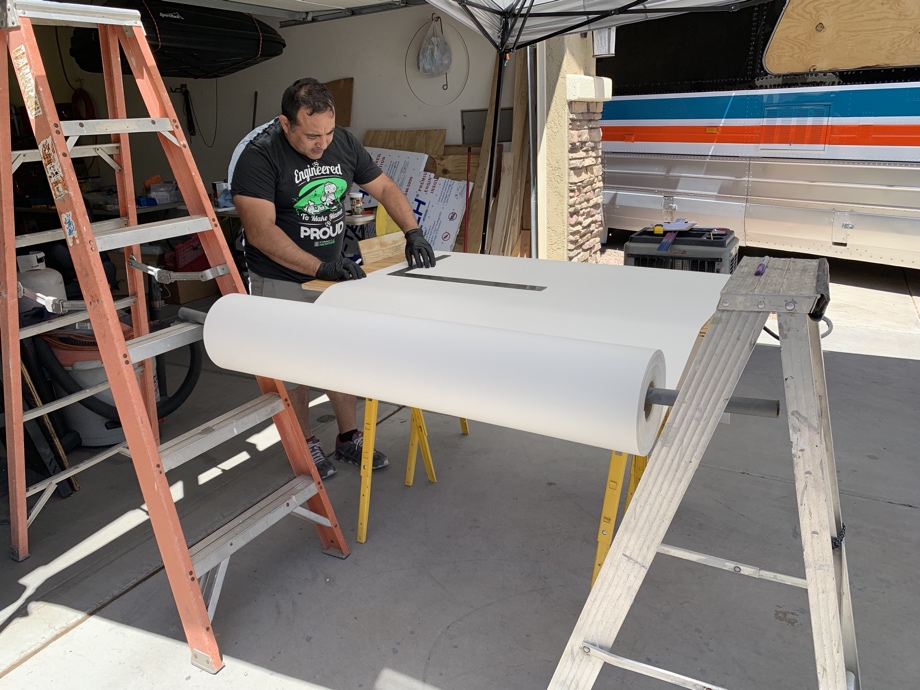
After finally deciding on a plan for insulation, we got to work. We were ready to start with the first layer of insulation, Ceratex. This ⅛” ceramic fiber paper insulation is extremely easy to work with. Since the giant roll of the Ceratex comes on a cardboard tube (like a huge roll of toilet paper - ha!), we made ourselves a big roller for it to make it easier to pull out and cut. We simply put a piece of pvc pipe through the center of the roll and propped the ends up on some ladders. This allowed us to easily roll it out onto our table as we were measuring and cutting. We just measured for each section and cut it with a razor blade.

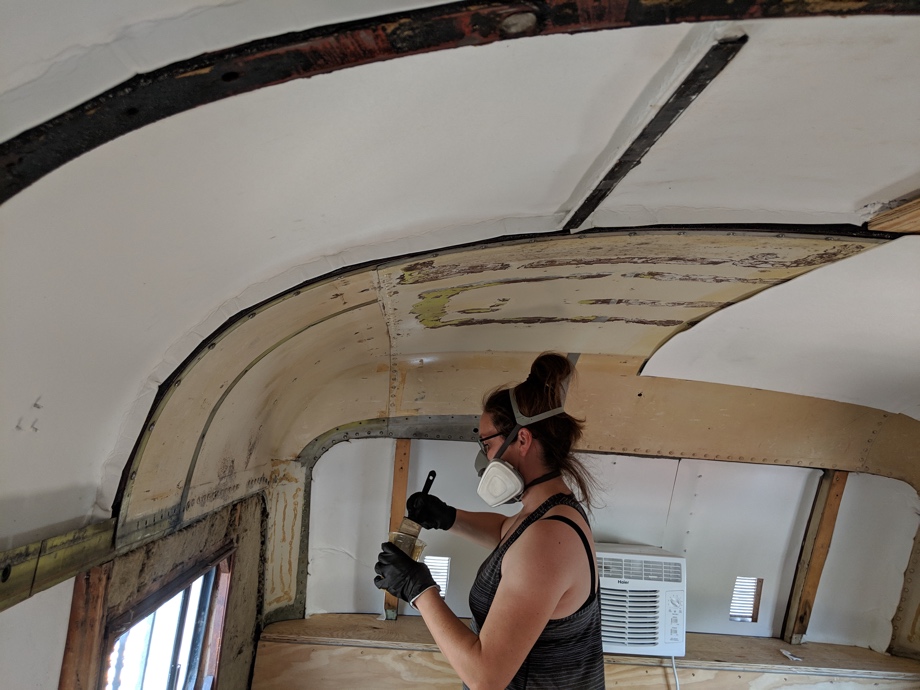
To install it in the bus, we used contact cement. Coating the Ceratex with the contact cement didn’t really work, because it seemed to become too soggy and want to tear. However, when we just painted a small amount of the contact cement onto the metal of the bus and then stuck the Ceratex on, that worked perfectly. We didn’t need the contact cement to make a permanent bond (where you would need to coat both surfaces before gluing together). We simply needed it to keep it in place while we finish the rest of the insulation and wall/ceiling installation. While the contact cement is pretty stinky, working with the Ceratex was really simple and it went up nicely.
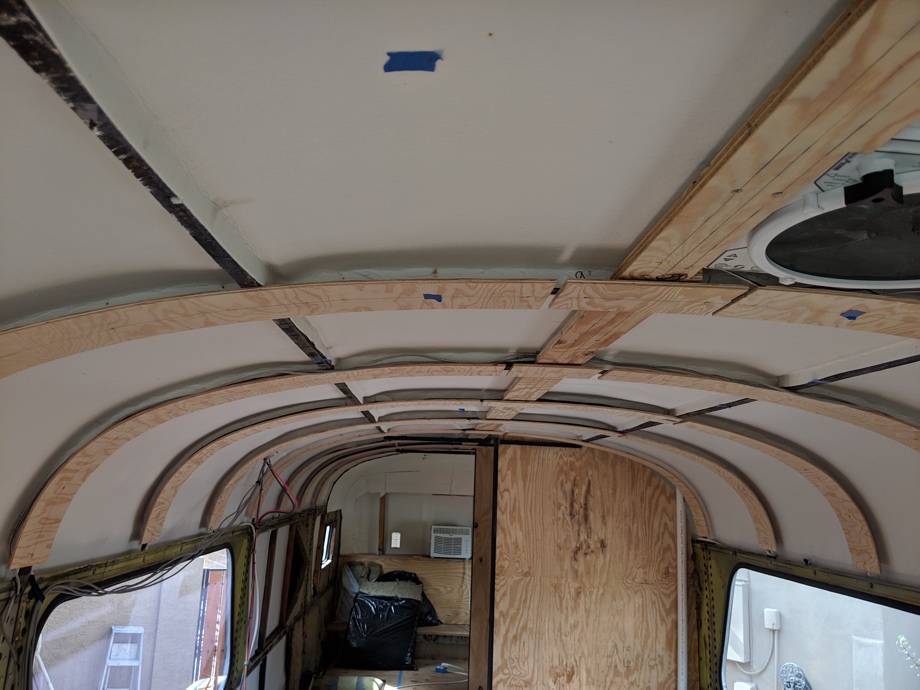
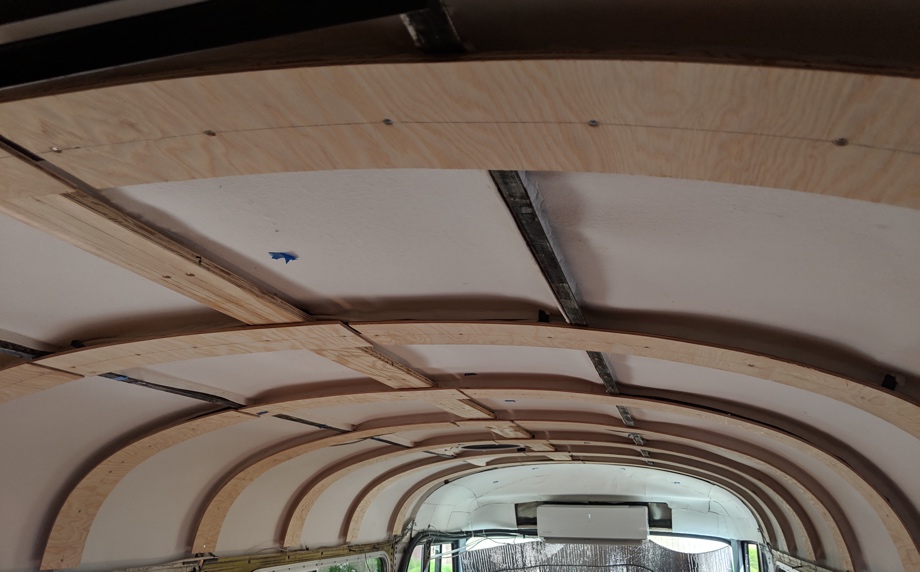
 The next step for us was to install furring strips. We went through several different ideas of how to create and install furring strips. We could install pieces of wood onto the sides of the ribs hanging just lower than the ribs themselves. Or we could use large sheets of wood almost like an underlayment over the entire ceiling. Or we could just put small blocks of wood right on top of the ribs. In the end, we think we came up with what will work the best for our application. We chose to make the furring strips out of ¼” plywood and cut them 6” wide, securing them on top of all the ribs.
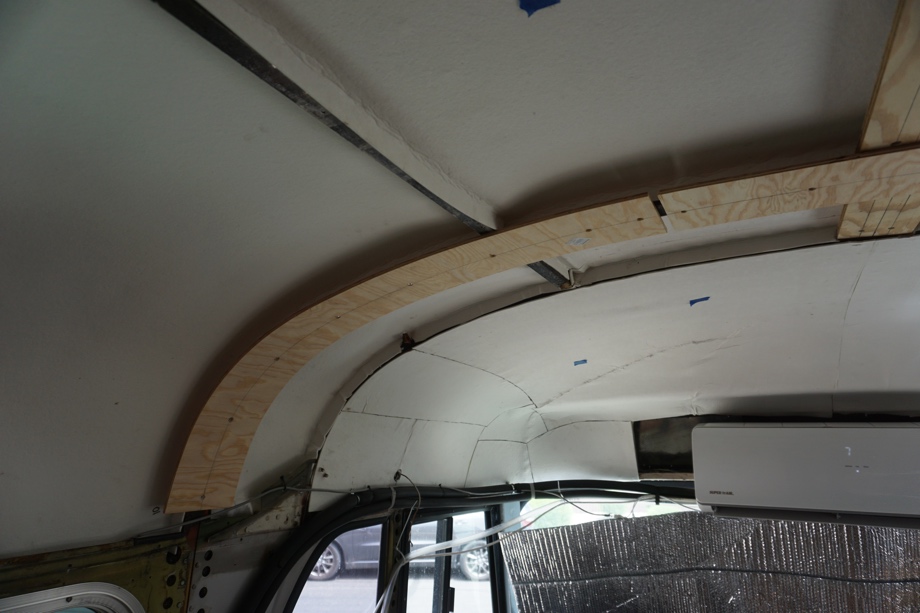
This plan then not only provides a thermal break since our finished ceiling planks will not need to be attached to the ribs, but it has two other functions as well. By making them wide at 6”, this gives 2-3” on either side of each rib for attachment points for our ceiling planks. That extra width on the sides of the ribs also creates a “pocket” or shelf where we can stuff the next layer of insulation, rockwool, and it will hold it up while we install the ceiling planks.
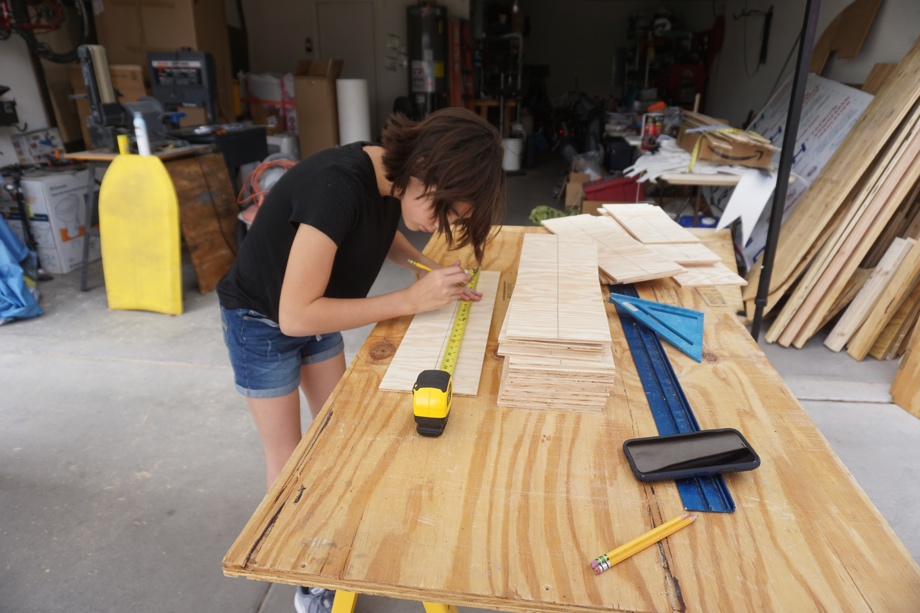
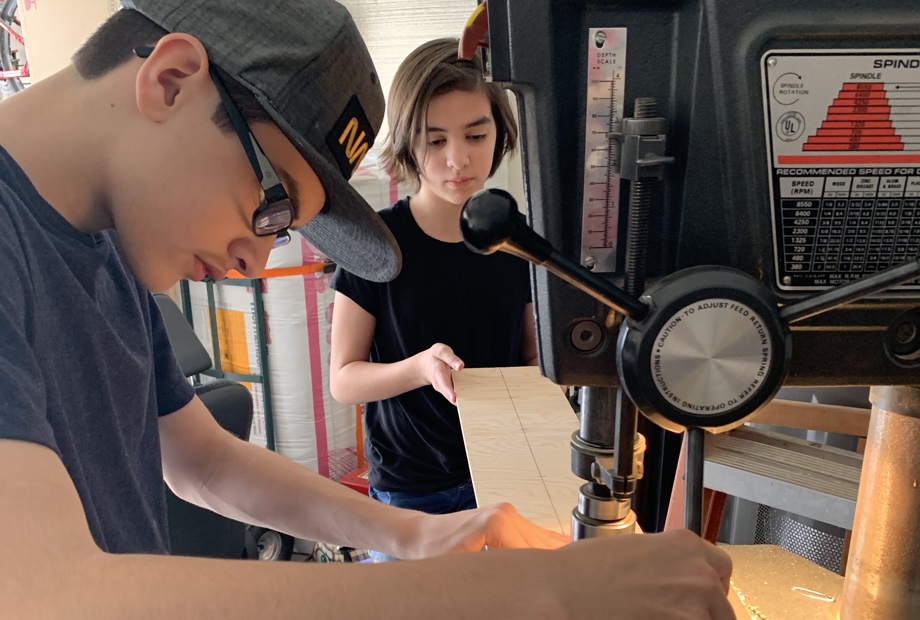
After finalizing this plan, we got to work cutting the plywood. Our older kids helped out by measuring and drawing center-lines on all the strips. Then they measured and marked the screw holes and used to drill press to countersink the holes. We love that they’re helping us so much and learning how to use all the tools.
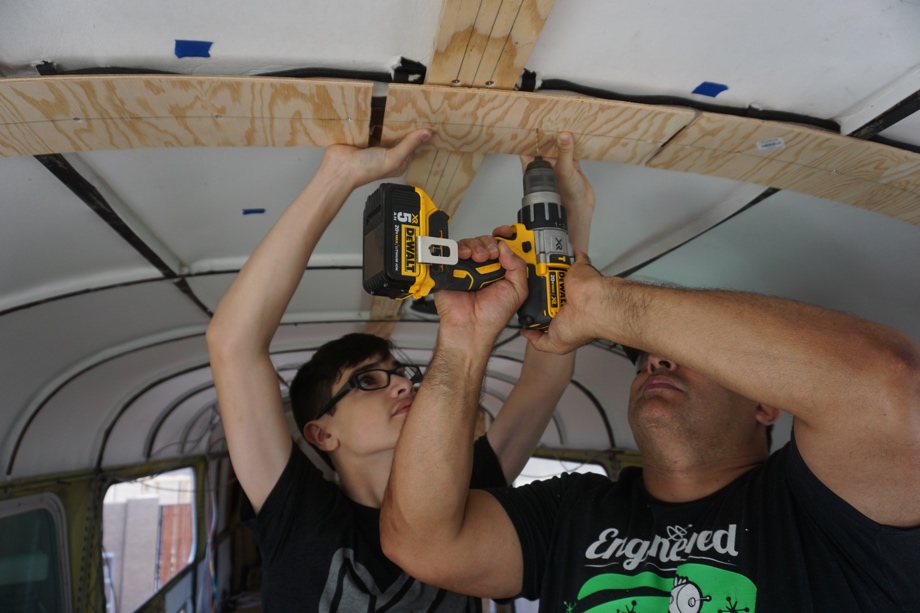
Bending these strips of wood along the steep curve on the sides of the ceiling was the most nerve-wracking part. It’s a pretty tight bend there and we were nervous that the plywood would keep breaking. We tried a couple different methods to make this easier. First, we tried putting some kerfs along the back in the part with the steep curve. I think we aren’t so great at kerfing yet. We broke a couple boards doing this. Next, we tried softening the wood by putting it over a steaming pot of boiling water. This worked really well, but it was simply taking way too long. We would still be working on the furring strips a month later if we continued that method. Finally, we just went for it. The key for us was going slowly and pushing the board into place gently from the bottom up. Our son and I positioned and held the boards, keeping the center lines we drew on the boards aligned with the centers of the ribs. Juan came through and drilled the holes through and screwed everything down.
 One thing to note was that we didn’t do one big strip for each rib. We left some gaps between the strips to allow for wire runs for the lights and fans.
When we finished getting the Ceratex put up, it was so exciting for us! Not because of the project itself, but because it meant all the ugly black tar-like ceilings and walls were covered up. It was like a fresh coat of paint and some lights were turned on. So bright and white! Then, after the furring strips were up on the ceiling which just accentuated the curves, it felt like we could see the beginnings of our home taking shape. If we squinted our eyes really hard, we could imagine our little home on wheels all prettied up. Such a good feeling that day!
 Next up, finishing the furring strips on the bottom and around the windows (spoiler alert, the windows were really tricky).
Watch the video:
Click here If you cannot see the video.


 CeraTex 3170 Ceramic Fiber Paper
0 Comments
Comments powered by Disqus