


After plumbing the toilet drain and waste tank sewer drain, the next step in plumbing was to plumb the vent pipe. The drains for the kitchen sink and washing machine will also drain through the vent pipe, so installing the vent pipe was an important step to finish up before we could move on to plumbing the rest of the drains.
We reused the location of the old vent pipe since there was already a hole in the roof for it, but we plumbed in new PVC and a new rooftop vent. The previous owner had enclosed the vent pipe in the corner of the bathroom with a small box. Our plan to build a pocket door between the bathroom and kitchen gave us a different idea for hiding that pipe. We decided to enclose the vent pipe in the back of the pocket door “pocket”.
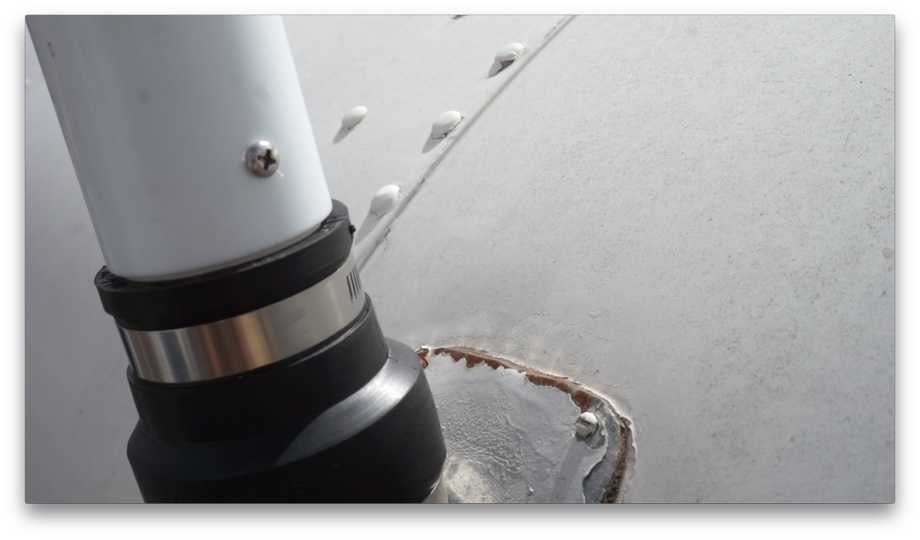
Because our vent pipe exits the bus on the steepest part of the curve in the roof, the previous owner had a metal “tube on a plate” fabricated and installed.
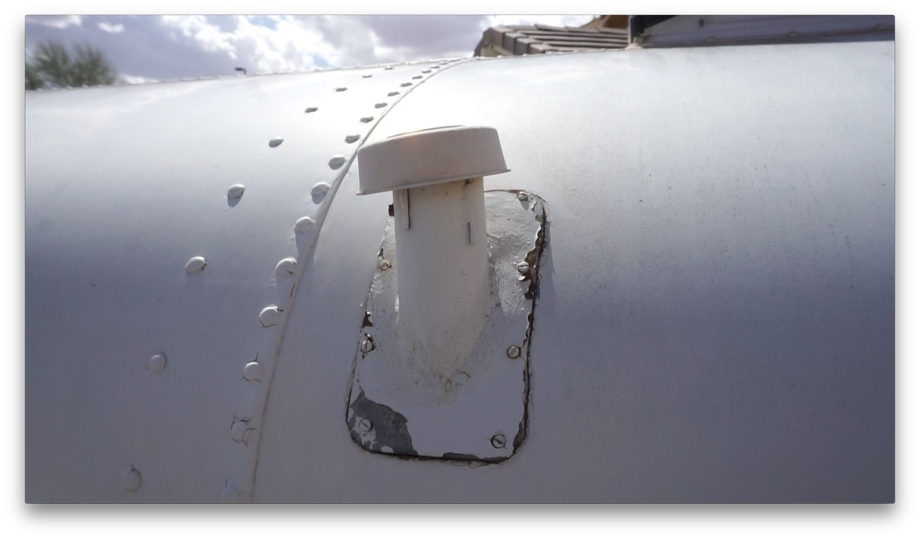
The PVC pipe is attached up into this, secured, and then the vent can be secured onto the top of the pipe. While the metal tube was still in good shape, the vent cap they had on top was cracked and leaking, so we removed the cap.
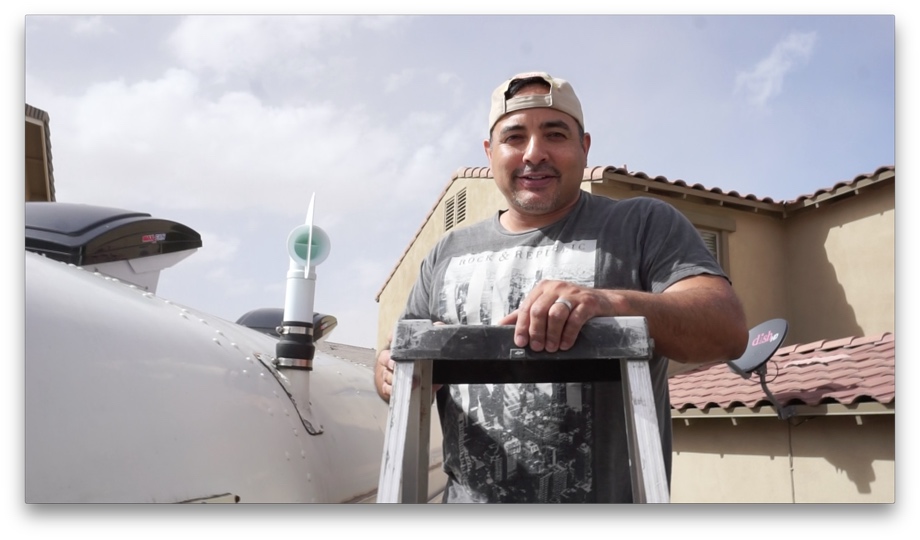
We had previously drilled the hole for the vent pipe in the floor when we installed new subfloors. So the first step for this project was to determine how long the pipe needed to be. Juan went outside and carried the new piece of pipe up the ladder and fed it down through the metal pipe into the bus.
We marked where the pipe needed to be cut (a couple of inches sticking out the top of the metal tube) and then took it back out and down the ladder. A quick cut was made and we were in business.
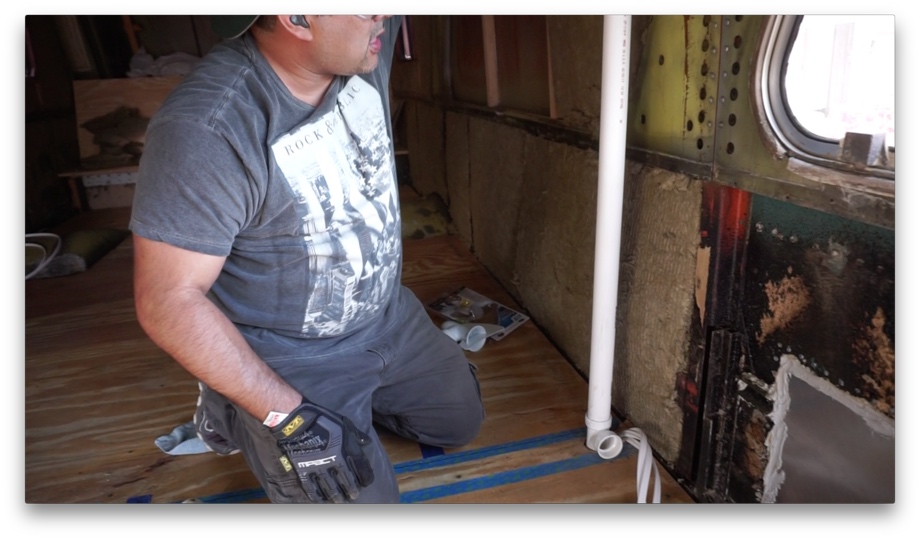
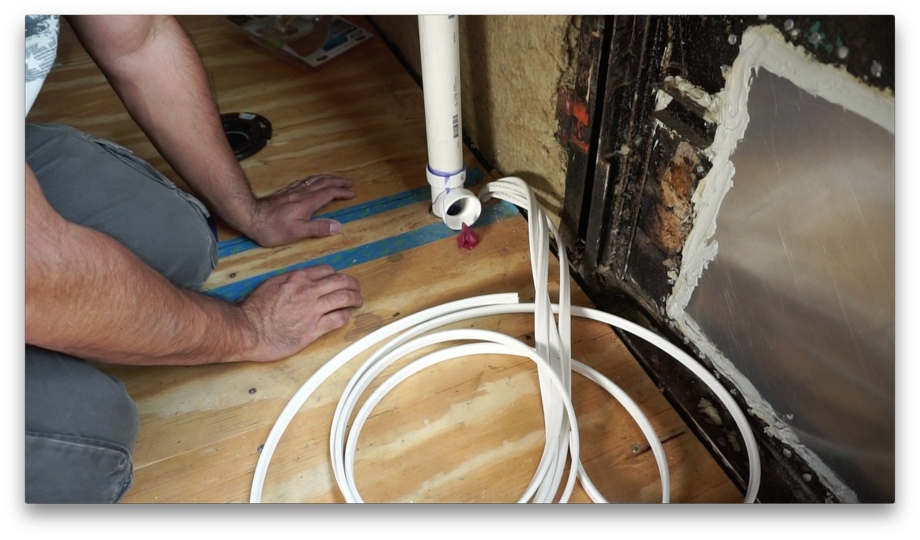
After cutting the length of the tube, we stuck it back down into the bus through the metal tube. Then, we used PVC cement to secure the bottom of the pipe into a sanitary-T. This is so the kitchen sink drain and washing machine drain can eventually be connected. The T was stuck down into the hole in the floor.
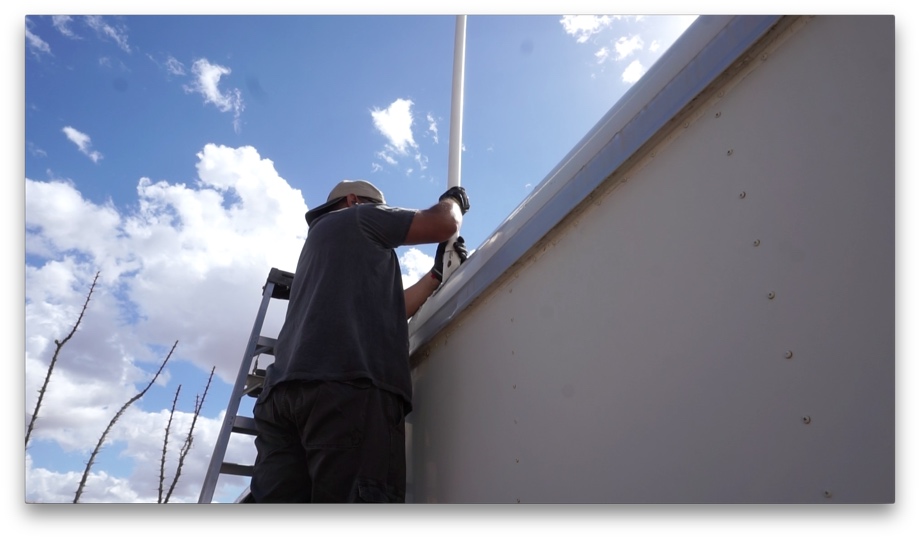
 It was time to head back outside and secure the vent cap.
We decided to try out the Camco Cyclone vent because we read good reviews about it sucking out the bad smells using a "powerful vortex".
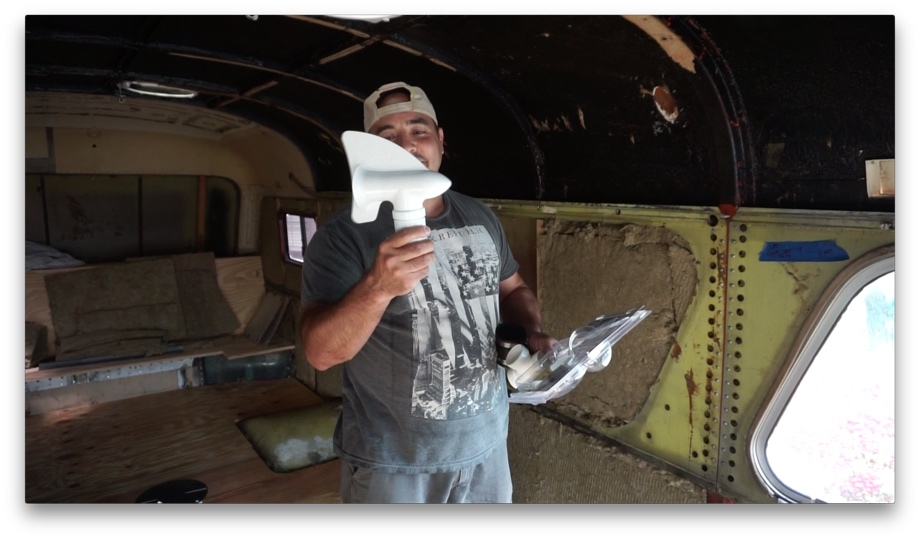
It comes with a flange to attach the vent to a flat roof. Well, since we aren’t applying the vent to a flat roof, we needed to figure out a different way to both attach it to the pipe and also to prevent it from leaking. We decided to try a rubber coupler we found at Lowes.
All we had to do next was secure all the pieces together. We secured the pipe in the tube with one screw. Then we slid the rubber coupler down onto the tube and pipe and screwed it down tightly. Finally, we used two screws to attach the Cyclone vent to the pipe, and that was it. Installation complete.
Side note: we decided to simply screw and clamp all of this together in the event that the vent ever needs to be replaced. This way we can unscrew and replace just the cap and we won’t have to get a whole new pipe.
We decided to just do a quick check to see if the Cyclone vent was actually creating the “vortex” like it claims to and pulling air up and out. To test, we used the ever-beautiful yet even more-so annoying dried up bougainvillea flower. They’re like tissue paper and get all over our yard from the neighboring bushes. So, we grabbed one, set it down next to the opening of the pipe from the sanitary-T, and...whoop, there it went. The vent was definitely creating suction in the pipe.
 We are going to call this project done.
Next up in plumbing: plumbing the rest of the vent pipe and the bathroom sink down into the waste tank.
Watch the video:
Click here If you cannot see the video.
Parts We Used
Camco Cyclone Sewer Plumbing Vent
1 1/2" PVC Schedule 40 Pipe
1 1/2" Sanitary Tee
#10 stainless steel screws
1 1/2" x 2" Flexible Rubber Coupler (this is a bulk pack - we bought ours at Lowes)


Tools we used
This drill is amazing
PVC Primer and Glue


0 Comments
Comments powered by Disqus