


It was finally time to install the propane system in the bus. We have had the water heater installed for almost 10 months, but with the hottest summer in Arizona history this year we were not in a hurry to hook it up. Many times during the summer, the water coming out of the tank is so warm we wondered if there was such a thing as a "water chiller". Our propane needs are very small. We will only be using it for heating water and outdoor cooking. All other appliances are electric. Even with a small system, it was still all new to us which meant we had to do a lot of research first. We wanted to be sure that we were building the system up to proper safety standards.
NFPA Standards
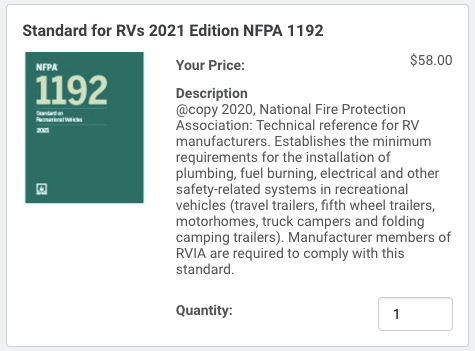
For all the technical details there is a lengthy guide provided by the NFPA that lays out the details very clearly. You can buy the guide for $58 or view it online for free by registering.
Parts
Tank
There are two types of tanks for use in RVs: ASME tanks (non-removable) and DOT cylinders (removable). Both have advantages and disadvantages. ASME tanks are not removable but they also tend to be larger and do not need to be recertified once they are installed. DOT tanks are removable but they need to be recertified 10 years after purchase then every 5 years after that.
Sizing a tank can be tricky. If the tank is too small, it will need to be refilled frequently. Too large and the tank can be difficult to fit or vent properly. It is easy to say "the more the better", but finding a good, safe place for a tank can be non-trivial. The tank needs to be securely fastened to the RV in a holder or mount, in a very well ventilated area between the two axles, and no lower than the lowest part of the frame or rear axle.
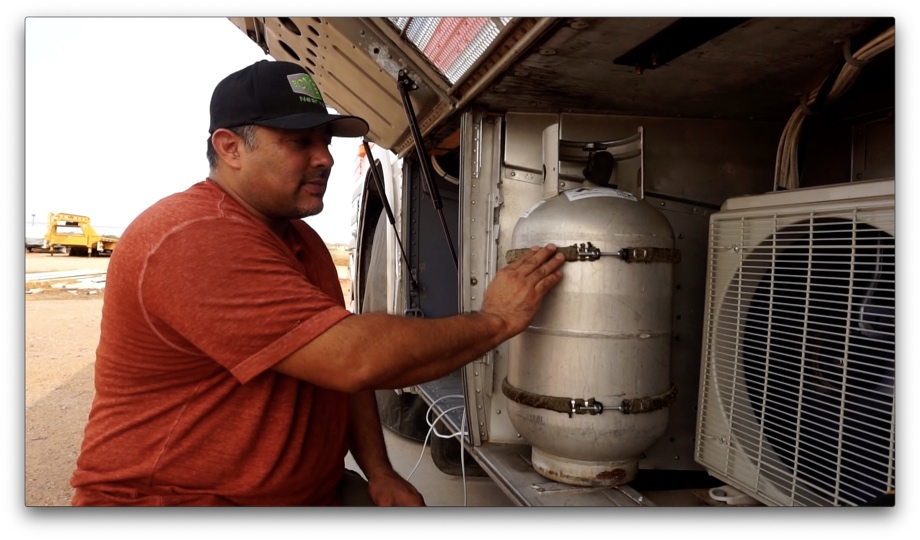
We opted to go with an aluminum 30 lbs DOT tank because we have small propane needs and felt it would be easier to take the tank to get filled as opposed to having to take the whole bus to the propane fill. We also mounted it in a ventilated bay using two holders that we welded together to make sure both the top and bottom of the tank were secure.
Regulator
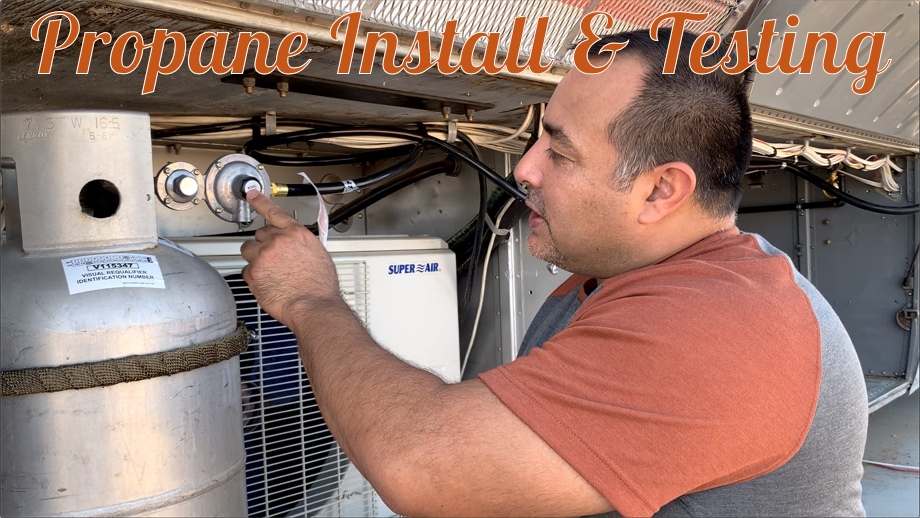
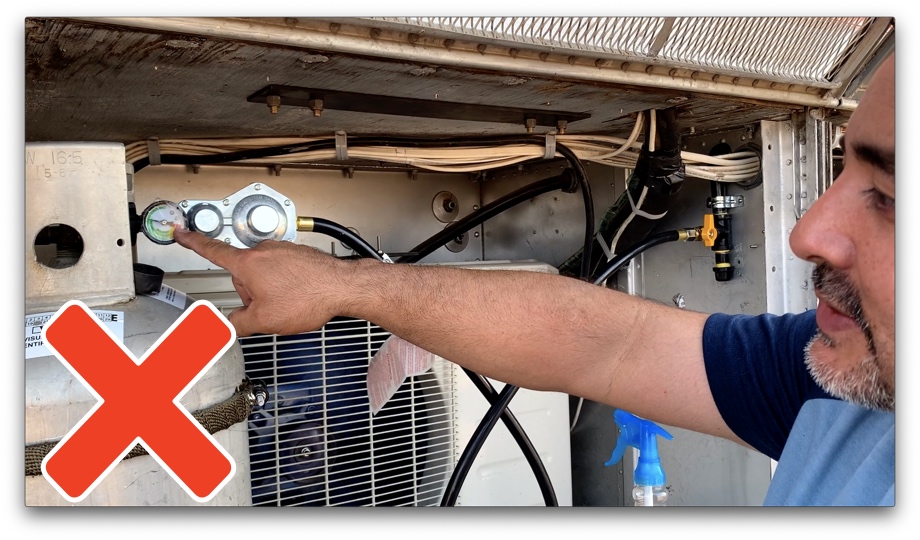
For the regulator in an RV, the NFPA has a list of requirements. The easiest way to know you have the right one is to make sure it is a 2-stage. This can be easily identified as having a large and small regulator incorporated into the assembly. We purchased one on Amazon and it was a disaster! It leaked so much we could hear and smell the propane rushing out. We ended up purchasing another one at Camping World.
Pipe
For propane in an RV, there are two basic systems available to use: flexible copper tubing or black steel. There are advantages to each: copper tends to be easier to install in tight locations while black steel tends to be much more durable. Again our application is pretty simple and since the pipe will be running in our "garage" (storage) bay where bins might bump against it, we felt it would be safer to use black steel.
Pipe Sizing
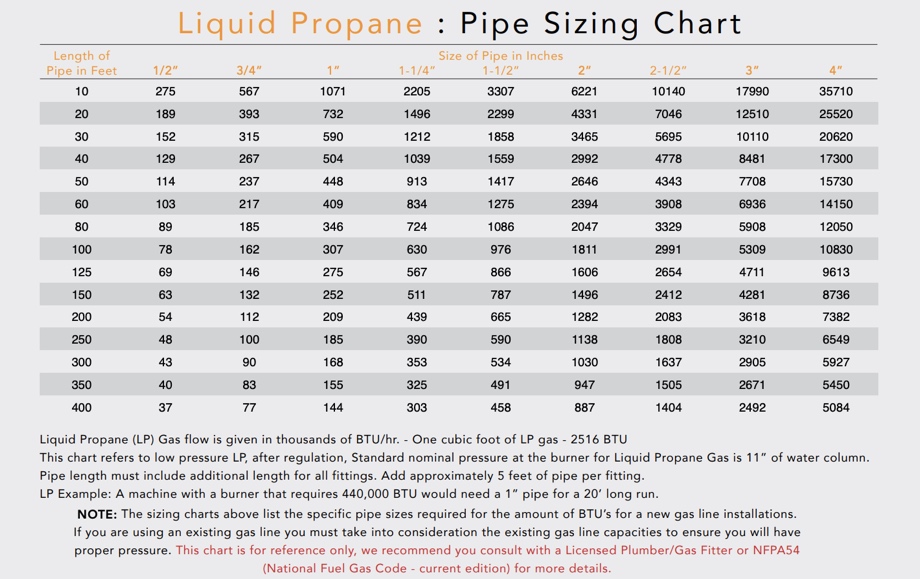
Pipe sizing is determined by the total length of the run and by the total demand. For the total length, we measured that we needed to run about 15 feet of pipe. For demand, we looked in the manuals for the things we intend on using. We have a Girard 2GWHAM Tankless Water Heater which has a demand of 42,000 BTU and a Blackstone 22" Griddle which has a demand of 24,000 BTU. So combined we have a need to supply 66,000 BTU. When we cross-referenced the sizing chart we see that for the length we are running and the demand we are running we should be more than safe to run 1/2" iron pipe.
Installation
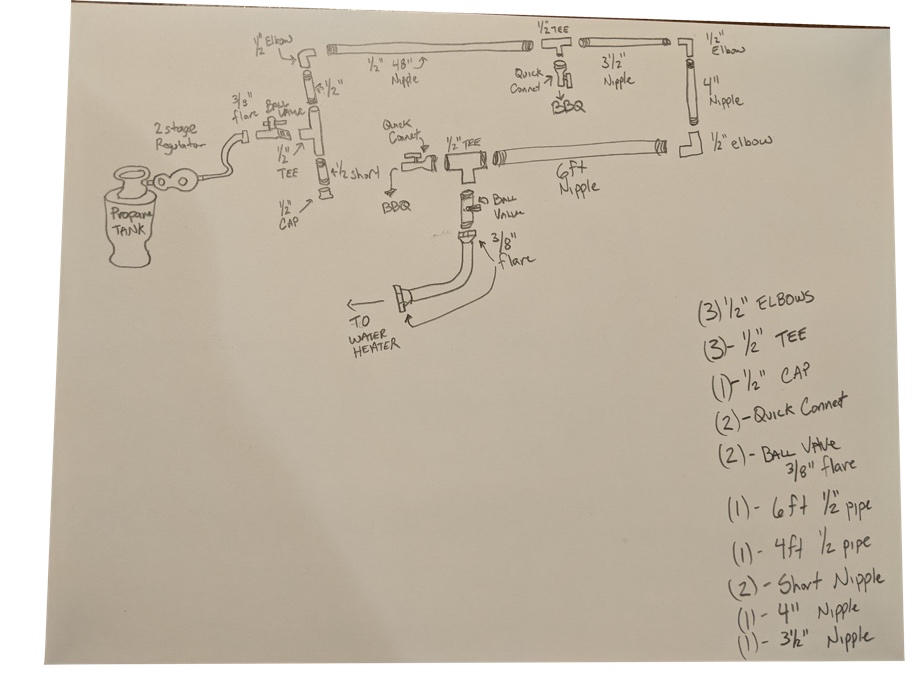
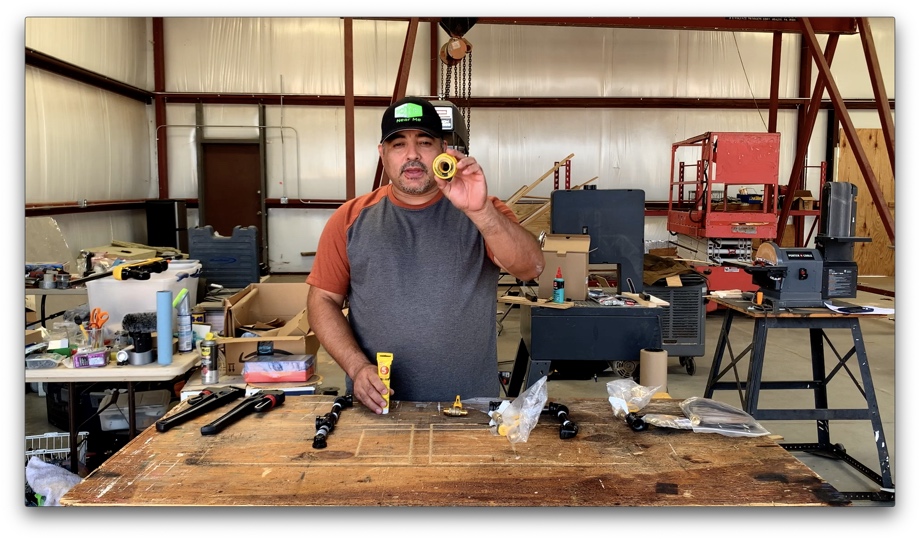
Whenever we install anything, we try to plan out what we want and then make a drawing. This install was no exception. We made a fairly crude drawing of what we wanted and then started making a parts list of what to buy. We ended up getting most of our pipe at Home Depot but most of the reducers, fittings, and hoses from Amazon. Black steel pipe can be custom cut and threaded to any length but we just used the standard sizes right off the shelf (48" and 60" pipe were our longest runs). We were able to make the other pieces fit exactly right with a few tees, elbows, and smaller nipples. During our research, we came across some interesting information about sediment traps and decided to include one in our installation.
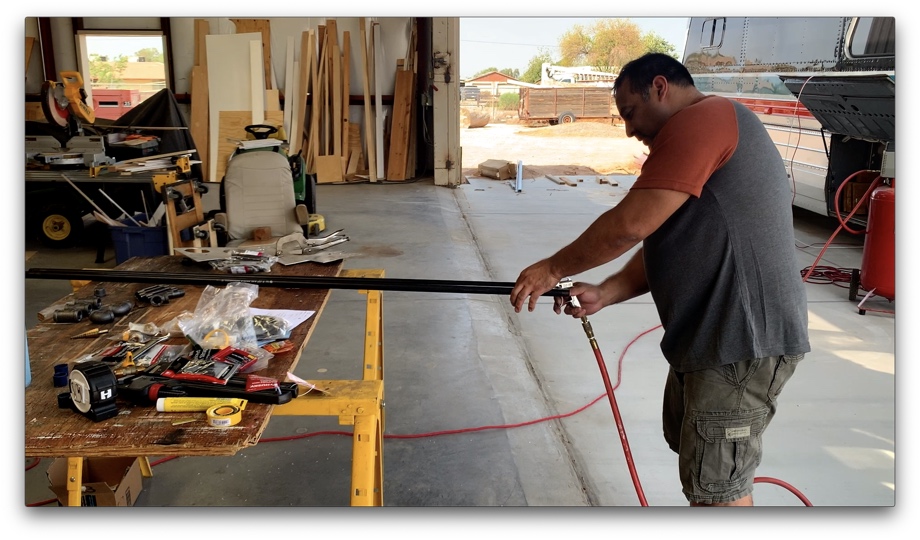
Prep (For black steel pipe)
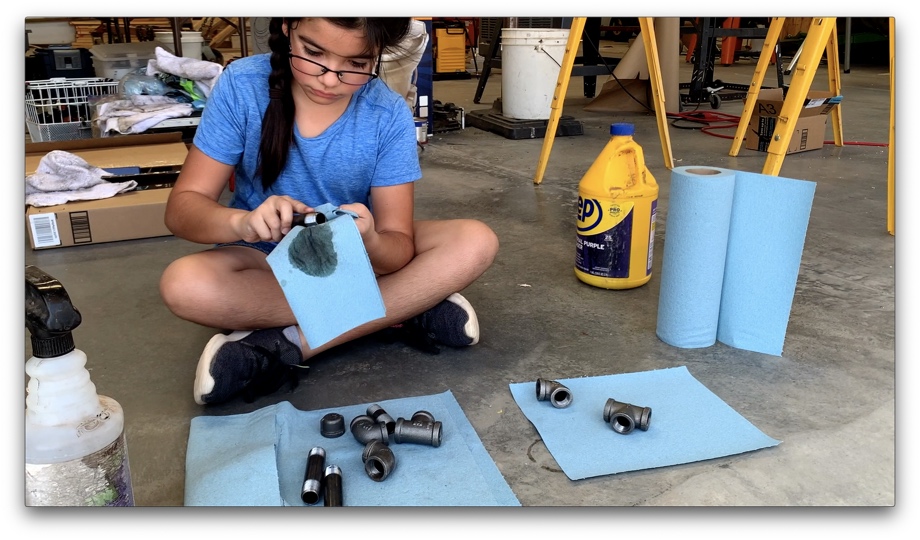
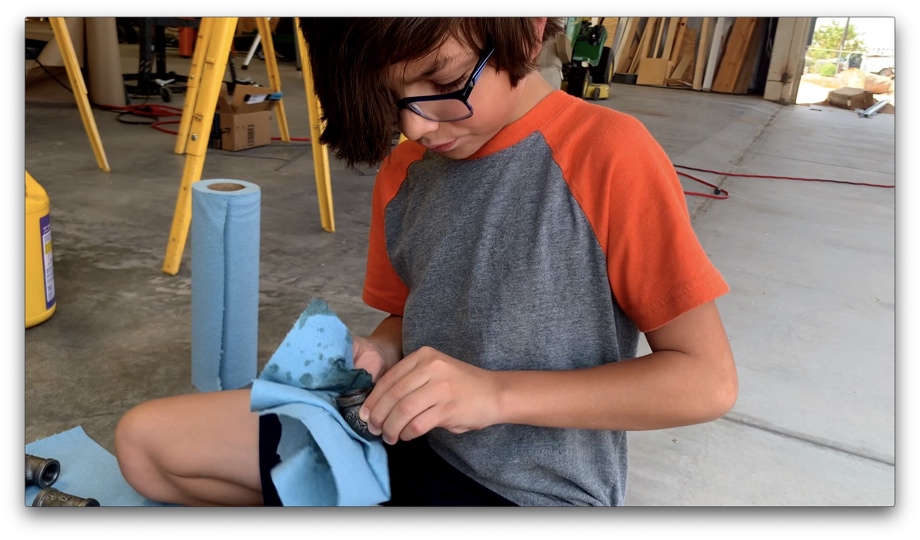
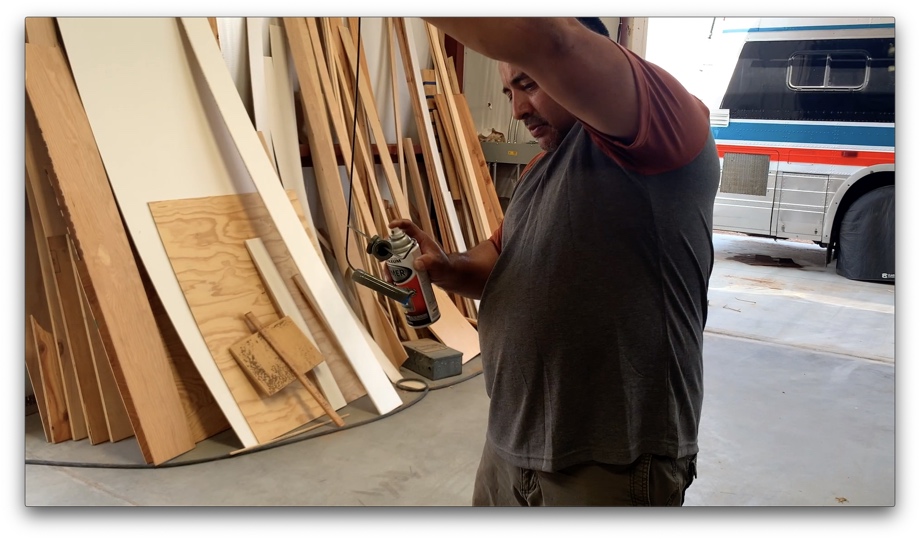
The black steel pipe comes with a thin film of oil on it to protect it from rusting. In order to make the pipes a little more durable, we cleaned off all this oil with a degreaser, used acetone to clean off any remaining residue, then primed the pipes, and finally spray painted them black.
Sealing steel pipe
Steel pipe needs to be sealed. There are 2 common products used: yellow Teflon tape and "pipe dope". We spent a significant amount of time researching which approach to take. In the end, we chose to use a few wraps of yellow tape followed some pipe dope on top of that.
Assembly
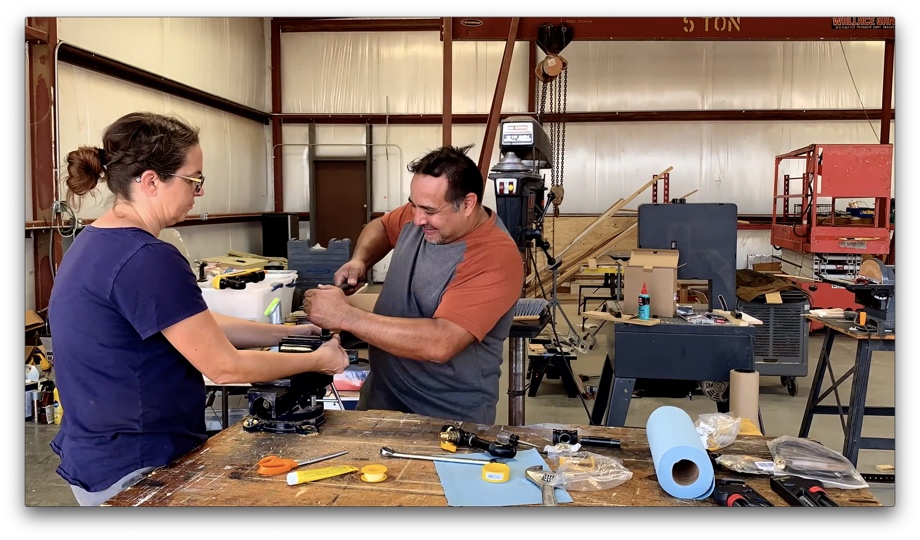
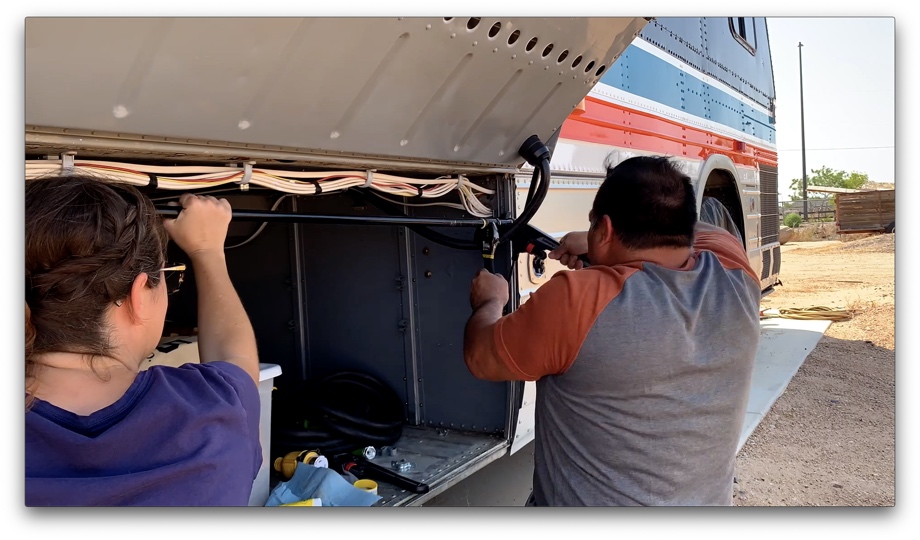
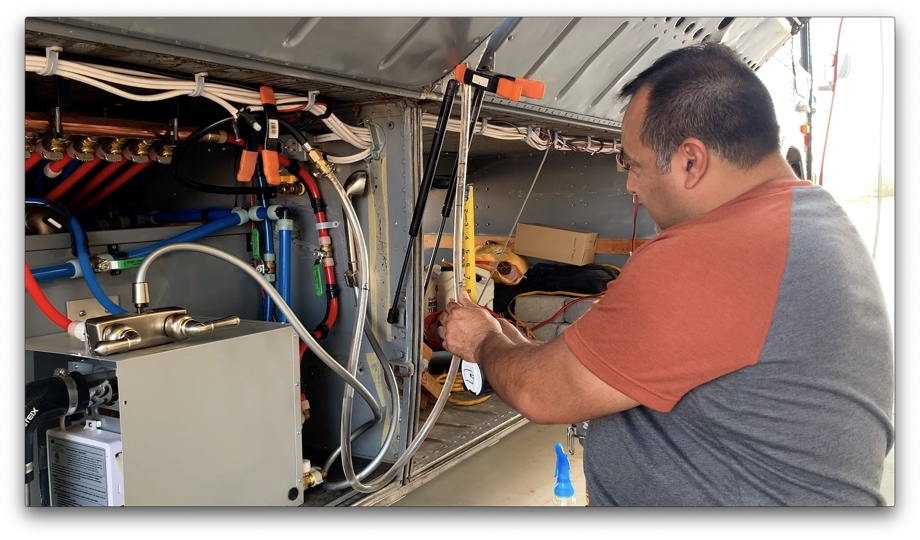
We assembled as much as we could on a bench using a vise and either a very large adjustable wrench or a very large pipe wrench (or both). The pipes require a significant amount of force to be used and we wanted to be sure we did not have any leaks. Once we assembled as much as we could on the bench, we moved to the bus and installed these larger sections from the tank to the water heater. This type of pipe basically requires you to start at one end and tighten and install the pieces until you reach the other end. Once the assembly was complete, we secured everything with clamps and screws.
Testing
For testing our propane install, we performed three different leak tests, a timed pressure drop test, and finally a pressure regulator test (water column).
Leak Testing
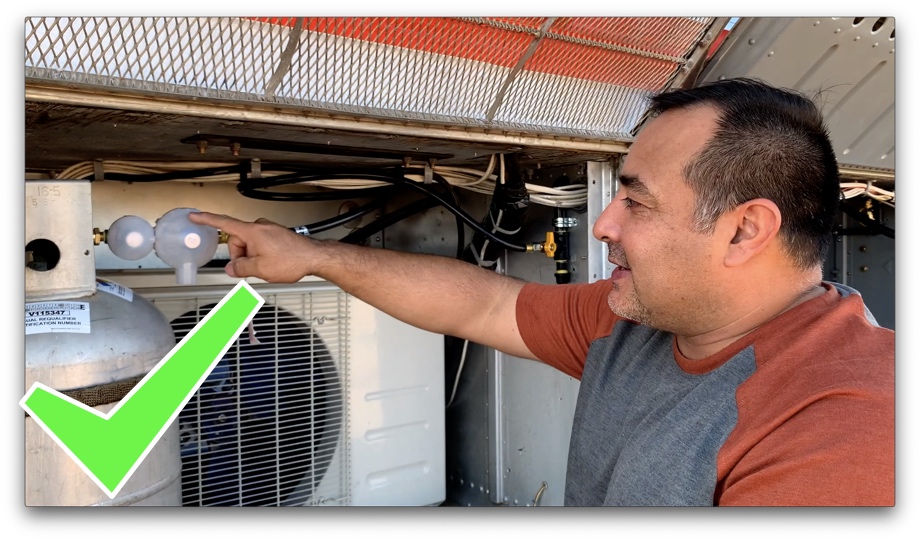
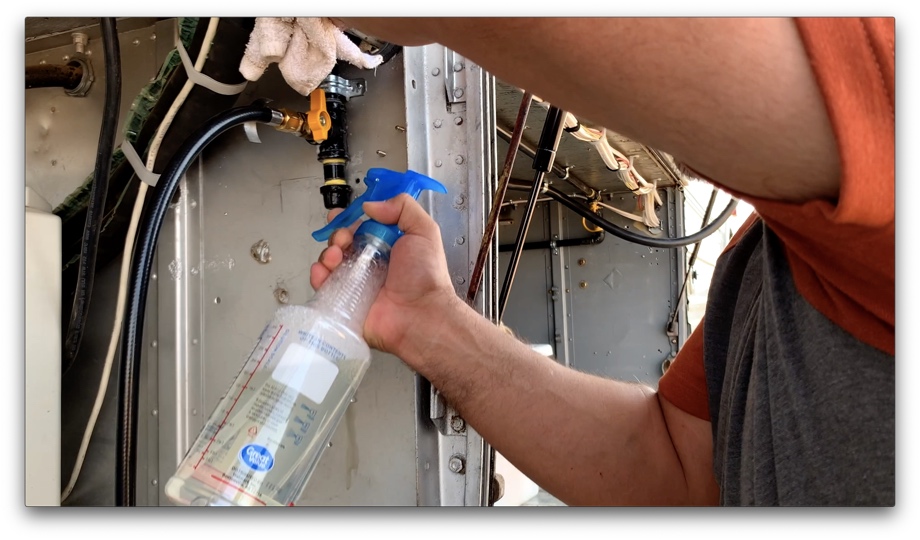
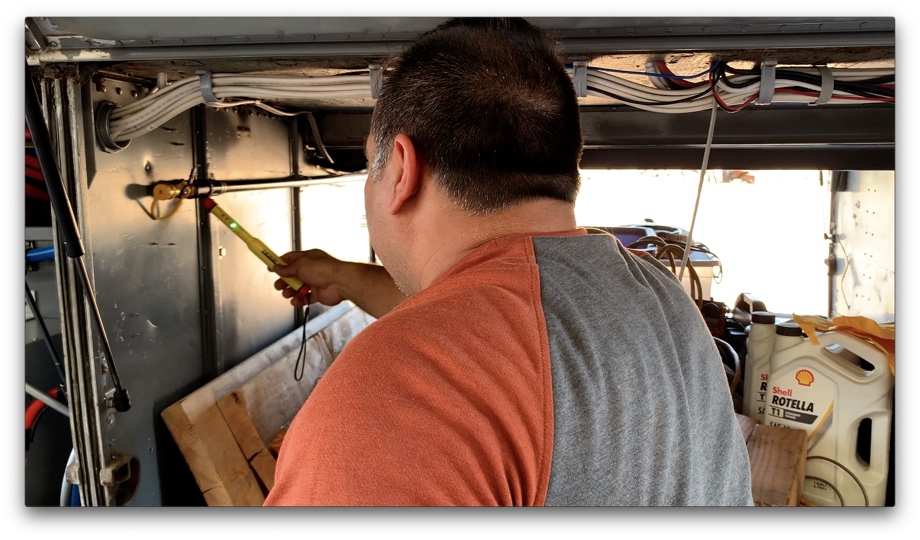
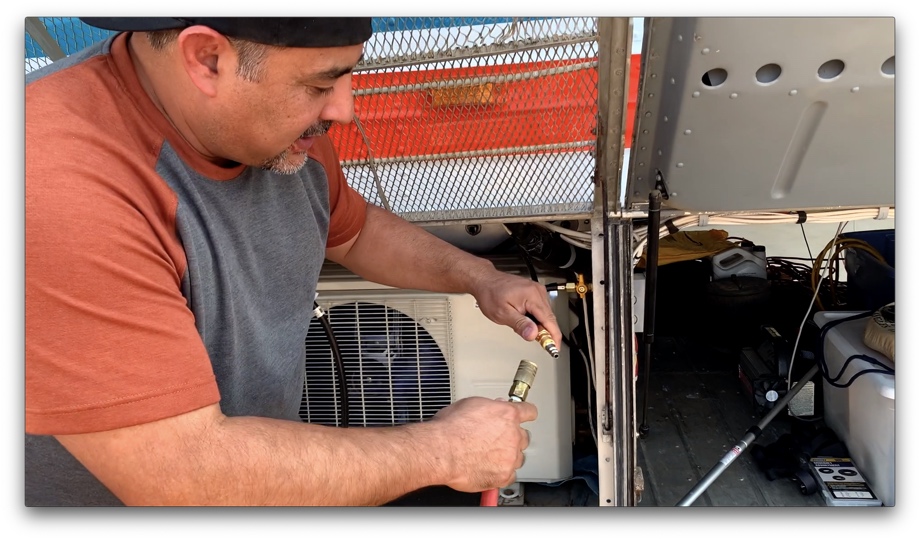
The most simple way to perform a leak test is by using your nose. Propane has an additive called Ethyl Mercaptan that gives propane that "rotten egg" odor. If you can smell that at any point, you have a leak. When you watch the video, you will see that we immediately realized we had a problem with the first regulator by not only smelling it, but we could actually hear the leak it was so bad. The second way we tested our install is by putting the system under load (we used 20 psi in our case) and then spraying each fitting with a generous amount of soapy water. If bubbles form you have a leak. The final way we tested our install was with a propane detection device. We bought a Home Flex Electronic Gas Leak Detector from Home Depot and we were surprised at how well it worked. It actually found a leak at the tank!
Timed pressure drop test
Once we were sure that we did not have any leaks in our pipes we performed a timed pressure drop test. From the research, we discovered that the test needs to be done at a minimum pressure of three times your normal working pressure. Propane operates at a pressure of between 11 inches of water-column and 14 inches of water column. Converting this to psi - we get about 0.5 psi. So the pressure drop test needed to be done at 1.5 psi minimum. Another restriction we discovered has to do with the gauges you are using for your test. The test needs to be done at a minimum of 1/5 of the total pressure of the gauge you are working with. Since we were using a gauge that reads up to 100psi this meant we needed to do our test at 20psi minimum. The last piece of the test is that it needs to hold this pressure for a minimum of 3 hours without dropping. We ended up running ours overnight. We were surprised to find that we had dropped 2 psi when we returned in the morning. Some quick googling revealed that this was due to the temperature difference between the very warm afternoon when we set it up and the very cool morning when we returned to the bus. It was about 23 °F difference. We had some things to do so we decided to leave the gauge and take the pressure readings at about the same time as the first readings (24-hours later). We checked again at the same time once the temperature was warmer again and the reading was exactly 20 psi.

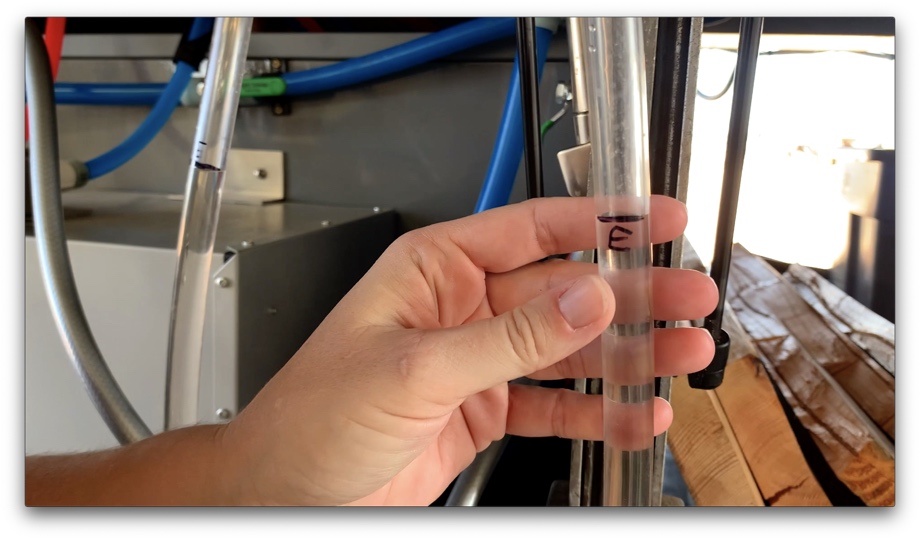
Pressure Regulator Test (Water Column Tests)
There are two tests that we performed to ensure our pressure regulator was working correctly. The first is a regulator lock-up test. To perform the lock-up test, we rigged up our water column test apparatus (a clear tube with water in it and an airtight connection to the propane system). Starting with all the valves off in the system we proceeded to open the propane tank valve, main valve, and the valve to our column test apparatus and observed the water. To pass, it should rise to a water column pressure no greater than 14.3 inches. Ours rose to about 14 inches and then locked up with no visible change in pressure.
The next test was the actual pressure test. This one is a little tricky because you have to perform it while the system is "under load" - like turning on the oven or a propane furnace. We didn't have those things so we just vented the lines through one of the quick-connect fittings. This test should show the water column pressure maintained at 11 to 14 inches of water column. Ours was slightly high so we turned our regulator down until we got about 12 inches of water column during the test.
Water Heater
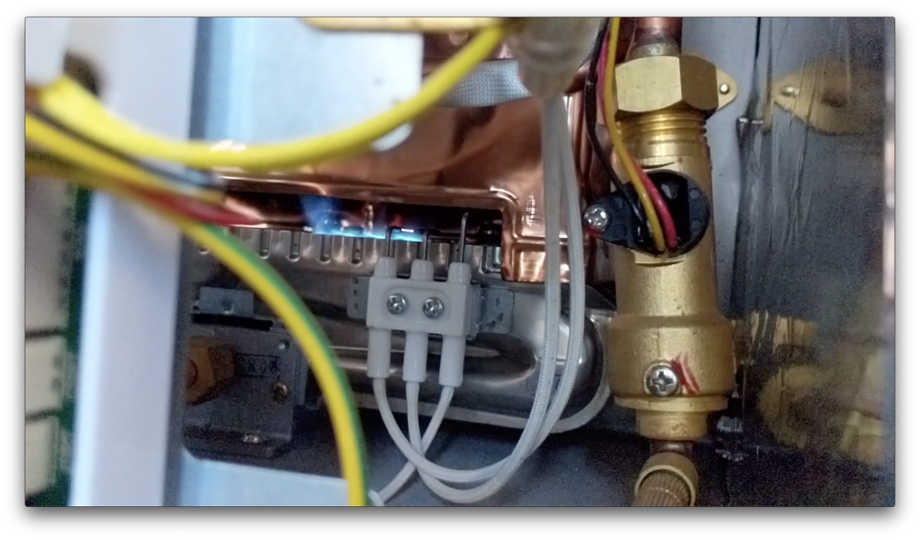
Finally, it was time to actually hook up the water heater and verify it was working. We turned the propane on at the bottle, made sure the valves were open and opened the hot water manifold valve for the bathroom sink. We went inside the bus and turned the hot water knob at the sink. We could hear the distinctive click click click of the water heater trying to ignite. Much to our delight, a few seconds later the water started getting warmer then proceeded to hot! SUCCESS!

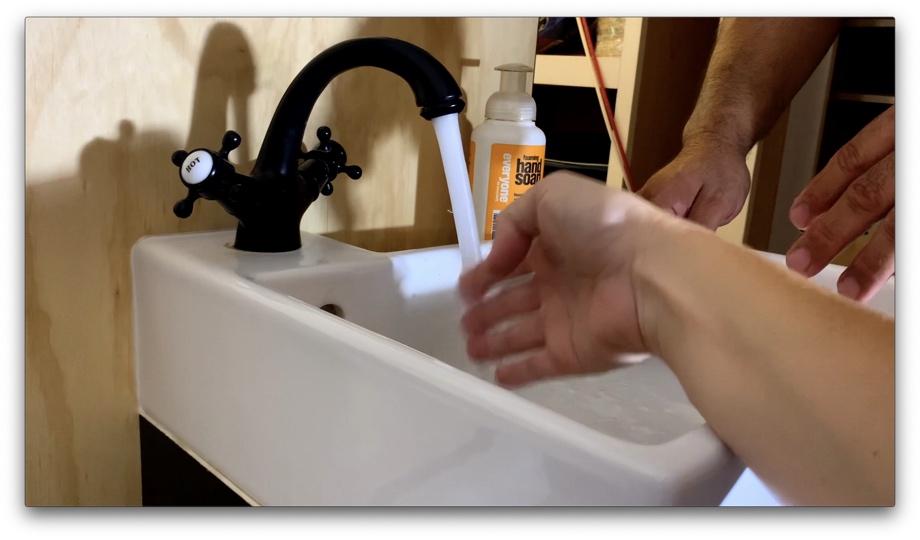
As the temperatures here in Arizona were starting to drop, and the freshwater tank was no longer HOT simply because of the outside weather, we were very glad to have this project done and have hot water. We are really pleased that the install went "relatively" smoothly (minus the regulator issue), and that we can now wash our hands at a comfortable temperature. We will be even more thankful when we get our shower installed.
Watch the video:
Click here If you cannot see the video.


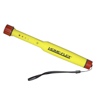 Home-Flex Electronic Gas Leak Detector
 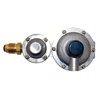 2-Stage RV Propane Regulator

0 Comments
Comments powered by Disqus