


Finally, we were down to the last few finishing touches in the bathroom to call it done. Before we moved on, however, we needed to test the plumbing to check for leaks and also to see how the tankless water heater and recirculation valve would work. Then, we finally were able to add a few finishing touches, and we had a completed bathroom.
First up, testing the plumbing. The last time we updated you, we had installed the shower fixtures. At last, we could see if the plumbing we installed so long ago was leak-free. We opened the shower valves on our hot and cold manifolds in the water bay and got to work. Whoops! We had accidentally left the knobs turned “on” for the shower. Thank goodness, the shower head was lying in the bathtub and not hanging up in its proper place or we would have had a mess on our hands. Take two. Turn on the cold valve. Check for leaks. None. Great! Turn on the hot valve. Check for leaks. None. Great!
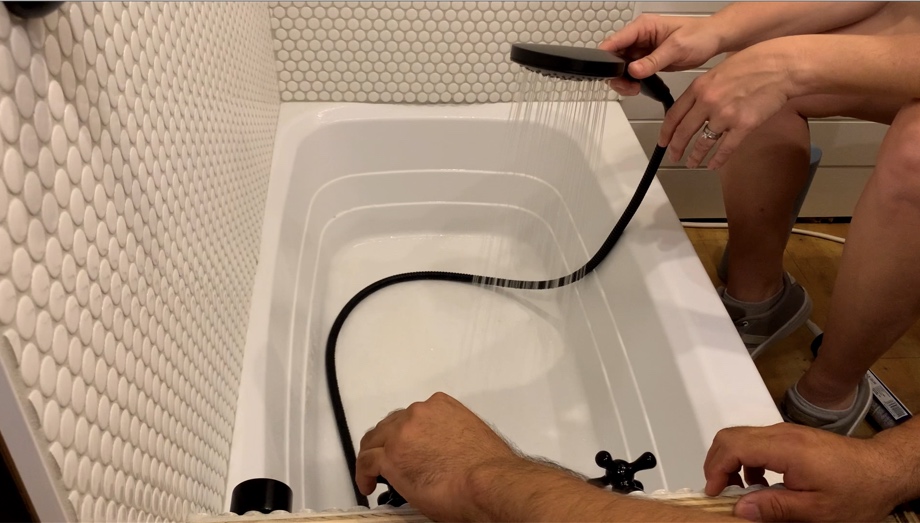
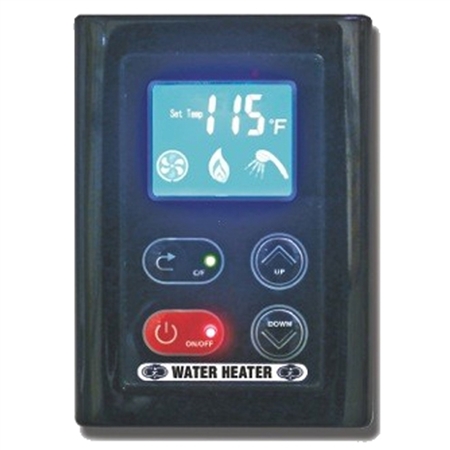
Next, we actually turned on the propane and the water heater to see how that worked. Our Girard tankless water heater comes with a thermostat for the bathroom. So, we can set it to the water temperature we would like, and then simply turn on only the hot water valve and it will heat it to that temperature.
Our first test was to see how long the water would have to run before it would get to the desired temperature. At the time we were testing, we were not on hookups and so were running off our water tank. It was in the 90’s°F outside, and the water in our tank was about 85°F. We were heating the water to 105°F. It took about 23 seconds.
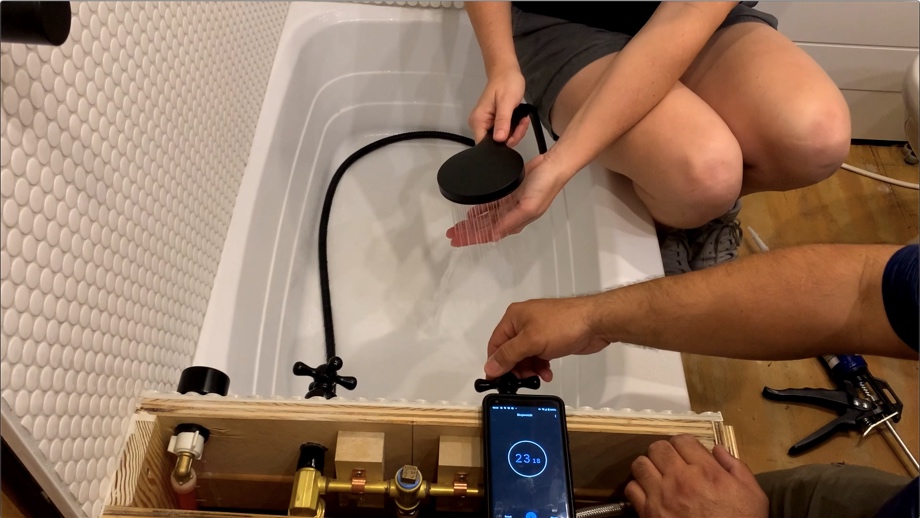
In a desire to conserve water when boondocking, we plumbed in a hot water recirculation line. As the water makes its way to the shower, we have a valve we can open, and the water is sent back into our fresh tank. This allows us to not just let the water run down the drain until it gets warm. We can simply keep the water recirculating until the water coming through is warm and then open the valve letting the hot water through to the showerhead.
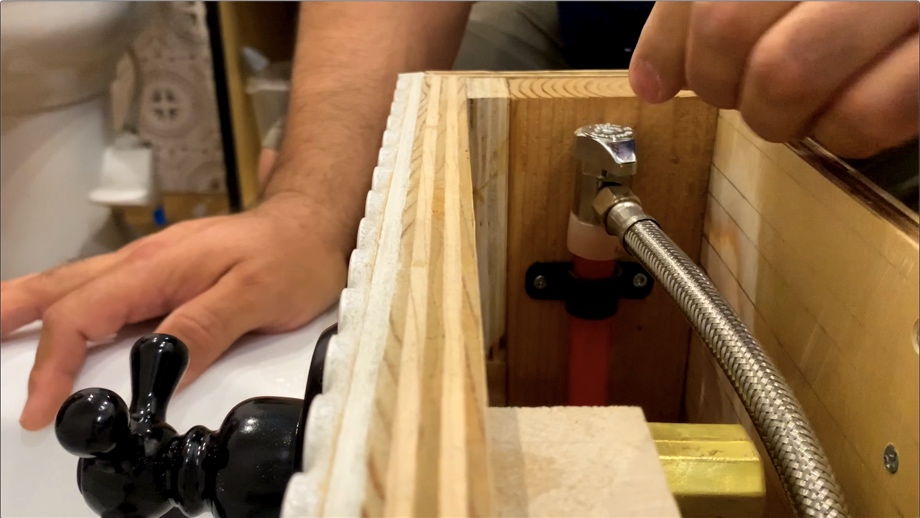
Next, it was time to try out that recirculation valve for the first time. Last time, it took about 23 seconds to get hot water. This time, we turned the hot water valve on but kept the recirculation valve closed. We simply felt the Pex line and when it was warm to the touch, we opened the valve. Within about two seconds, the water coming out of the showerhead was hot.
20 seconds to let the water run doesn’t seem too bad, but we know that the water we will be heating will very rarely be at 85°F. Most of the time it will have to heat it from a much, much lower temperature and will take longer to heat. The recirculation valve will come in very handy to conserve water.
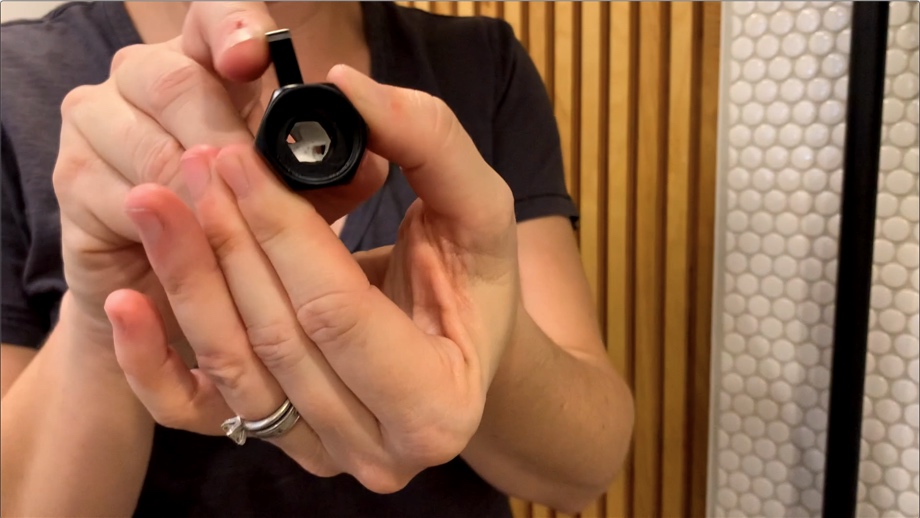
To further assist in our water-conserving efforts, we installed another valve at the base of the showerhead. This should make it even easier to take military showers.
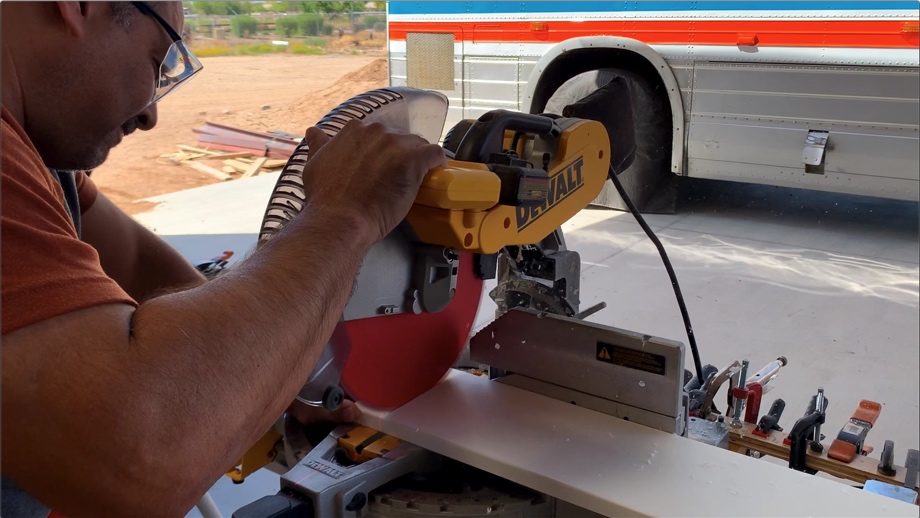
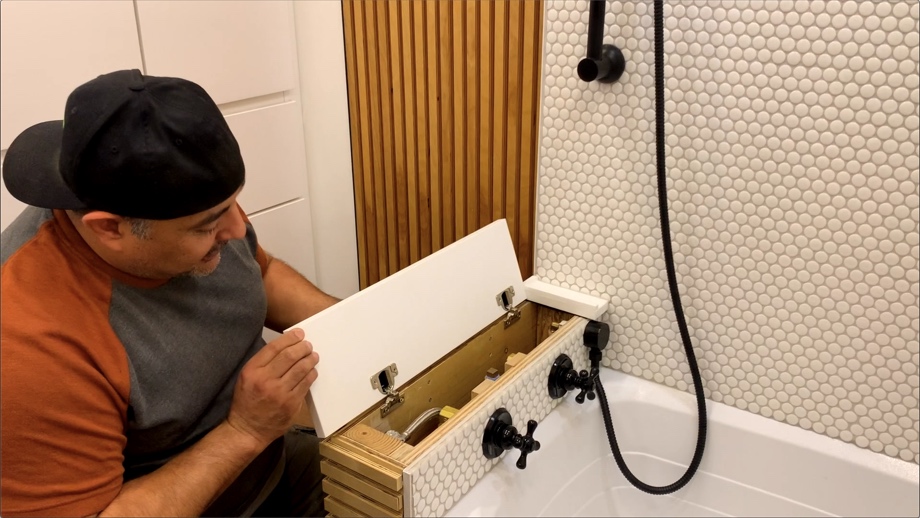
Now that we knew our plumbing was good to go, it was time to put a top on our shower bench/plumbing wall. When we designed this plumbing area, we knew we needed a top that would be water-resistant and sturdy. It also needed to be able to hinge up to access the recirculation valve. We had no idea what material we were going to use. Then, somewhere along the line, one of our YouTube viewers mentioned something about a product called Starboard. Folks in the marine industry are likely very familiar with it, but we had no idea. With a little bit of research, we found out that it is high-density plastic that is commonly used for countertops, decking, cutting boards, shelves, just about anything for a boat or the marine industry. It is sturdy, lightweight, UV resistant, and waterproof. It can also be cut with standard woodworking tools.
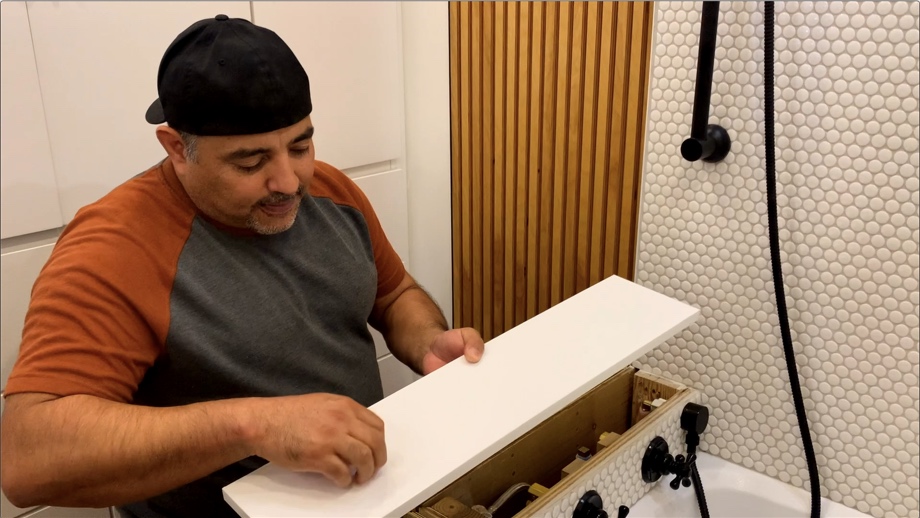
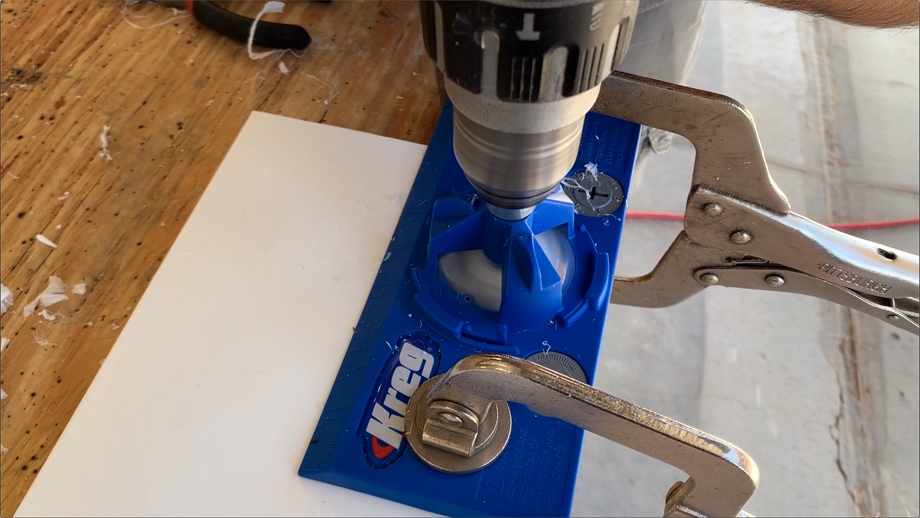
We ordered a custom piece of Starboard from Boat Outfitters. We made it the exact width we needed and were able to have them put a round-over edge on it. We had it made longer than we needed, knowing we had to do a little tweaking to it. Because we needed the top to hinge up, but we didn’t want water from the shower wall running down into the plumbing area, we decided to make a stationary piece that fit next to the wall. This involved screwing it into the wood framework and then creating a little “dam” so water runoff would drain back into the bathtub. Then, the rest of the benchtop could hinge without the worry of water coming in. We used our Kreg hinge jig to drill out cup holes for our hinges. Then, we installed the hinges and screwed them into the plumbing wall. Voila! Waterproof benchtop.

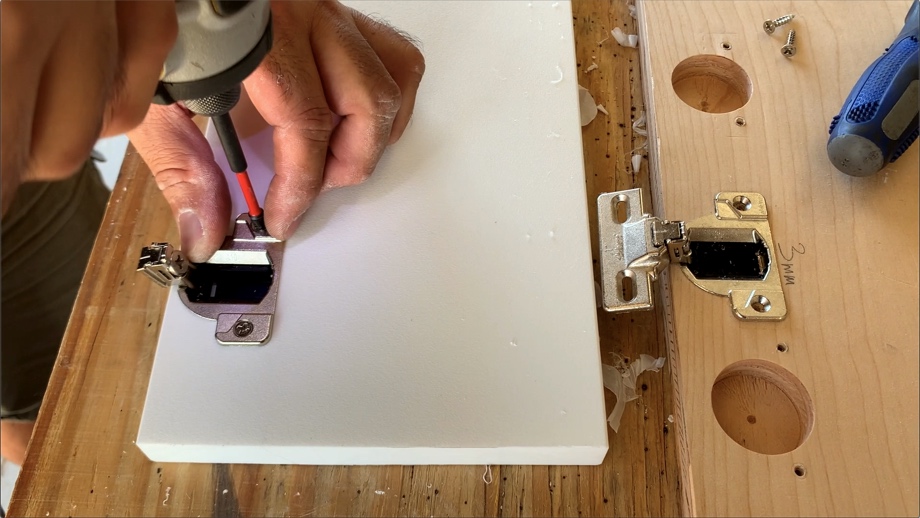
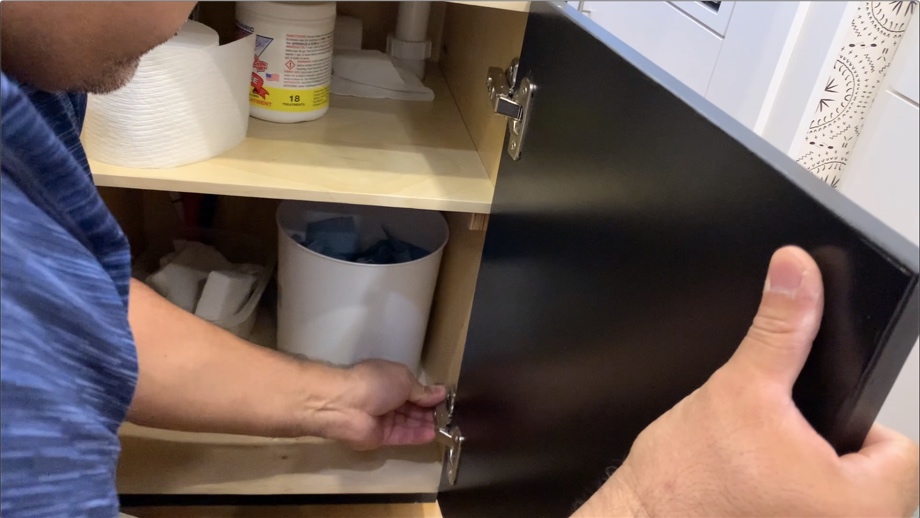
Finally, it was onto all the little finishing touches that make a bathroom functional. First on the list was to finally install the door for the vanity cabinet. We made that door and painted it back when we actually made that cabinet. We just hadn’t installed it yet, because we were afraid it would get all dinged up while we were still building in there. That day, we simply had to install the hinges and the handle and screw the hinges onto the cabinet.
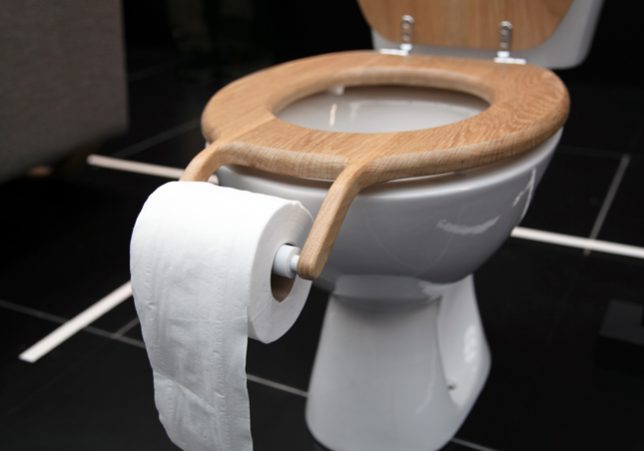
Next on the list was where to put the toilet paper. We knew this was going to be an issue, but figured that we would just figure something out. We couldn’t put it on the wall next to the toilet because our towels will hang there. We couldn’t put it on the side of the cabinet because it was too tight of a space. We couldn’t put it on the wall behind the toilet because who wants to twist backward to get toilet paper. We even joked about getting one of these toilet seats:
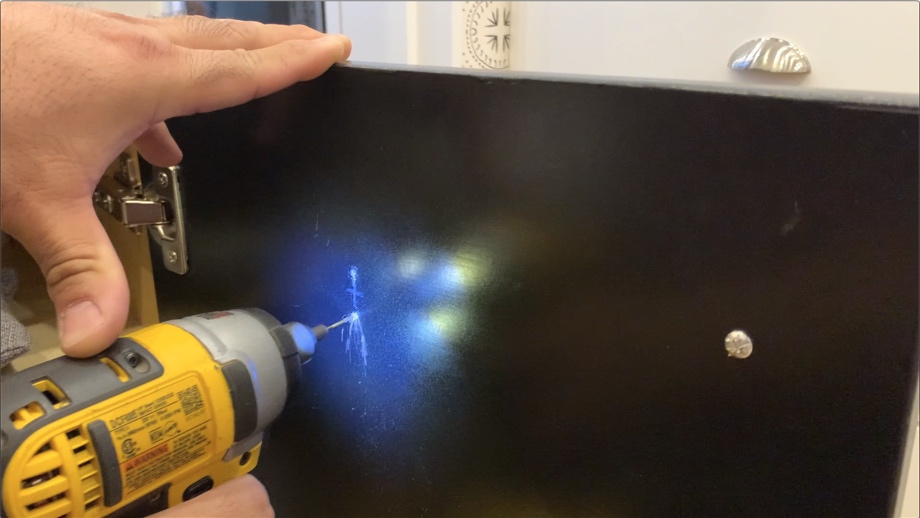
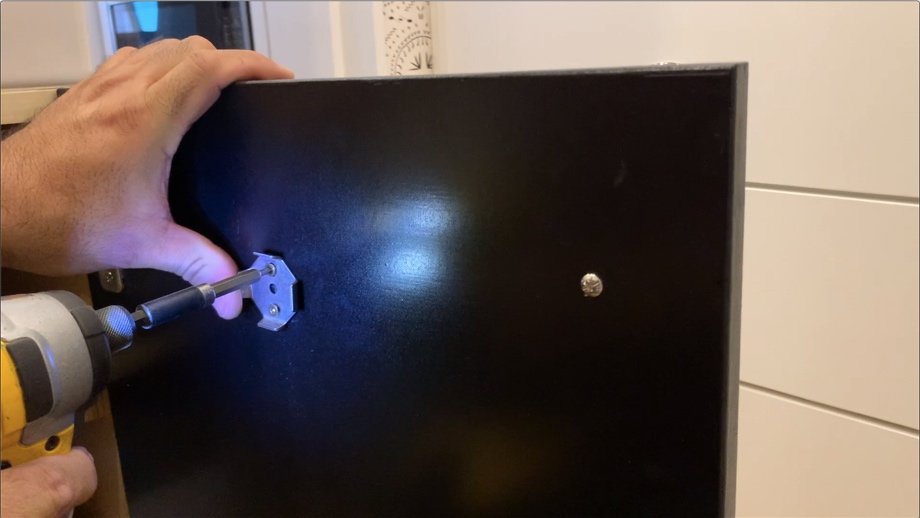
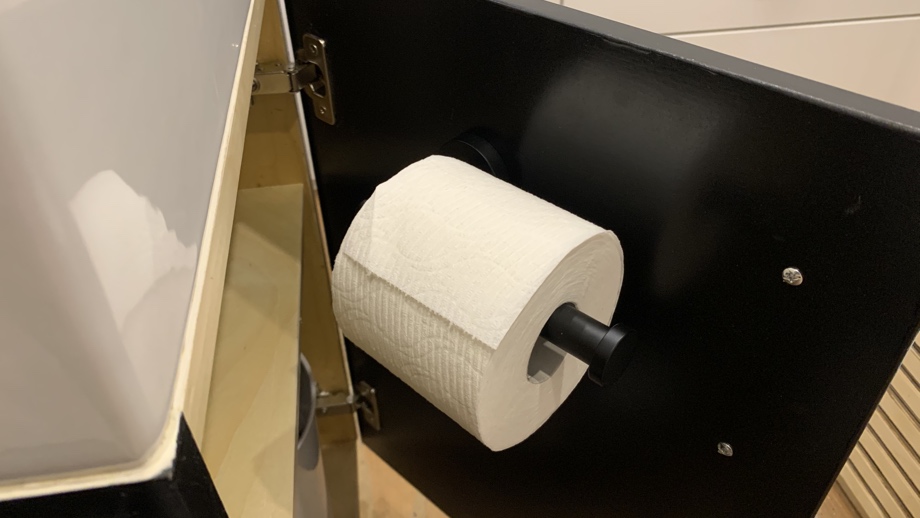
Finally, we realized that inside the cabinet door was the perfect place. It protects the toilet paper from getting wet when people are drying off or washing hands or anything. Yet, it’s easy to access from the toilet. We screwed the toilet paper holder on the inside of the cabinet door, slid on the roll, and we checked another thing off the list.
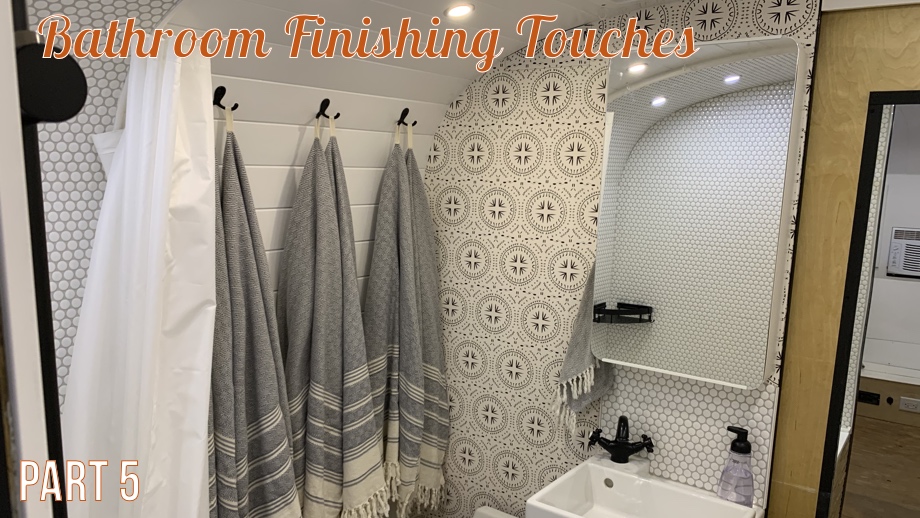
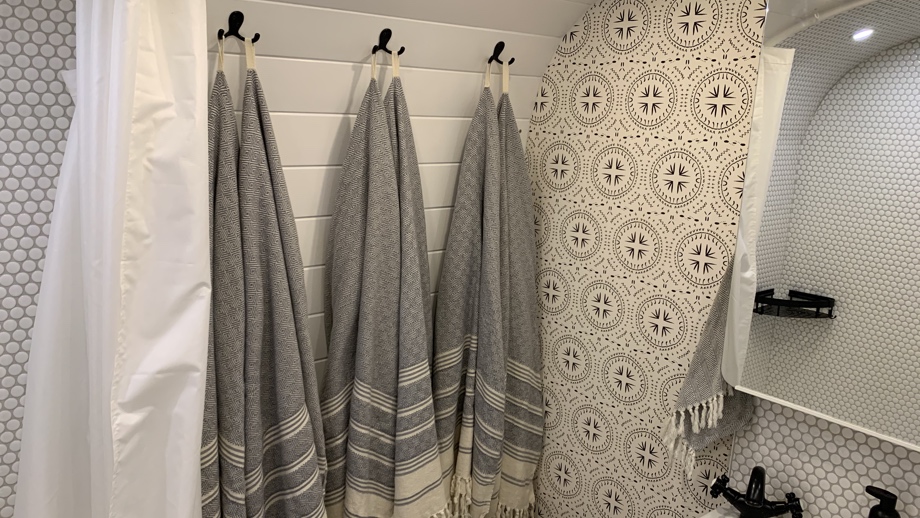
Then, we screwed some towel hooks onto our slatted wall. I sewed some little tabs onto our Turkish towels to make them easier to hang. One hook and towel per person. The hook closest to the shower is for the youngest in the family and it goes up by age to the other wall. Everyone knows where their hook is, and it is never a question of whose towel is whose.
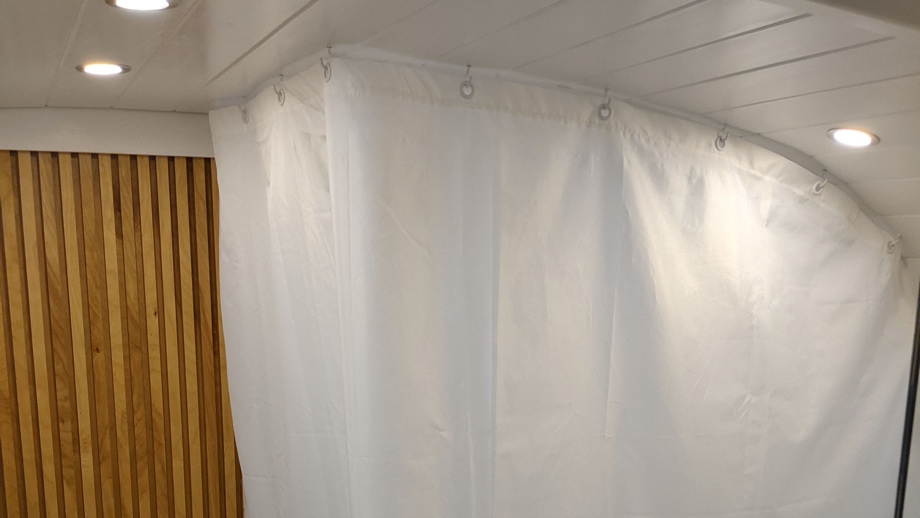
Finally, the shower curtain. Ugh! We honestly had no idea how we would address this until the shower was built. Again, we just figured something would come to us. There was no way we could use a rod of any kind, even the L-shaped ones, because of the curve in the ceiling. I thought maybe we could fabricate some kind of curved rod, but that didn’t seem realistic either. In the end, the simplest solution was the best. Cup hooks. We put cup hooks around the edge of the shower ceiling. Then, I bought an extra-long shower curtain, cut a matching curve into the top of it, re-sewed the top hem, and put in new grommets. Now, we just hook the grommets onto the little hooks around the shower. It’s actually really simple and quick to do. We really like this solution.
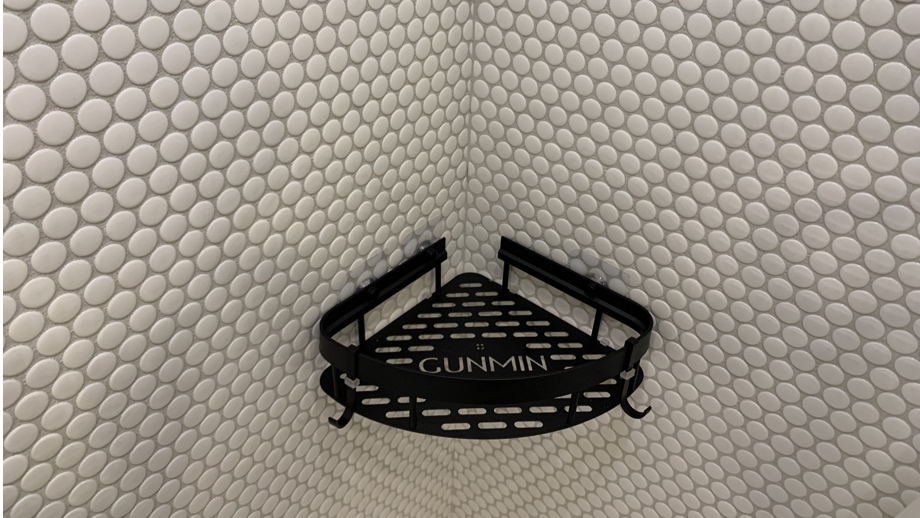
We were almost fully functional, but where do the shampoo and soap go? Well, that has been quite the journey of trial and error. We didn’t want to get one of those caddies that had to be drilled into the wall. What if we didn’t like it? What if it was in the way? What if it leaked into the wall? We found a few options for shower caddies that are made to stick onto tile with an extremely sticky pad. We were really not sure if that would work because our tile is bumpy penny tile and not a big flat surface, but we tried it anyway. We started out with a corner caddy. After about two weeks, water was getting behind the stickers and it came crashing down. We tried another caddy that just went on the back wall and had much larger stickers. That worked really well for a while, but about two months later it also came crashing down. We even got some additional stickers for it and added those, thinking more surface area sticking would have more luck. Nope. It all eventually came tumbling down. Sticker caddies just do not work on penny tile. Finally, we found these caddies that attach to the shower head pole. We got two of them and they are working fantastic. We put them low on the rod so we can still slide the shower head up and down for the little kids. These are the keepers!
And, that’s a wrap on the bathroom. We were so happy with how it all turned out in the end. After now using it full-time for about five months, we can say that we really like it. It functions well. The shower is comfortable and the water is always hot with great pressure. The tile is holding up great and is very easy to clean. The benchtop is so handy for putting a foot up while shaving and we can easily flip it up to turn the recirculation valve. The vanity is just the right size for brushing teeth and washing hands. We love that all of our clothes are in the closet drawers right there so getting dressed is easy.
That’s a wrap on this bathroom project. We will continue to alternate between travel blogs/videos and finishing the documentation of the bus build. Thanks for hanging in there with us.
Watch the video:
Click here If you cannot see the video.


0 Comments
Comments powered by Disqus