


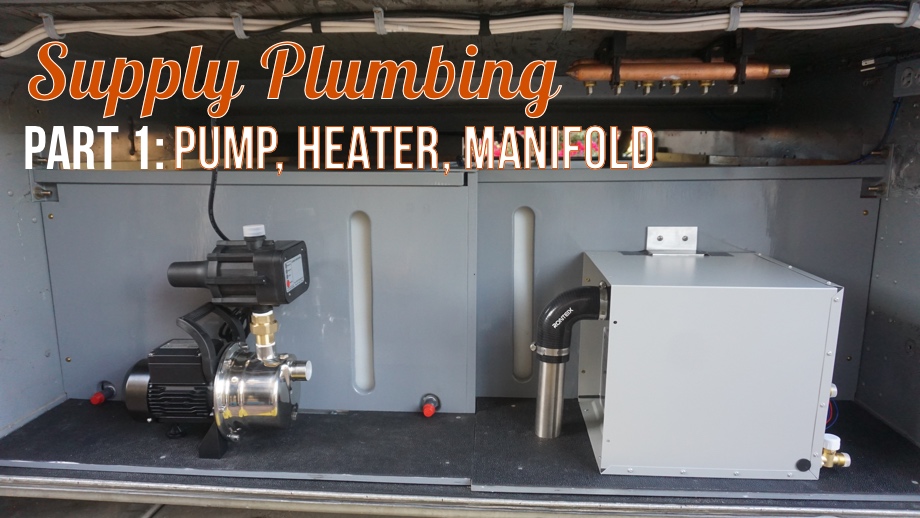
After securing the water tanks, we started the process of installing the major water system components in the water bay. As you may have come to expect from us, we have chosen a couple of components that are not “typical RV”. This week we are talking about our water pump, water heater, and distribution manifolds.
Water Pump
Most RVs use small 12V water pumps that flow anywhere from 2-5 gallons per minute. That’s normally just fine for a camper who rarely uses their water pump because they use city water pressure most of the time. However, we have heard a couple of recurring issues about these pumps through forums, Facebook groups, and friends. First, if someone is taking a shower, it’s difficult to get decent water pressure at a sink, etc. There’s not enough flow with these small pumps to accommodate multiple people using different water sources at the same time. Second, they don’t last long when used full-time.
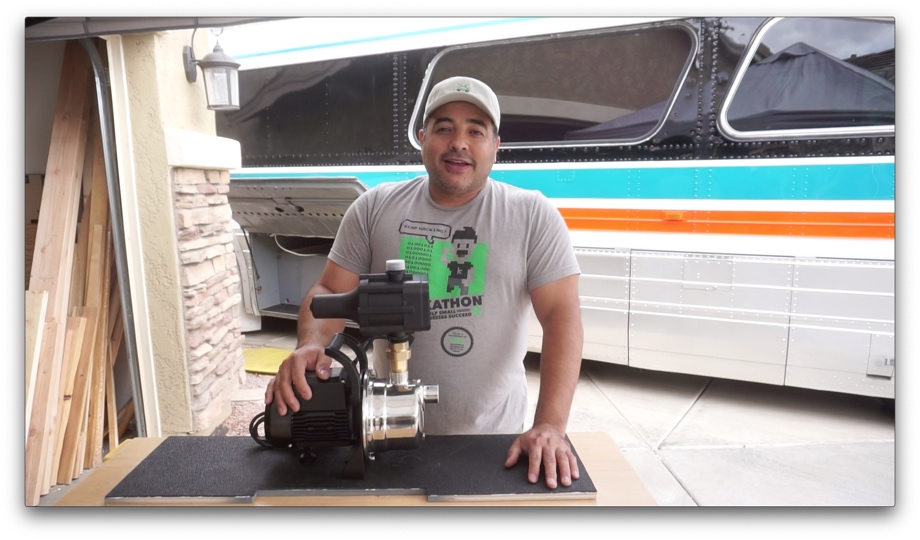
Since we are designing our bus to be “boondocking first” (i.e. let’s be prepared to always run off the pump and water tank), we thought we might start looking at other pump options. Could we find a pump that might give us better water flow and hold up to the rigors of full-time use with a family of six?
Juan realized that he already had experience with a pump that just might fit the bill. A shallow well jet pump. These flow at 15-18 gallons per minute, but still at up to 60psi (similar psi to a 12V pump). In high school and college, Juan spent several years living on a 40-acre ranch that was on well water. When they moved out there, the water pressure was supplied by a gravity tank and the flow was dismal. After installing one of these shallow-well jet pumps, they were finally able to get more than a trickle out of the shower or faucets. The pump held up well for many years of hard use. So, could we use this in an RV?
As always, Juan researched and researched to see if anyone else was using this kind of pump in an RV. He only came across one blog post by the RV Nerds who replaced their 12V RV pump with a jet pump. So, Juan reached out to them and they shared that after over a year of use, they have been really happy with it.
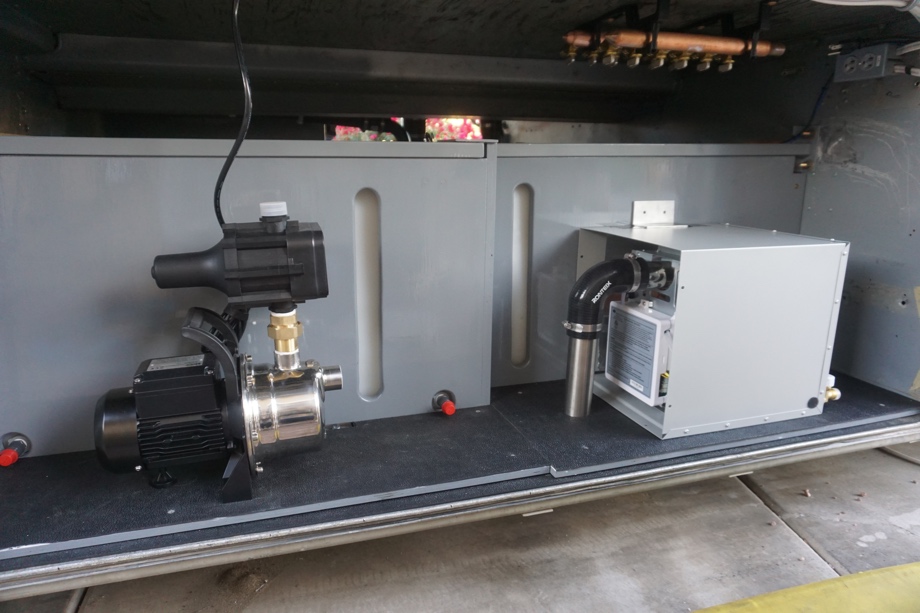
Okay, we decided to go for it. The cool thing is that these pumps are a similar price to a good 12V pump. One thing to consider, however, is that they are 120V. And, obviously, they are larger and take up a bit more space, but they have a built-in accumulator tank, which many RVers add to their plumbing to try and even out the pressure. So, maybe, in the end, the added space of the larger pump is about equal to a smaller pump plus an additional tank.
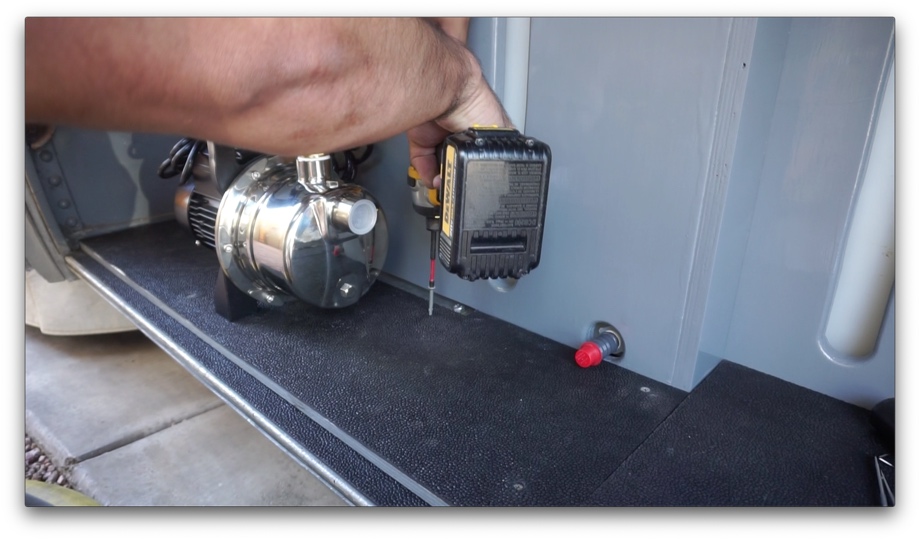
 That brings me to our space planning for this in the bay. We had just enough room next to our freshwater tank to mount our jet pump, but the floors of the bay are corrugated. We needed a flat surface to mount the pump. We cut a piece of plywood and mounted the pump to that. Then, we simply screwed the plywood through the “high points” on the corrugated floor.
Water Heater
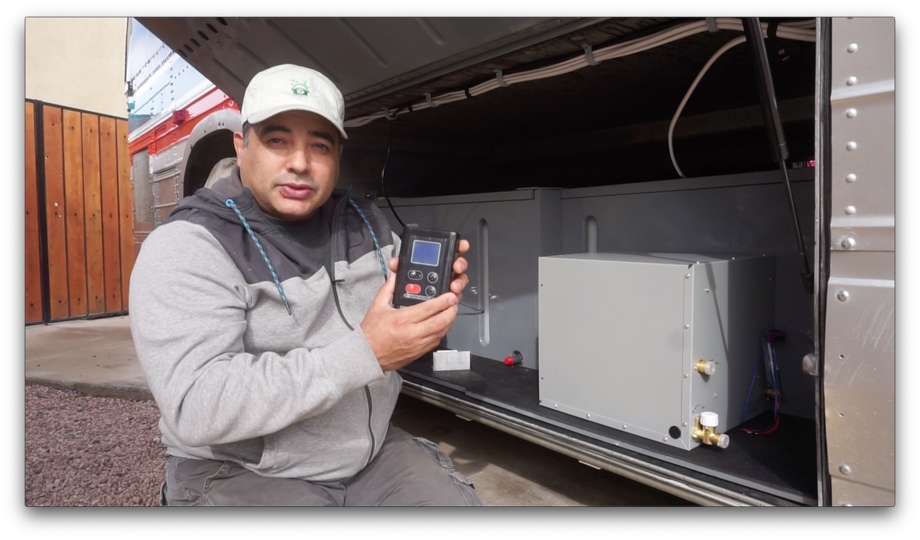
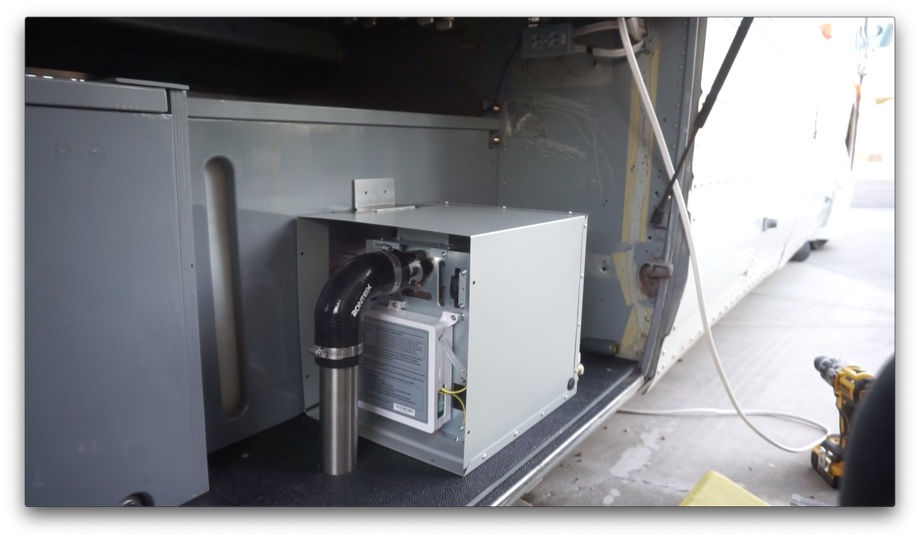
For our water heater, we are actually using something made for RVs. Ha! It is a Girard 2GWHAM tankless water heater. With six people in our family, we knew we needed more than a standard 6 or even 10-gallon water heater. We have heard very good reviews of the Girard tankless water heater, so we decided to give this one a try.
 One side note - it will be our only propane-powered appliance on the bus. While we do have a very large battery for an RV, and all of our other appliances are electric, heating water and air is so extremely inefficient that it just didn’t make sense for us to try to do an electric water heater (going with the “boondocking first” planning model). For heating air - we will be using diesel heaters (we will get to that in a later post).
Alright, back to the installation. While we are finally using something rather common in the RV world, we aren’t installing it in the typical way. This water heater is made to replace a standard tank heater and fit directly into that space in an RV, venting out the side. You can buy a cover for it that matches your opening.
We installed this next to the waste tank in the water bay. Again, we had to add an extra plywood floor underneath it to have a flat surface for mounting. Because this is in our water bay with the big thick aluminum doors, we didn’t want to vent it out the side and have to cut a hole in our bay door. We decided to turn the heater so the vent was facing the back. We bought a silicone heat resistant 90° coupler to join the vent to a stainless steel tube, drilled a hole in the floor, and then vented the water heater out through the bottom of the bus. We screwed the water heater into the floor and into the sidewall.
Manifolds
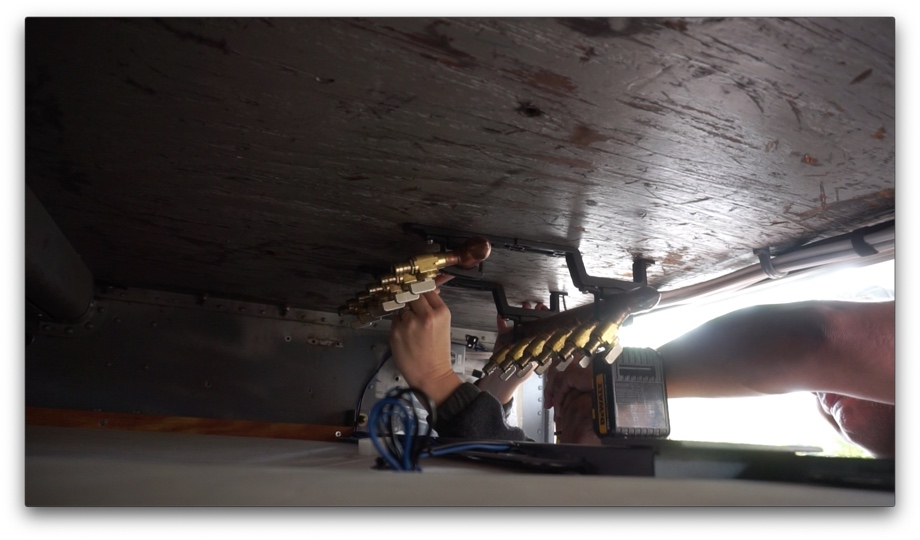
For water distribution from the bay and up into the living spaces, most RVs have one main cold line and one main hot line. Each of those then branches off to each water fixture (sink, shower, washing machine, etc.). We see a couple of problems with this system. First, more branches mean more connections which means more places for leaks. Second, if you need to service any of those fixtures, it can often mean shutting off water to everything while you are fixing it.
We decided to use a “home run” system that runs from a manifold. In this type of system, each fixture gets its own dedicated line from a manifold. There are two manifolds - one for hot water and one for cold water. At the manifold, there is a valve for each line. This type of system means there are no branches which means fewer possibilities of leaks hidden inside the bus. In addition, each fixture can be individually shut off at the valve on the manifold, leaving water still running to all other fixtures.
We mounted our two copper manifolds on the ceiling of the water bay which gets them up and out of the way while still giving us easy access to them.
 We were really happy with how the water bay was starting to shape up. The next thing we will share is installing our water filters and the city water inlet. Then, we will finally be able to start Pex plumbing and getting water lines actually inside the bus.
Watch the video:
Click here If you cannot see the video.

 RV Tankless Water Heater by Girard-GSWH-2
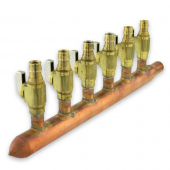 6 branch Copper Manifold 1/2" PEX-A


0 Comments
Comments powered by Disqus