


Did you think we got swallowed by the bus? Some days it feels like it. It seems like we eat and sleep "bus". In fact, I've been having dreams about the bus - wiring, dash gauges, etc. Homeschooling is about to start again, and I am so thankful to have something else to think about. Don't get me wrong - renovating this bus is mostly fun and amazing when I think about it, and this bus is going to take us on amazing adventures. But, the day-to-day grind of it sometimes leaves my head spinning.
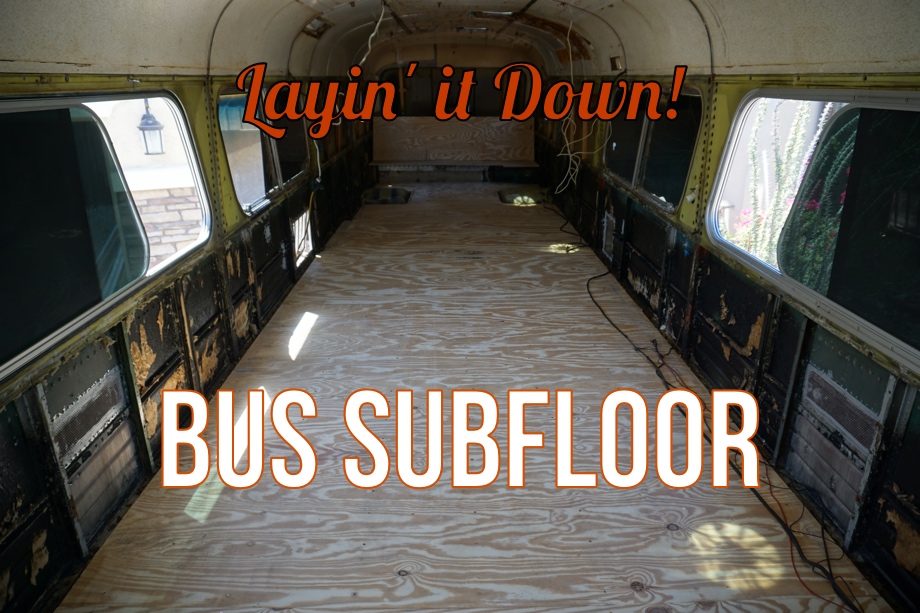
So, now we need to back up about five months. Where were we? Oh yeah, the floors. Remember the old subfloors that nearly did us in? Well, it was time to replace those with nice, new non-splintering, non-water-damaged 3/4" plywood. But first, we had to do some repairs and prep work.
Watch the video here:
Click here If you cannot see the video.
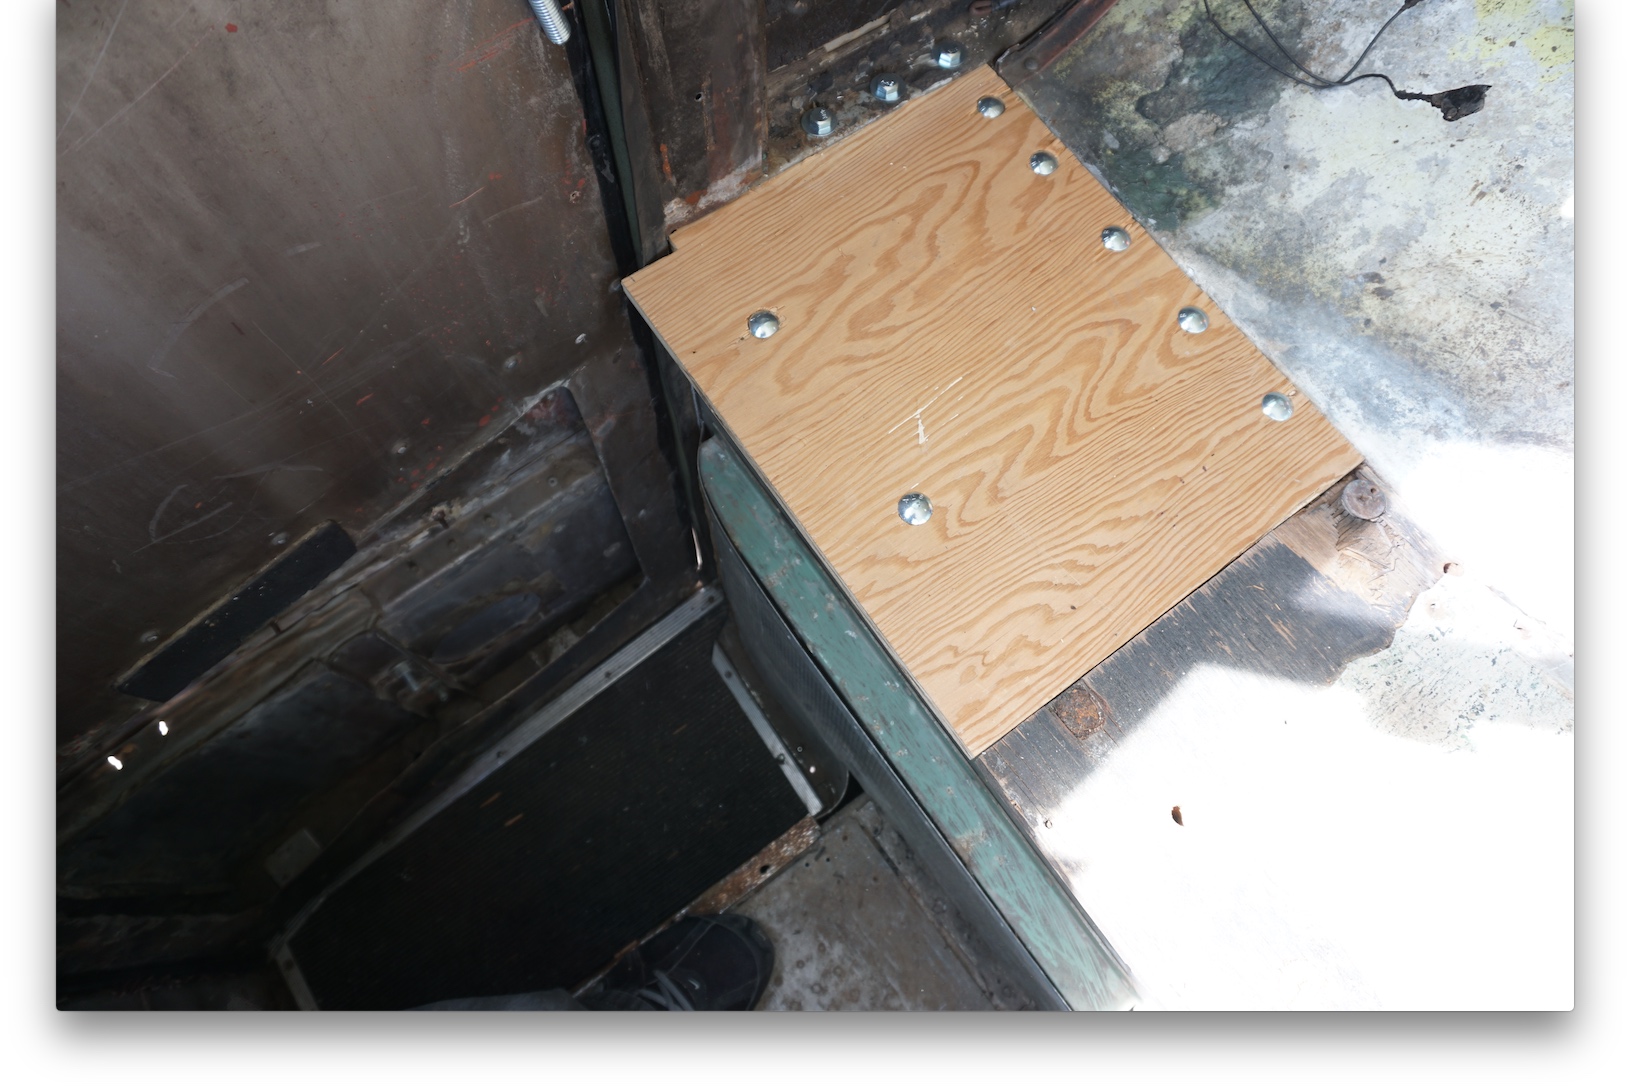
Back when our bus was an actual working coach, there was a lavatory in the rear passenger corner. There was a large hole in the floor that was from....hmmmm, a drain? Not sure what went there, but whatever it was had to be patched.
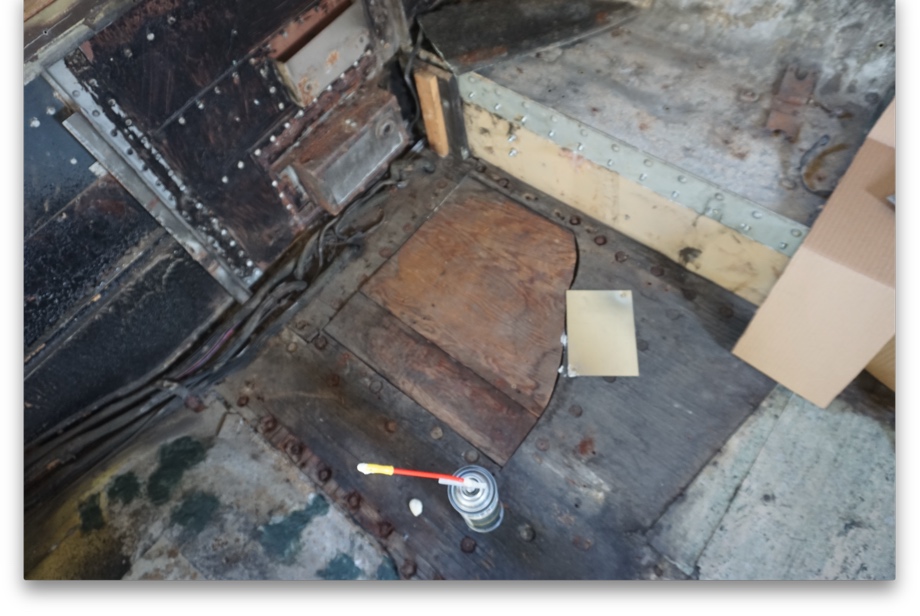 Of course, there were also some random bolts and screws that needed to be ground off in a few different places. (Note: if you ever attempt a bus conversion, just buy a few jumbo packs of grinding wheels before you even get started. They will not go to waste.)
Juan insists that I learn how to do stuff. How dare he try to make me more well-rounded and capable! haha So, it was my turn to use the grinder. I had watched him do it plenty of times - how hard could it be? Okay, Michelle, let's just start by figuring out how to turn the switch on. Doh! Now, go! Yikes, these sparks are hot and burning my arm! Okay, okay, maybe I should be wearing long sleeves, but it's hot in the bus. Now, I've got the hang of this. Hey, I can do this. No big deal!

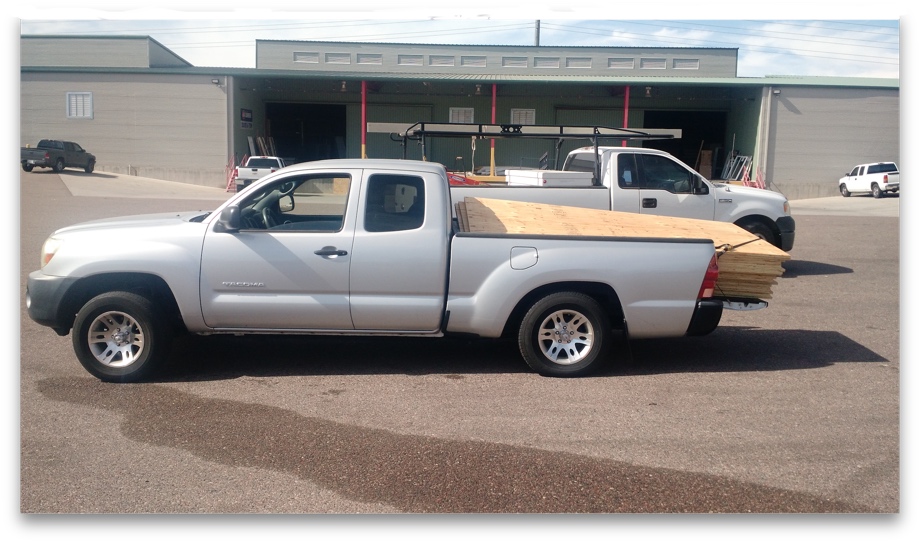
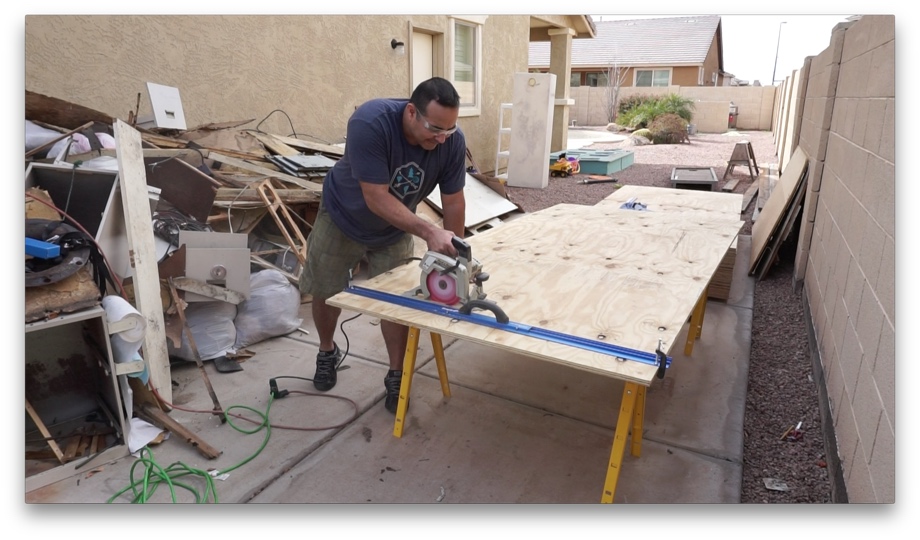
Prep done, next we had to go buy the plywood. Juan borrowed a small truck from a buddy, not really considering how heavy all of the 4'x8' sheets of 3/4" plywood would be. We bought more than we needed for some other projects and to have some extra. Clearly, we should have borrowed a bigger truck! ha! But, he made it home and we unloaded.
Next, the fun started. We had to decide whether to lay the wood with the long sides running the length of the bus (which would mean two pieces across the width leaving one big seam front to back down the middle of the length of the bus) or lay the wood with the long sides running the width of the bus (then we have multiple seams going side to side down the length of the bus). We went with the second option. Since the bus will basically have an aisle down the center once all of the cabinets and furniture are in, we decided it would be best NOT to have a seam in the subfloor running right down the middle of that aisle.
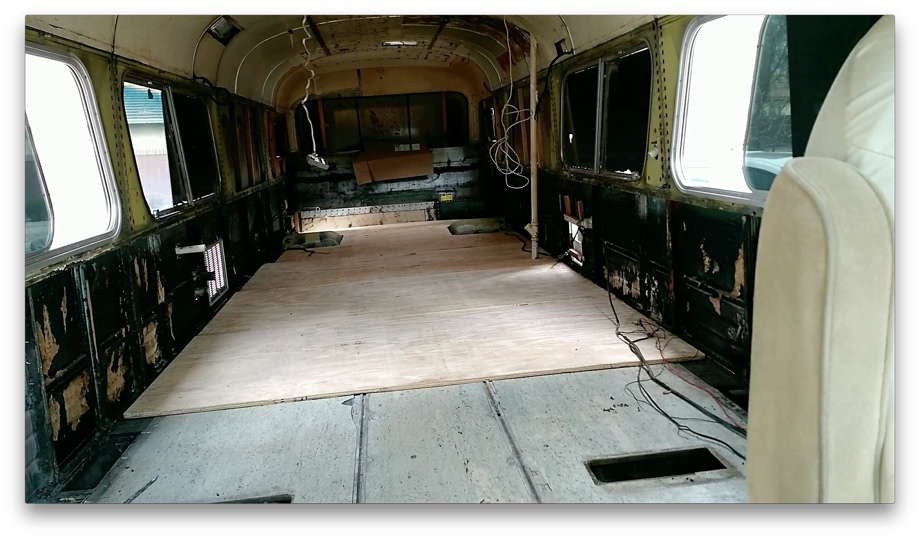 "Measure twice cut once" the saying goes. Well, I think we measured more like five or six times. We also made paper templates in some places. The back of the bus floor has weird curves around the engine bay and the wheel wells, so the first and second pieces were some of the most difficult. I have taken on the role of the "measurer and drawer of lines" while Juan double checks my numbers, and then Juan is the "cutter" while I double check everything is lined up. We make a good team. :)
 please excuse the demo pile - this was before our SECOND run to the dump
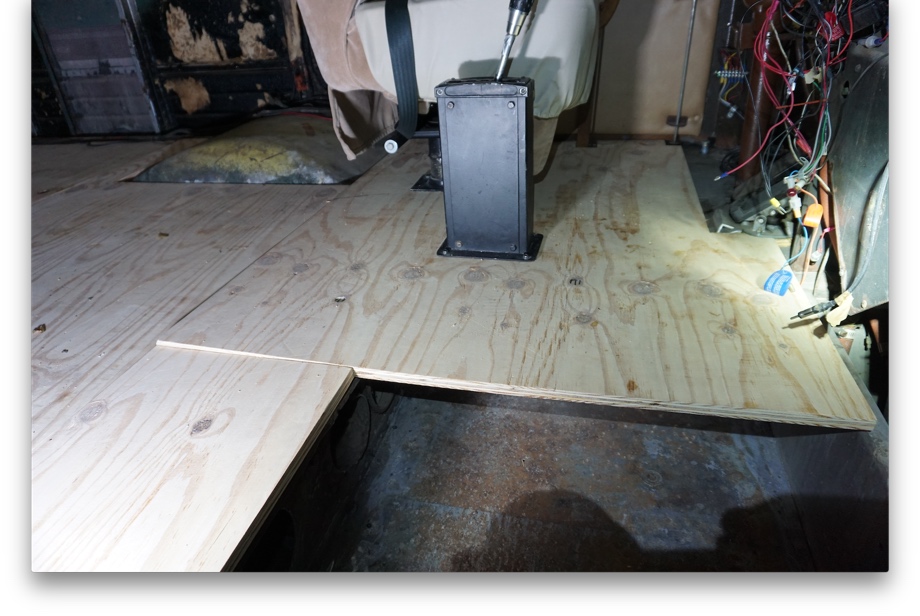
When we got to the third piece we had to cut a hole for the vent pipe. Of course, we didn't have a hole saw. Off to the store yet again. More measuring, triple checking. More cutting. Next piece. Rinse and repeat. After we were about 3/4 done, we had to pause. The blower vents for the original bus heating/cooling system were on the floor. We had to remove those, which meant, you guessed it, more grinding. Dang 53-year-old screws! In the process of removing those vents, we found a couple of fun things down in there. One was a 1964 nickel and the second was an old stomper toy. Juan remembers having one of those as a kid. I wonder if the previous owner's grandkids lost it down the vent hole. see it here on Instagram
When we finally got back to work finishing these subfloors, we had to work around the front wheel wells again. Then, came the very front and drivers area. One major thing we had to deal with was some disintegrating sub-sub-floor (the original wood subfloors that were are under the plywood) right by the front door. There is a hole in the metal in front of the wheel well. This probably let water get splashed up under that wood, and it was now falling apart. The hole will get covered up when we Line-X under the wheel wells, but we had to remove and replace that piece of sub-sub-floor. Confused yet?
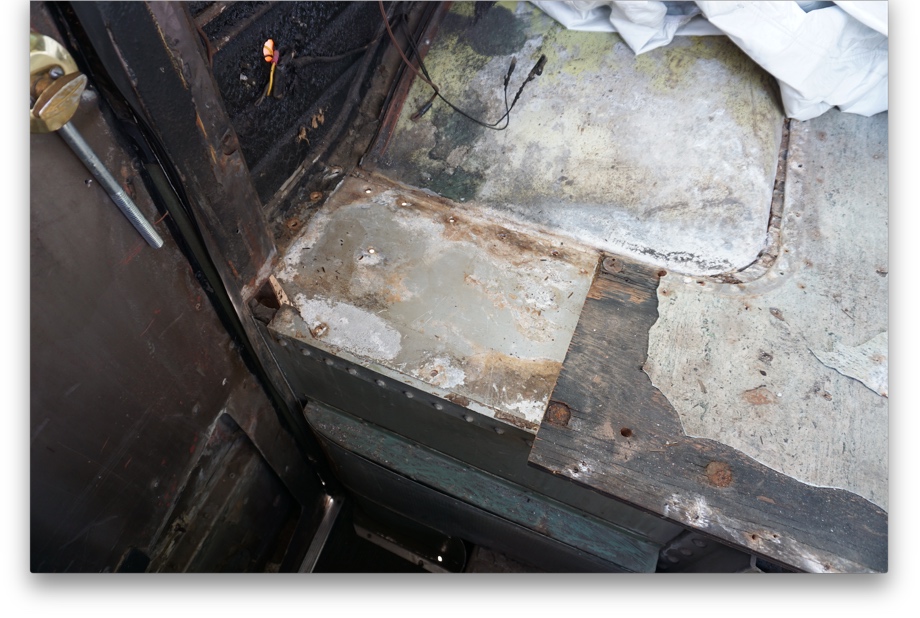 That wood is not 3/4", it is 5/8". Awesome. Fortunately, we had saved the walls that divided the bathroom from the kitchen/living room during demo, because we wanted to use it as a template for the curve of the roof when we rebuild new walls. And, those old walls were 5/8". We didn't need to save the whole wall, so we cut out a piece of that to use for our repair. That one small piece took quite a while because of the weird corner and angles necessary to fit it between the wall, bolts, wheel well, stair well, etc. Measure, cut, sand, check, sand some more, check again, trim, sand, okay done.
 Finally, we could finish the last couple of pieces of subfloor in the very front of the bus. This involved removing the driver's seat, the emergency brake handle, and the gear shifter. Oh man! Please, let us not screw this part up. I mean, what happens if we remove the gear shifter and then we can't get it back correctly? The bus is stuck in our driveway of our HOA neighborhood? Alright, let's do this. Careful measurements, taking pictures so we know how to put everything back together, patience, paper templates, a ton of weird crazy cuts and angles to get around the pedals and the electrical panel on the side, and more patience, and by the end of the day...we were DONE. Everything was put back together and worked. Phew!
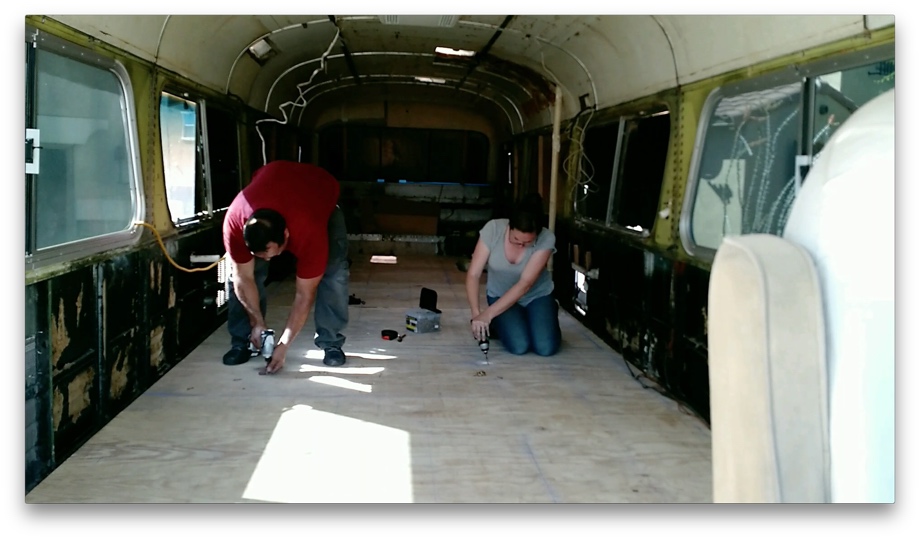
 Next up, screw it all down. The old floor was twist nailed down about every two inches. NOT doing that again! We used self-tapping, self-countersinking Torx screws. We decided to install the screws approximately every six inches front to back and about every ten inches side to side. After measuring and marking lines the first couple of sheets, we decided to go get a blue chalk line to finish marking the rest of the grid. Then, we just worked our way along the intersections of the grid and pretty soon, the subfloor was all screwed down.
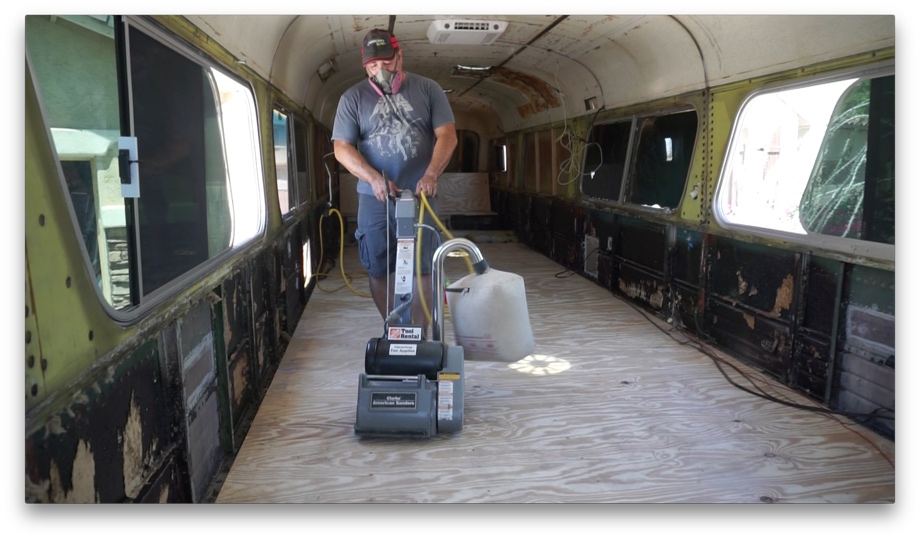
The final step was to sand it all down. The plywood wasn't perfectly 100% flat, so there were small lips where the different pieces met up. Even though as we walked on it, the differences really couldn't be felt too much, we knew that when it came time to build cabinetry or lay down laminate floors on top of this, it would need to be as perfectly smooth as possible. Juan went to Home Depot and rented a drum sander for half a day. He got to work, and after a few hours, it was smooth. We paid about $45 to rent the sander - a worthwhile investment we think.
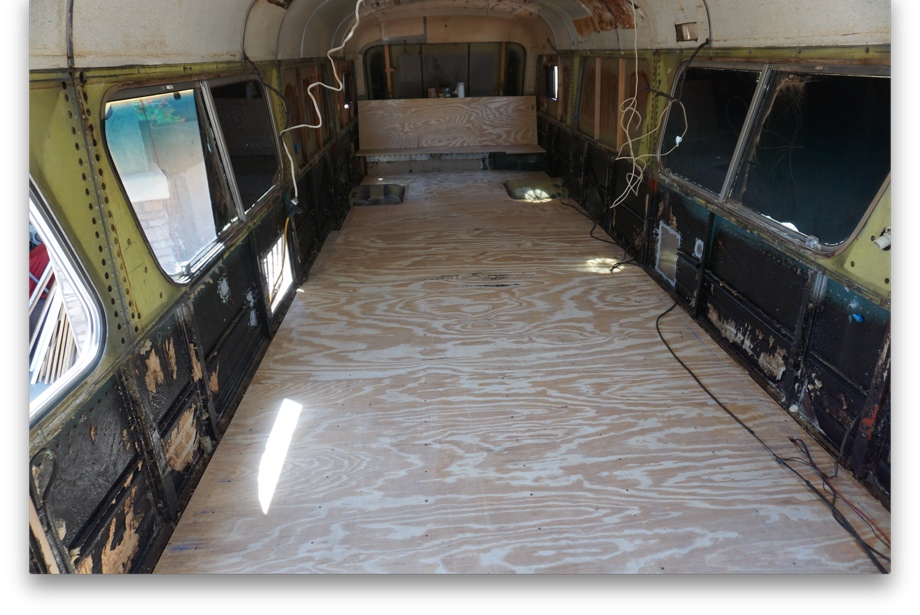
 After quite the process, we now have a solid foundation on which to build the interior. And, bonus, it smells much nicer in the bus with freshly sanded wood.

0 Comments
Comments powered by Disqus