


It’s finally time to tackle building a rack to hold our solar panels. The goal is to get all eight of our Sunpower E20 435W panels on our roof, giving us nearly 3500W of solar. We realize that using panels of this size (81.5”x41.5”) is quite unconventional for most RVs. But, if you haven’t figured it out already, we are totally fine with making unconventional choices if it serves a purpose for our family. In the video, we discuss several of the reasons that we chose these large panels over more standard 100W-200W panels. A few of the reasons include higher energy density, better technology to cope with shading, and higher efficiency (some of these are discussed in the blog post when we first bought the solar panels). Juan goes into a little more detail in the video.
In order to mount all of these panels, we have two big obstacles. The first is our curved roof. We originally intended to mount all eight panels in a row perpendicular to the length of the bus, kind of like a huge platform covering the roof. We had seen some skoolies take this approach with larger panels (not quite as large as ours). However, the curves on the sides of the roof are very steep, and when we took our foam solar panel “stunt double” up on the roof to see how this would work, we quickly nixed that idea. The steep curves on the sides of the roof with the solar panel hanging over created quite a “wing” - not the look we were going for and definitely could cause a problem with wind or air pressure while driving.
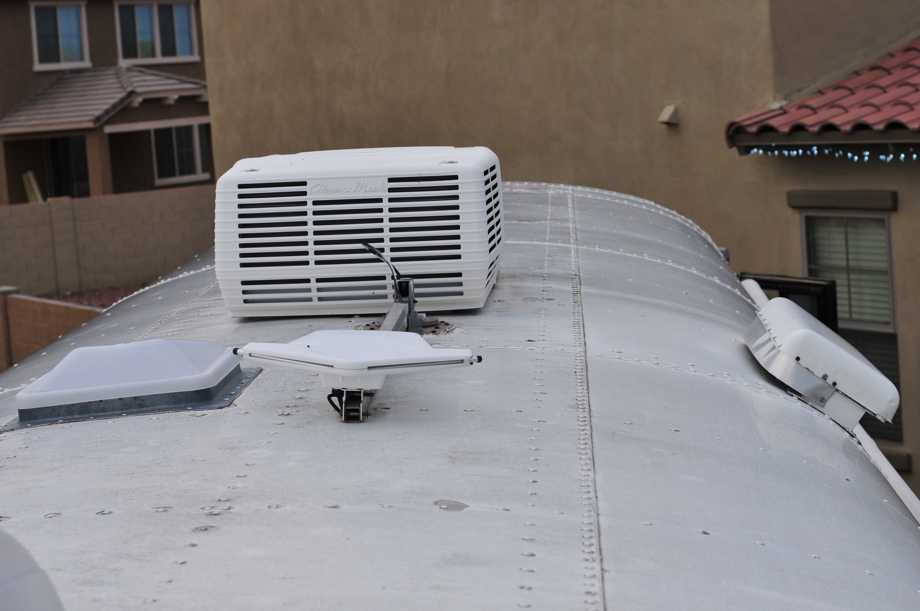
The second obstacle is our three rooftop Maxxair vents. Most folks mount their solar panels flat to their roof and just work around their rooftop “accessories” - i.e. air conditioners, vents, antennas, etc. We eliminated everything on the roof except those vents, which we feel are pretty essential for comfortable full-time living in the bus. Could we simply lay out the panels in between and around the vents? With these large panels, that wouldn’t work very well. We would maybe be able to fit three or four panels, which is still a lot of power, but then we would also have to deal with the shading that the vents created on the panels. We knew we could come up with a better solution. Elevate the panels over the vents.

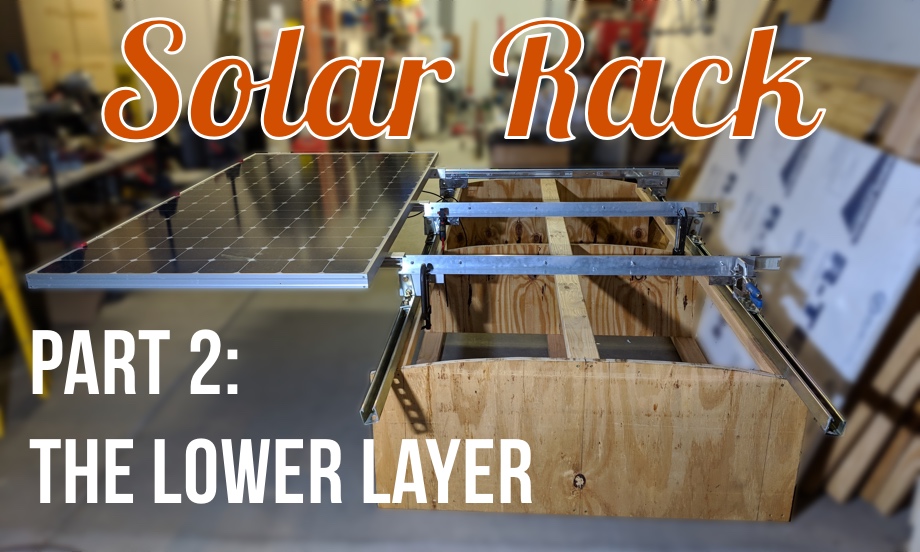
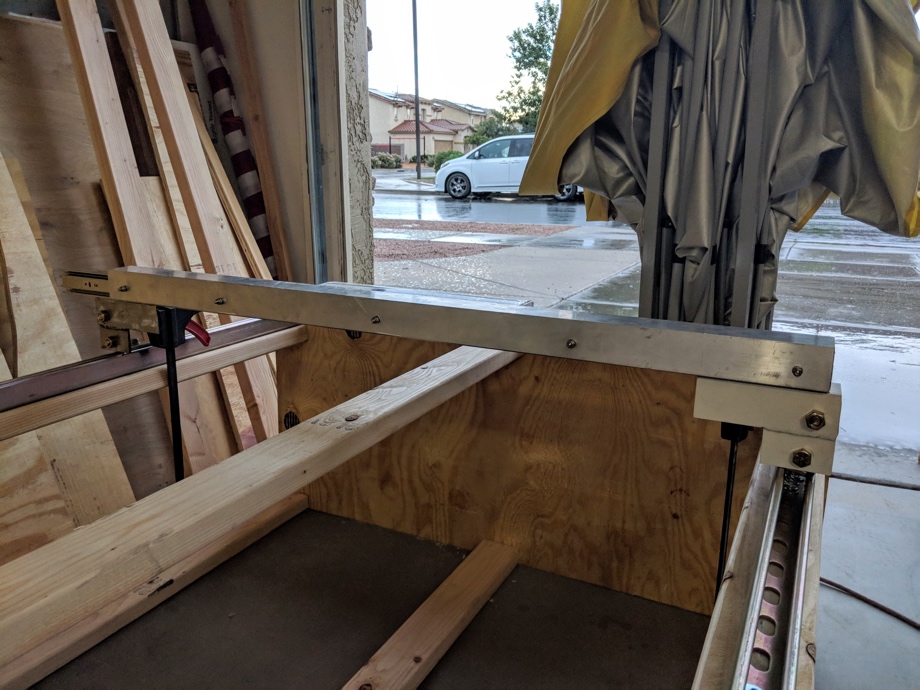
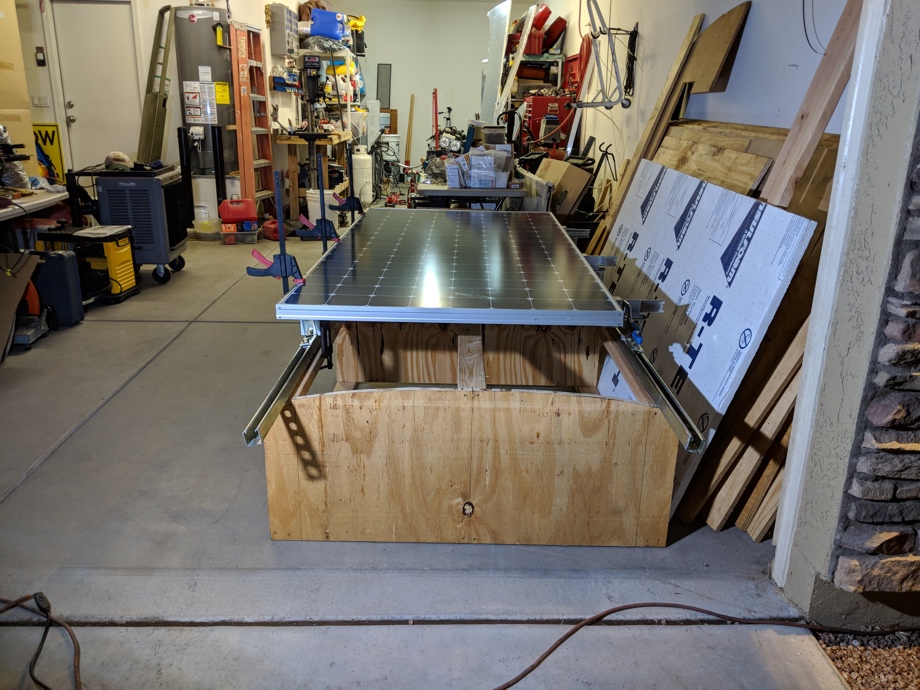
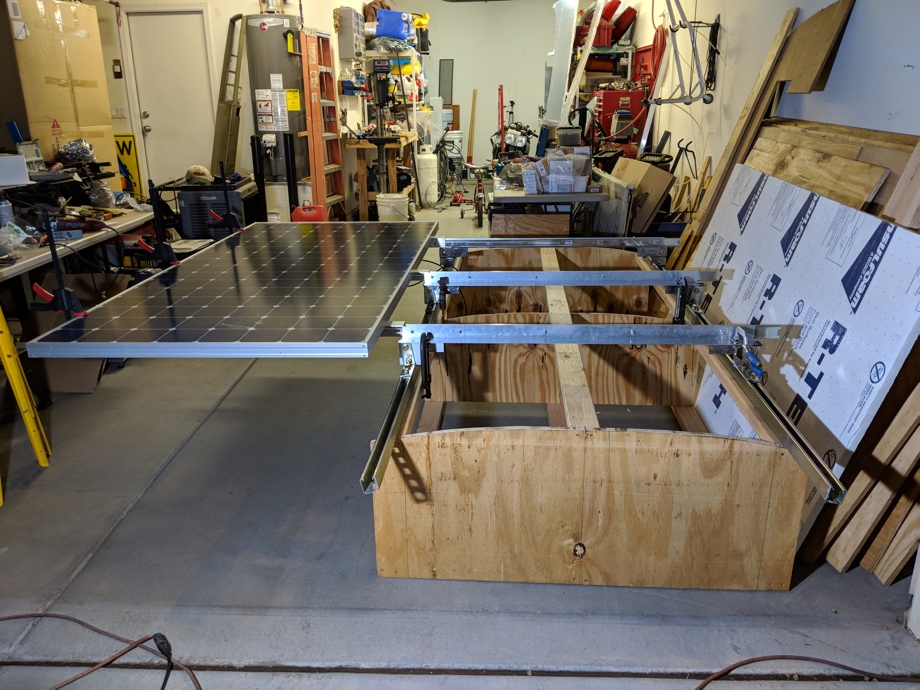
After many different iterations in our plan, we have decided to mount the panels in two rows of four with the long sides of the panels parallel with the length of the bus. We will mount them in two layers centered in the middle 42” of the bus, one layer above the other, and all of it raised up above the vents. When closed, the vents are about 5.5” tall, so the lower layer will need to sit about 6” above the roof to clear those vents. When we are parked, the lower layer of four panels will slide out to the passenger side of the bus - half of each panel still above the roof and the other half of each panel will hang out over the awning (about 21”). When those four panels are slid out, we can raise the vents fully and they will still be below the upper layer of panels. When we are ready to drive again or when there is bad wind, we can simply pull the lower layer of panels back in. The upper layer of four panels will sit just ½” above the lower layer, keeping everything as compact as possible. Funny enough, even with elevating all the panels this way, the overall height of the bus will still be several inches shorter than when we had a rooftop air conditioner up there.
In order to deal with the curve of the roof and still mount the solar panels flat, we have decided to use superstrut rails down the length of the bus on each side. L-brackets mount into the superstrut, and then we will create brackets that when bolted onto the L-brackets create a flat surface to mount the panels. These brackets also provide the necessary lift to get the panels up and over the vents.
In this video, we tackled building the mounting system for the lower layer of panels. There were some issues with our plan for the drawer slides we are using to slide the panels out, and as always, lots of cutting, welding, drilling, grinding, etc.
Next up: building the mounting rack for the upper layer of panels
Watch the video:
Click here If you cannot see the video.
Parts We Used
50" 400 lb Capacity Drawer Slides
1/8" x 2" x 2" Aluminum Angle
10-24 x 1" Stainless screws
10-24 Stainless Nylon Locking Nut
#10 Stainless washer
#10 Stainless Lock Washer
3/16" x 3" Steel Flat Bar
2" x 2" x 1/8" Steel Angle
1-5/8" Super Strut Channel
4 hole 90 degree Superstrut fitting
1/2" x 1 1/2" Grade 8 Bolts
1/2-13 Grade 8 Hex Nut
1/2" Grade 8 Locking Washer


0 Comments
Comments powered by Disqus