


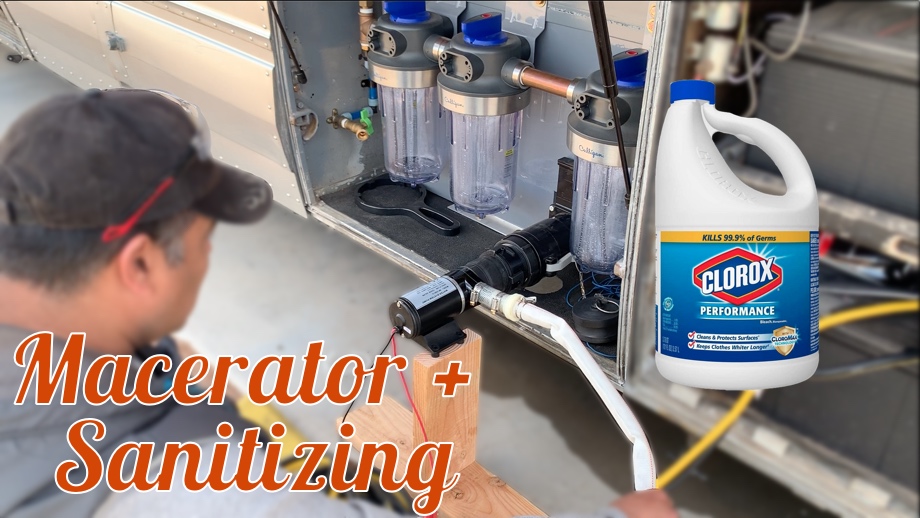
After moving our work space out to my uncle’s shop with no power and water, we had to put a few things in place to make it work for us. Power hasn’t been a problem because of our battery and solar. We had all of the plumbing done except the shower, and in the last post we shared that we had installed the toilet. That allows us to spend full days out at the shop working without having to run home mid-day for a pit stop. So, now that we could actually use our toilet, we had to find a quick solution for dumping. There are RV dump stations about 20-30 minutes away from the shop that charge about $15, but our house is only about 10 minutes away and it’s free. The only problem is that we can’t use our large 3” WasteMaster dump hose at home. We made a plan to use a macerator pump, allowing us to dump through a hose into our sewer cleanout which is easily accessible in our front yard.
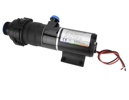
We researched the different options for macerator pumps. There are several different varieties that come in prices from $50-$400. Since this isn’t what we will be using the majority of the time when we are traveling, we decided not to invest a lot in it. We found one on eBay for less than $50 that we are trying. It has a bayonet fitting attachment, but since our waste tank is plumbed with a cam-lock for our WasteMaster hose, we had to purchase a camlock-to-bayonet adapter. The next step was deciding on a hose. The outlet of the pump is 1”. Although it can be used with a standard garden hose, we chose to purchase a 1” hose. This should allow the dump process to go much faster.
While dumping in our own front yard, we could get away with a fairly short hose. However, we want to be prepared for other situations where we may need a longer run of hose. We found a 65’ hose that is almost like a small fire-hose. It’s PVC on the inside, but it lays flat and rolls up fairly small for storage. We decided to use a short piece of clear 1” braided vinyl hose to make a “window” from the outlet while dumping. This will help us know when the water is running clear after flushing the tank. Then, we used a quick-connect to attach the hose.
We tested using the macerator to dump the waste tank with only water in it for the first time. It went well, but we hadn’t filled the tank up with much water (maybe 10-15%). It ended up just kind of sputtering out. But, it worked, and we did find a couple of small leaks (exactly why we were testing with clean water!)
The bayonet to camlock adapter and the quick connect fitting were both just barely leaking. Some new O-rings and Teflon tape fixed them right up.
Since that was pretty successful, we decided it was time to take the bus back to our house for an afternoon to sanitize our fresh tank to prepare it for use. This would also allow us to dump our waste tank a few more times with just water. We read several different articles on how to sanitize the tank and just followed those instructions.
We used ¼ cup bleach per 15 gallons of water. For us, that ended up totaling 3 cups of bleach. Since we have three large water filter housings, we opened those, put a cup of bleach in each, and then filled the tank. As the water filled the filter housings, it began diluting the bleach and filling the tank. Once the tank was completely full of the bleach water, we opened all the faucets and let the water run until we could smell the bleach in the water. This ensured that all the lines were getting sanitized as well. Once this was done, we drove it back to the shop for the night. After letting it sit overnight (and slosh around while driving), we drove it back to our house the next morning. We opened the faucets and filled the waste tank with the bleach water. Then, we dumped that. The goal was to continue to fill the fresh tank, run it through all the lines, and then dump it until we no longer smell bleach coming out of the faucets. That took us about three fills to feel like the smell was completely gone.
Finally, we dumped that last tank of bleach water and refilled the freshwater tank. (We still have to add actual filters to our filter housings, but luckily we know that the water at our house is good.)
We headed back to the shop and were now prepared to work full days out there. Power - check. Water - check. Finish the bus - still on the to-do list!
Next up: We finally get back to building!
Watch the video:
Click here If you cannot see the video.
 eBay macerator pump


0 Comments
Comments powered by Disqus