


We have been researching solar power since before we started on this full-time journey. Initially, we wanted to setup a system that would run our pool pump and maybe offset some of our high Arizona air-conditioning bills. There is something really cool about getting energy directly from the sun (for free-ish). However, by the time we were ready to pull the trigger on the pool solar setup, we had already shifted focus to our future, houseless journey.
Unlike our planned pool setup, we soon discovered that solar panels on RVs present several unique challenges. The first challenge is space. Even the largest RVs have a fairly small surface area on which to mount panels. The second is weight. Many RVs are sold to be almost at carrying capacity by simply filling them with water and putting some of your stuff in. The third obstacle is energy storage. Harnessing the power of the sun does not do you any good if you don't have anywhere to store it. Of course, as always, the cost is also a consideration.
When we first started researching solar, we found most people were using 100W panels. Renogy brand panels seemed to be the most popular. This makes perfect sense because the Renogy panels perform very well and they are pretty small, light, and inexpensive. They also allow you an easy way to see the advantages of solar without spending a whole bunch of money.
Next, we started researching our daily power needs. Things we might need to power: lights, refrigerator, microwave oven, water pump, technology and devices, air conditioner etc. While we wouldn't be running all these at once, a full day of running just the air conditioner might consume all of our huge battery.
Of course, we plan on following good weather - but we all know how that goes - sometimes the good weather doesn't want to follow us. One of our goals for our bus is to be setup in a way that doesn't limit where we can stay (as much as reasonably possible in a 35-foot vintage bus). We don't want the lack of power to be the limiting factor that prevents us from a great boondocking spot in less than perfect weather.
We wondered: exactly how many of these panels would it take to do things like run the air conditioner?
HOLY SMOKES! Running the air conditioner on solar power is a hot topic. People online seem to be quite passionate about running solar (or not being able to) to run air conditioners. We have a standard RV Air conditioner that came with our bus (a 1-ton Coleman Mach) and it pulls about 15 Amps at 110V - that's 1650 Watts just for the A/C. Technomadia and Gone with the Wynns both have good information on running A/C on a solar setup. They suggested that a good starting point is 2000 Watts or 20 of these 100 Watt panels, a huge inverter, and a huge battery bank.
At the time of our research, you could buy Renogy 100W panels for as low as $140 per panel. That would put our starting cost for panels only at about $2800 for 2000 Watts. Surely, there is a way to do it for less money?
Enter gray market panels. Very often on Craigslist, we would see panels of 325W, 255W, 305W etc listed for WAY less than retail. When I called on a few of these, I was often told that these were "B-grade" panels. I later discovered that this usually means they are electrically sound but have cosmetic dings or cell discoloration. Since I am not planning on entering any beauty competitions with the panels, this seemed like a reasonable way to go.
While casually researching and keeping my eye out for solar panels, I discovered that there were a few companies making solar panels into the 400+ Watt range. The issue is that these panels are strictly commercial and quite rare. From my research, these offer the best space/power generated ratio. The downside is that they are very large measuring 81.36" x 41.18" per panel and weigh 56lbs.
So after all this research we basically boiled our options down to 3 different choices. All of which had their pros and cons:
- 100 Watt panels ($2800 for 2000 Watts)
- (+) Well tested reliability
- (+) Easy to replace if damaged
- (+) Most versatile for installation due to physically smaller size (47" x 21" @ 16.5 lbs)
- (-) Most expensive option ($1.40 per Watt)
- (-) Least energy produced per square foot (14.6 Watts/ sq ft)
- 325 Watt "B-grade" panels ($1316 for 2275 Watts)
- (+) Least expensive option. ($0.58 per Watt)
- (-) B-grade panels - everybody seems to define this differently
- (-) Second lowest energy produced per square foot (15.6 Watts/sq ft)
- (-) Physically large panels (77" x 39" @ 50.7 lbs)
- 435 Watt panels ($1500 for 2175 Watts)
- (+) Most energy produced per square foot (18.9 Watts/sq ft)
- (+) Reasonable price ($0.69 per Watt)
- (-) Used commercial panels
- (-) Hard to find/replace
- (-) Physically large panels (81" x 41" @ 56 lbs)
After making this list and considering all the different options, we decided that the best option for us would be the 435-watt panels if we could find them. To address the issues mentioned previously, our bus should be able to handle the weight and we plan on building a small framework to house them on the roof (this will be tricky).
Early on, I thought I had found the mythical panels once on craigslist but the deal never materialized (the guy never called me back).
Fast-forward to last week - again I see 435 Watt panels advertised on craigslist. I called and discovered that the seller is about an hour drive away from me and had 8 panels that he said all had tested good. I asked about his availability and arranged to go see him.
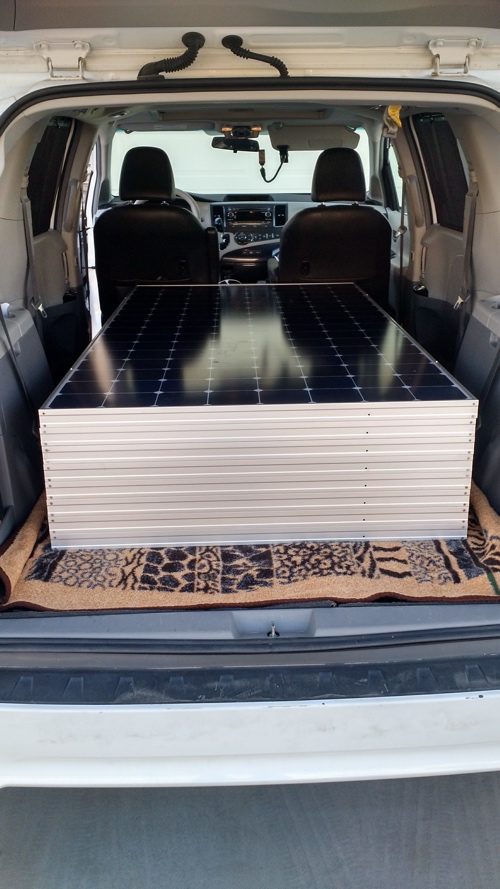
A few hours later I drove our minivan - cargo style (I had removed all the seats leaving a large space in the back for cargo. Surprisingly, a 4'x8' sheet fits in there with no problem) to see him. I really didn't know what to expect. I was just hoping that they were as advertised. I was clear with the guy that we needed to test and inspect each panel. (see the video for a short demonstration on how we inspected and tested the solar panels) He was extremely nice and had his sons help unload and test each panel. To my surprise, they looked great and worked as advertised. They do look used but in overall great condition. Although we originally decided to have about 5 of these panels, we went with 8 because we have the room and they are pretty difficult to source. So for $300.00 per panel ($2400.00 total) we now have 3480 Watts of solar power to fill our lithium battery and fuel our boondocking dreams.
What's next:
- Figure out how to mount these panels. We would love to mount all the panels on a platform on top of the bus.
- Figure out charge controllers. Because these panels operate at such a high Voltage (rated for 75V) it somewhat limits the charge controller that can be used. We are only considering MPPT controllers and will likely match the charge controller with our other components. It is very likely that we will need more than 1 charge controller.
- Figure out wiring, switches, circuits, breakers and fuses and the rest of the electrical stuff in general.
Watch the video here:
Click here If you cannot see the video.

0 Comments
Comments powered by Disqus