


We knew pretty early on that we were going to need to replace the rooftop a/c for a few reasons. First, it simply didn’t cool the bus down very well. It was a 13,500 BTU Coleman Mach unit. It blew cold, but it just didn’t push the air very far at all. So, unless you were standing right next to it, you just weren’t going to be able to feel it.
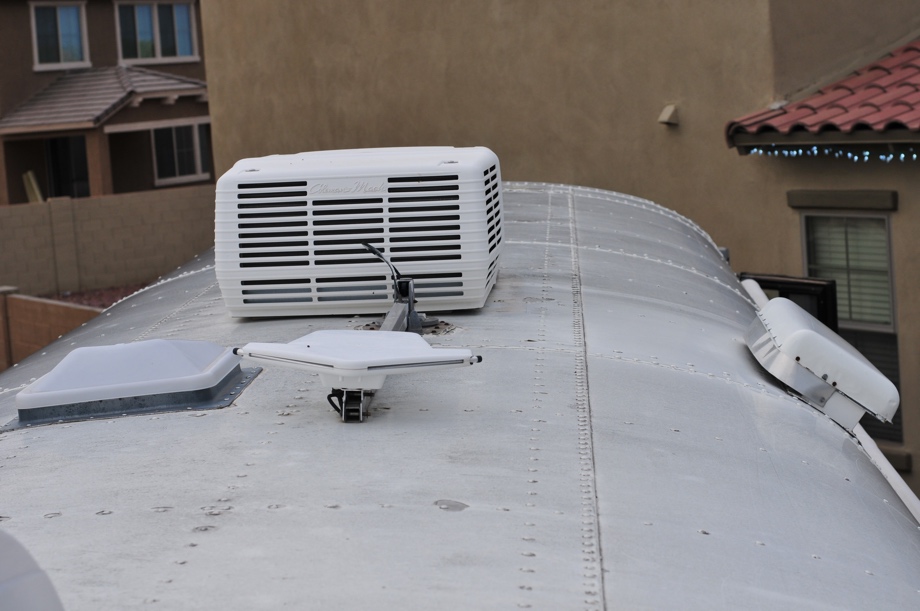
Second, it’s just so darn big and unattractive on the roof. Looks aside, what we are really trying to do is eliminate as much as possible on the roof because we will be putting a large solar array up there. We need the space for huge panels, and also we don’t want a large a/c unit casting shadows onto them.
 That TV antenna and refrigerator vent are now gone, too!
Lastly, it was very inefficient. We hooked it up to our Kill-a-watt to see how many amps it pulls. It pulled over 15 amps. In fact, it blew the 15amp fuse in the Kill A Watt. Video link here. Since we are trying to set our bus up to be able to boondock, and we are trying to be able to run an a/c off our battery pack, we want an a/c that is as efficient as possible.
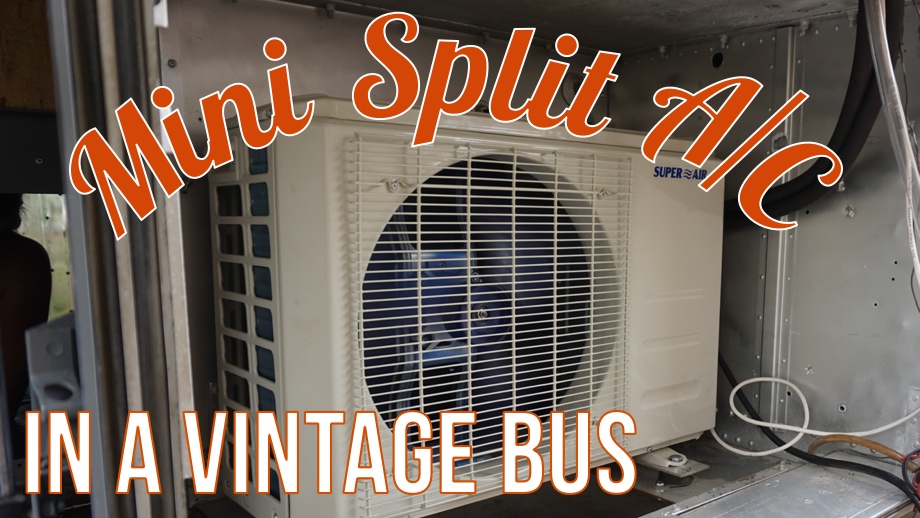
Enter the mini-split air conditioner. Juan had been researching these for a while. They are much more efficient than the standard a/c. Also, they are extremely quiet - the old one was extremely loud. If the rooftop a/c was on high in the bus, it was difficult to even have a conversation in there. The indoor unit is fairly small and lightweight which always has to be a consideration. And, we had a good place to install the outdoor unit. We were sold. It would definitely be worth a shot anyway.
Next decision was which one to get. We had seen some high-efficiency mini-split units that had up to 5 zones with BTU ratings all the way into the 42,000 BTU range (3.5 tons). Unfortunately, all the multizone units seemed to only come in 240 Volt configurations. In fact, 12,000 BTU (1-ton) single zone was the biggest configuration we could find for 120 Volt. This is the one we chose (the price we paid was about $900.00).
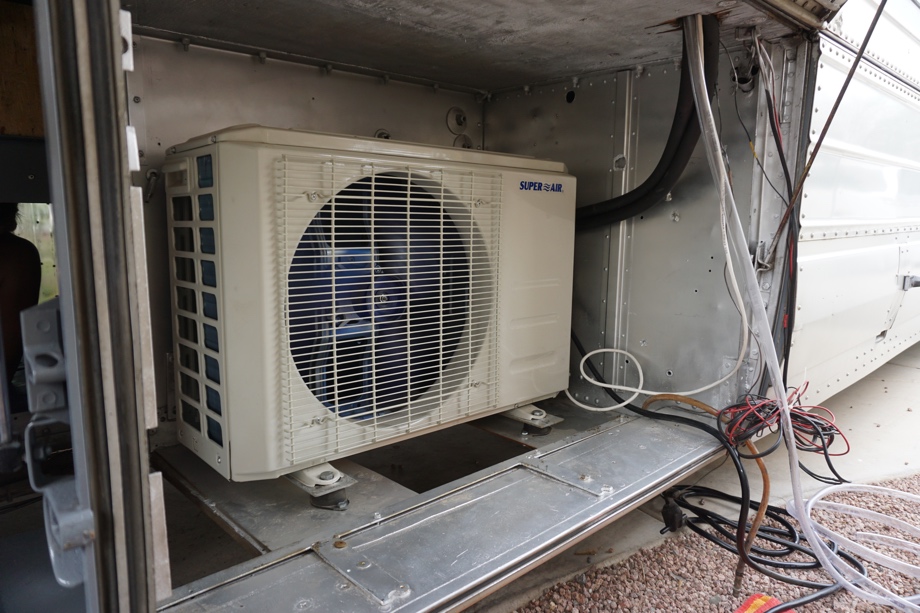
On to the installation. The first thing we had to do was figure out how to install the outdoor unit. We chose to mount it in the bus’s original a/c bay which has a mesh door. The previous owner had a large generator and two propane tanks in that bay, and so the floor is mostly open. 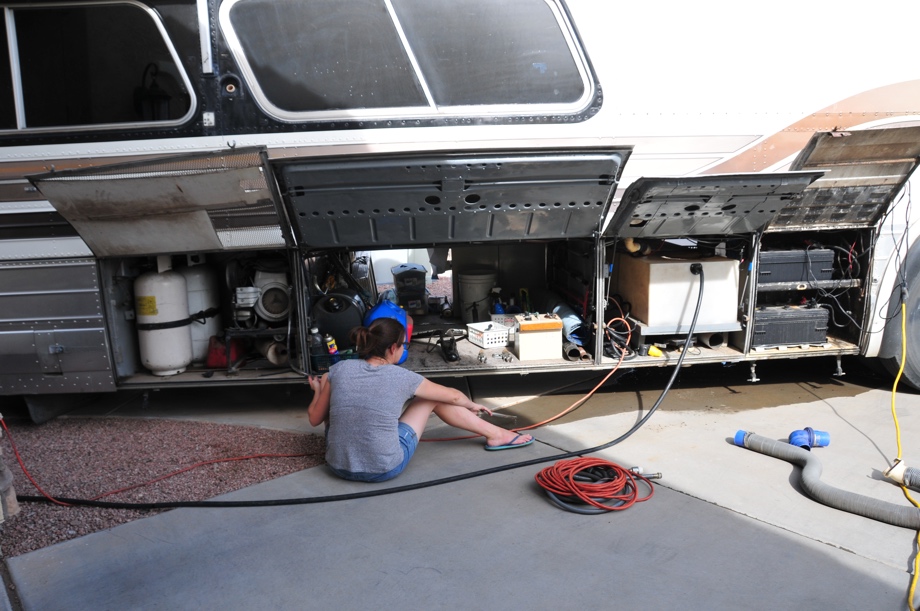
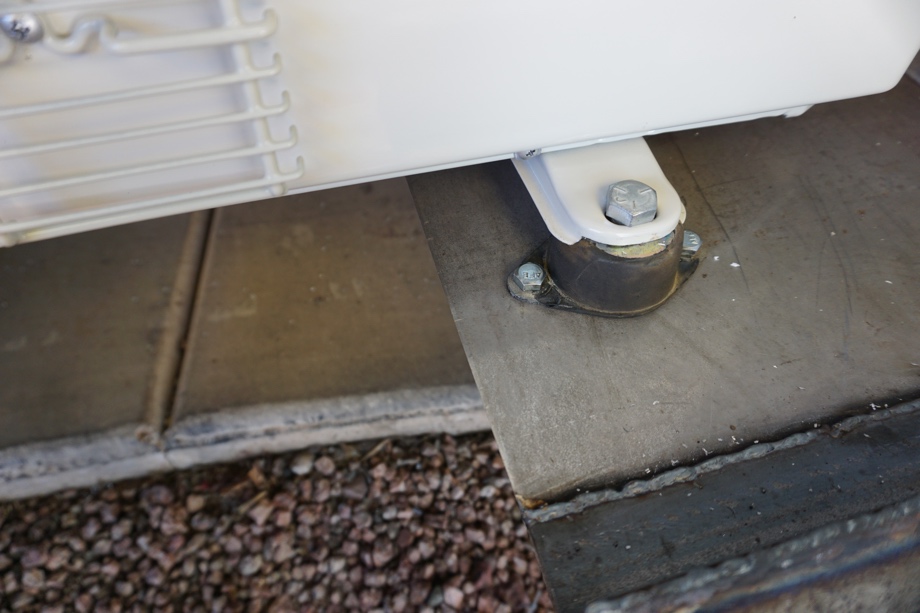
There was one metal bracket running across the floor and we decided to make another metal bracket in order to have a strong base to attach the a/c to while still leaving the floor open for airflow.![]()
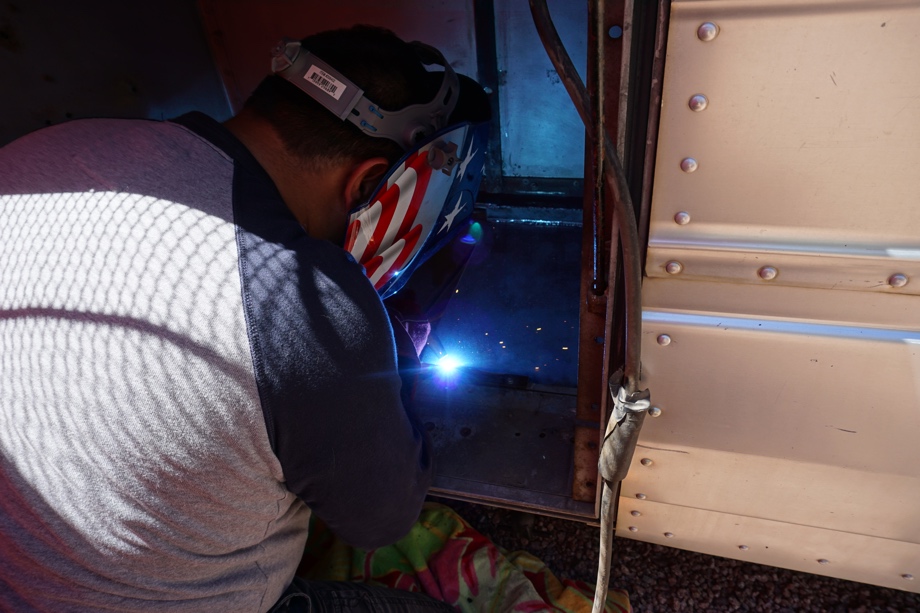
That meant Juan had to learn how to weld. We have had a friend’s MIG welder sitting in our garage for years now but had never had an opportunity to use it. So, he did what all normal people do when learning a highly technical skill - watch a bunch of YouTube videos.
He used some scrap metal to practice, and he quickly realized that it is definitely an art to be able to make good welds. He practiced and practiced using several different techniques that he had seen. There was a definite learning curve, but after a while, he felt like his weld was decent enough to test out. 
Test one: bang on it as hard as you can with a sledgehammer and see if you can break it apart. It didn’t budge. Good sign. Test two: Slice through the weld with the chop saw to check the penetration. Looked good. While the welds may not have been the prettiest ever, they seemed like they would hold up. Time to do it for real now.
We used our grinder with a flapper wheel to clean up the angle iron pieces that were already in the bay. Then, Juan got to work with our piece of 3/16” steel and welded it up to the angle iron. Everything seemed to be nice and secure, so we cleaned it all up and put a coat of paint on the entire bay to protect all the steel from rusting.
Next, it was time to attach rubber feet to the metal brackets. These actually were originally from the old generator that we pulled out of the bus. Perfect fit for the a/c feet and hopefully will work well for absorbing some of the bumps while driving. We lined up the rubber feet, drilled some holes, and secured them with large bolts. Then, we were able to test fit the unit in there. We secured the a/c feet to the rubber feet. Surprisingly it is extremely stable and secure in there. We may still add some kind of strap up near the top of the unit to stabilize it even more. But, we have driven around with it in there, and it doesn’t move.
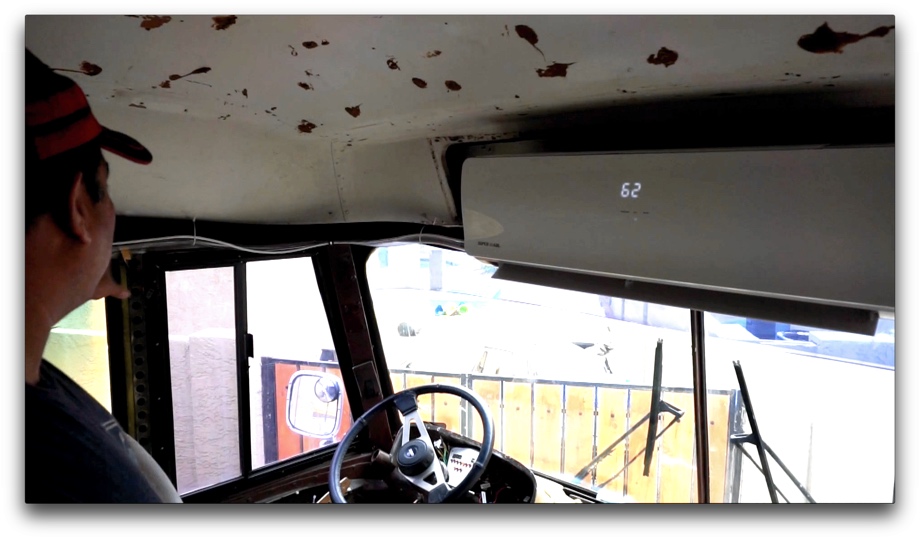
After the outdoor unit was all installed, it was time to move to the indoor unit. It only weighs about 20 pounds, but the bracket it came with was pretty flimsy for the location and way we needed to install it. So, Juan was able to practice that welding again. We designed and he welded up another 3/16” steel bracket that we were able to then mount securely to the front of the bus above the dash. 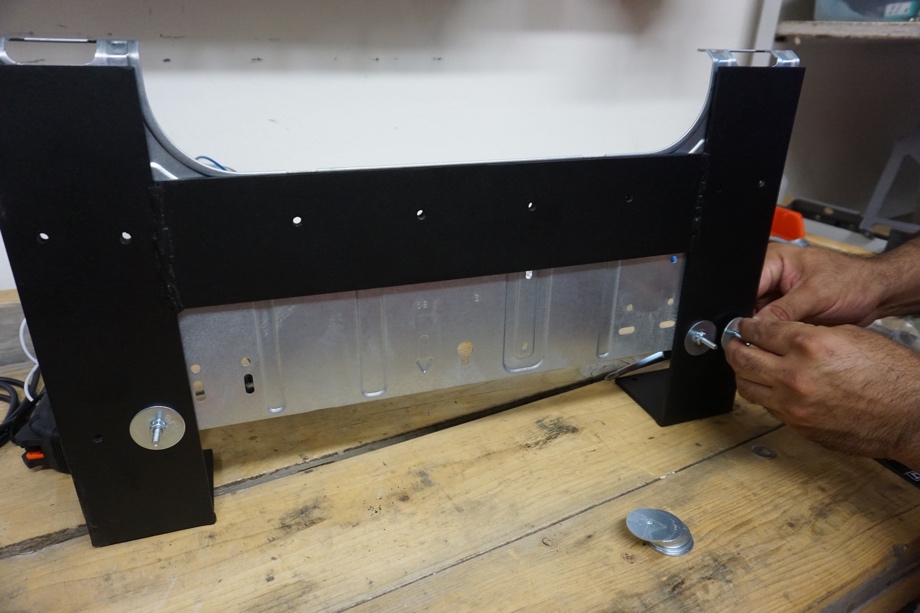 The bracket that came with the unit was then attached to our bracket and the indoor unit was then attached to that. We hung it up, and it was very secure. Driving down the road with it hanging there is absolutely no problem.
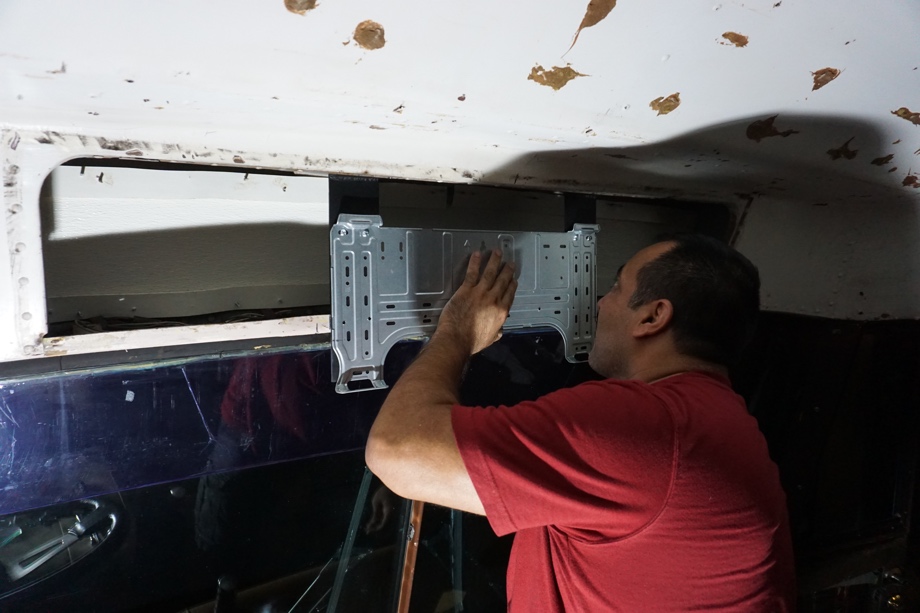
Finally, it was time to actually hook everything up. The indoor unit and outdoor unit are wired together and then have two copper lines running between. Juan did the wiring, and then we asked our neighbor, Daniel, who happens to be an a/c dude, to help us with the copper lines. 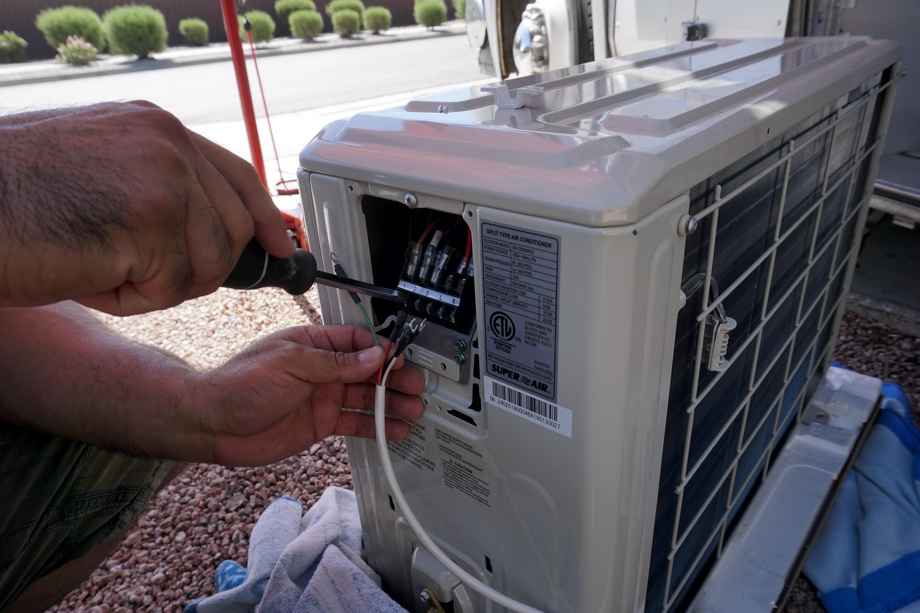
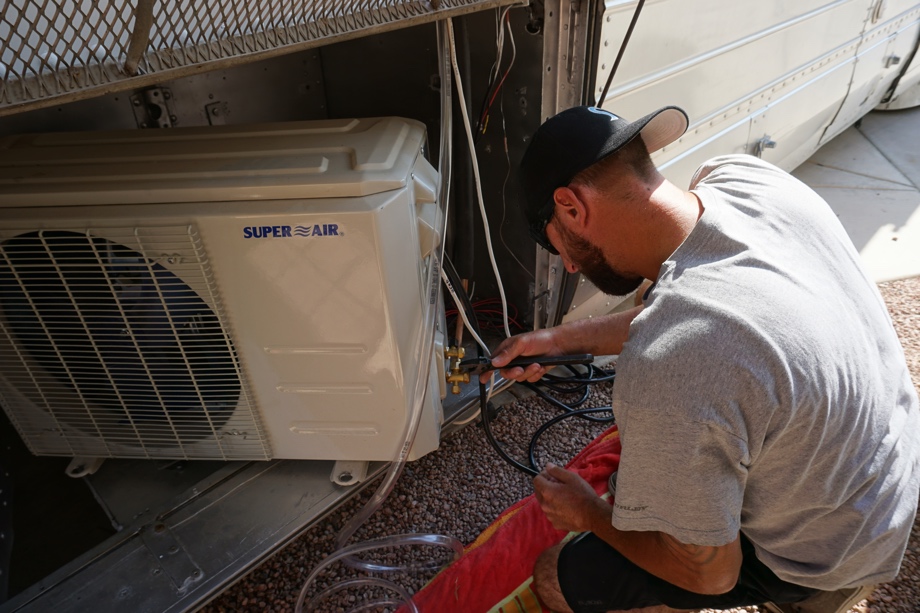 Unfortunately, the standard length of lines that comes with this unit is 16 feet. We needed closer to 27 feet. So, I bought new longer lines. Daniel was then able to help us get the lines in place, cut the replacement lines, and add the new flared fittings. Then, he pressure tested the system with nitrogen and performed a leak-down test. Next, he vacuumed out all the nitrogen and once the lines were clear, he released the freon.
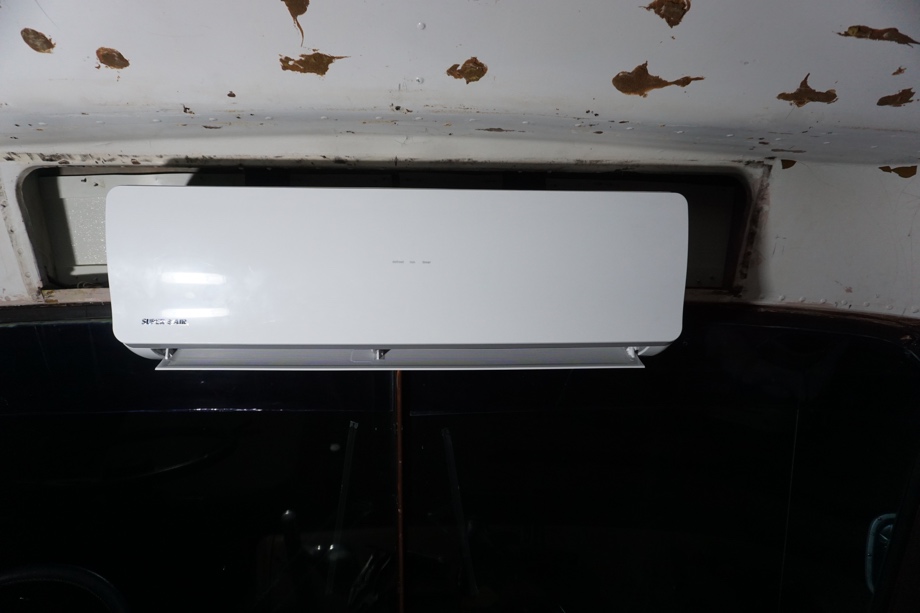
 We went up into the bus, turned on the mini-split with the included remote control, and it fired right up. And it was so, so quiet. You can barely even tell it’s on, even at full blast. Awesome! The day we installed this it was 108 degrees outside. Our bus had pretty much been the same temperature or hotter on the inside since it’s not fully insulated yet. Within about an hour, it was down 15 degrees in there. After about three or four hours, it was downright cold. We went out later that night, and it was still about 102 degrees outside, but I opened the door and walked into the bus and then immediately turned around, went inside the house, and came back out with a jacket. It was super cold in there. Haha! That was the Best!
 One of the concerns we had was whether or not the cold air would really cool off the entire bus. I put the outdoor part of our little weather station in the very back of the bus and the indoor unit right up in the front. The back was only about five degrees warmer than the front. I don’t think that’s too bad. And combined with our MaxxAir fans pushing air around, I think we should be good.
Let’s go back to our original reasons for wanting to replace the rooftop a/c and see how this unit really stacks up. The first problem was the old one didn’t cool down very well. Solved. The second problem was that it was too big for our plans for the roof. If you watch the video, you will see our ever so graceful and cheerful experience of finally removing the old a/c from the roof (zoom forward in the video to about the 12-minute mark to see what we are deeming our first “follies” section of video). Solved.
The third problem was the old a/c was a power hog. Well, we pulled out the trusty Kill-a-watt again and tested out how many amps the new mini-split pulls. It fluctuates between about 6 amps and 10 amps. On that first super-hot and extremely humid (for Arizona) day, when we set the indoor temp all the way down to 62, it was settling in at about 9 amps. But, since then on days when it hasn’t been quite so humid and we set the temp at a more normal 72, it pulls about 7.5 amps. Significantly better than the 15-18 amps of the old unit. Solved.
There will be cabinets and storage hiding most of the A/C lines eventually.
Overall, we are extremely happy with the mini-split so far. Once we actually get on the road and are traveling and living with it for a while, we will report back on how it has been doing. But, for now, just working in the bus, we are so happy to finally have cold, quiet, energy-efficient air.
Check out the video:
Click here If you cannot see the video.

0 Comments
Comments powered by Disqus