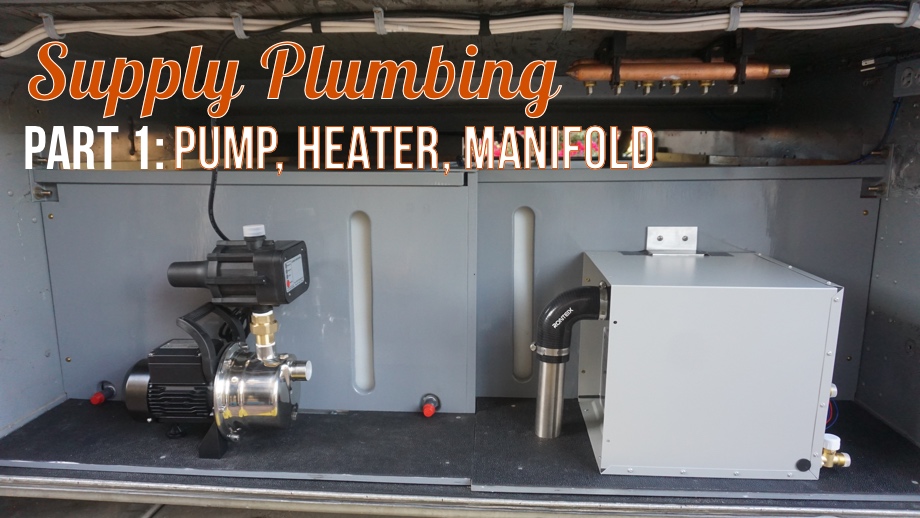
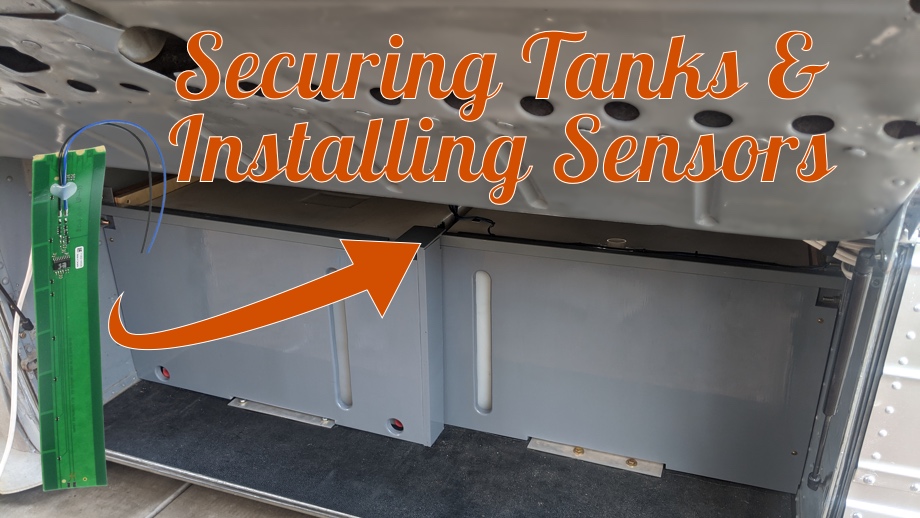
After securing the water tanks, we started the process of installing the major water system components in the water bay. As you may have come to expect from us, we have chosen a couple of components that are not “typical RV”. This week we are talking about our water pump,
Securing the Water Tanks and Installing SeeLevel Tank Sensors
Last week, we finished plumbing the last drain into the waste tank. We were finally ready to start the supply side plumbing. First, however, we had to secure the tanks.
We have two large tanks, each over 160 gallons. If a tank is full, it will weigh over 1300 lbs.
Framing the Bathtub and Plumbing the Drain
We hope you have all had a wonderful holiday season. We have been enjoying time with family and friends while continuing to work on the bus on weekends as usual. Also, as usual, we are a bit behind on the videos from where we are in real-time. So, let’s
The Beastly Front Cabinets
We had been absolutely dreading this project. I kind of just wanted to go on vacation and pray it was magically done when we returned. Unfortunately, we have no magic bus building elves. So, we had to just suck it up and do it - build the cabinets in the
Securing the Refrigerator in the Bus
Long ago, we decided that we wanted a residential refrigerator in the bus. We have enough battery storage to maintain the 120V needs of a refrigerator when boondocking, especially because newer residential refrigerators are very energy efficient. Our biggest limitation when deciding on a refrigerator was the height of the
Building the Tech Cabinet
The day had finally arrived!!! We were somewhat giddy to start this project - the Tech Cabinet. For months and months, all of our electronic gear has been sitting on the floor of the bus in a box just waiting to have a home. When we wired everything in, we
Building the Broom Closet & Pantry
Building this bus into an RV has been a long project...a very long project. The one good thing about that is that there has been plenty of time to soak up as much knowledge from other RVers and renovators as possible. One of the common issues we have noticed
The Wardrobe - Part 4: Device Charging Station
The project for this week may very well turn out to be my favorite functional part of the bus! With six people living, working, and homeschooling full-time in the bus, we knew we needed to make a space for all the devices. Laptops, iPad, tablets, a few phones, not to
The Wardrobe - Part 3: Building Drawers with Under-mount Slides
After last week’s slight fiasco with painting the face frames, we were so thankful to move onto building again. We are becoming a bit more confident with some basic woodworking skills, so we're excited to build the drawers for the wardrobe.
We planned six large drawers for the bottom
The Wardrobe - Part 2: Misadventures in Painting
Well...we don’t have too much good to share this week. Mostly a bunch of mistakes that we call “lessons learned”. We try to research and research and plan and plan, but sometimes we just screw it up.
The project for the week was to build face frames for
The Wardrobe: Part 1 - The Carcass
Finally...after all of this time...the day came to actually start building some real structure into this bus. I know we already have the pocket doors in, but starting the closet feels much more momentous. Also, I’ve decided not to call it the closet. I want to call
Building the Pocket Doors
In last week’s video and post, we shared with you part of our design plans for our two pocket doors that will be for either side of the walk-through bathroom. After finalizing the plan, we got to work building the doors.
We started with a sheet of ¾” birch plywood
Planning for Pocket Doors - A Peek Inside our Thought Process
Although the demo process of the previous conversion was long, arduous, and mostly gross, the fact that we bought a bus that was already converted did give us one big advantage. We were able to really get a feel for what would work and what wouldn’t work for our